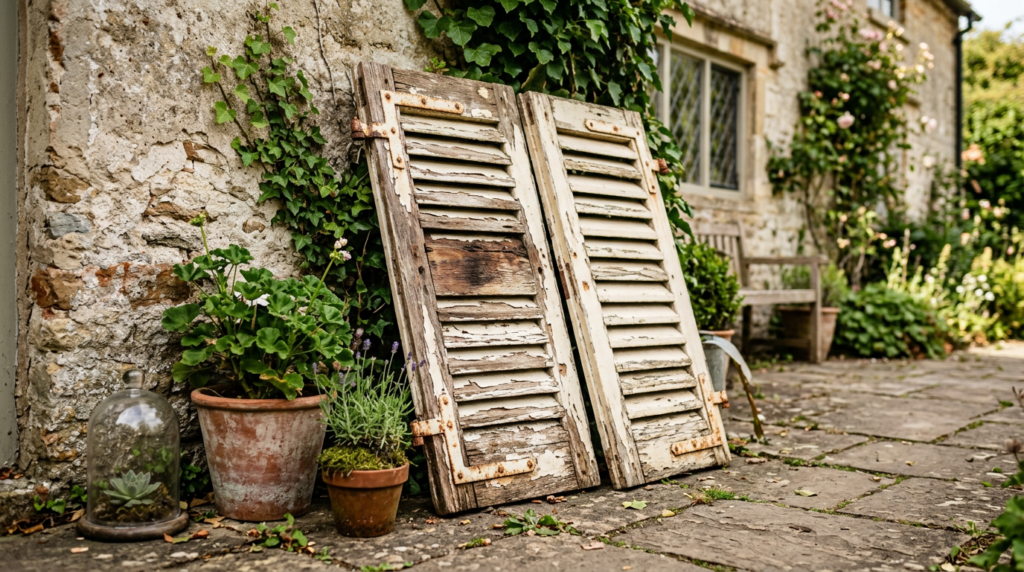
That stack of weathered shutters tucked in your garage or leaning against your shed isn’t just clutter—it’s the beginning of a charming repurposed shutters photo display that brings personality and warmth to any room. Whether they’re chipped, faded, or missing slats, broken window shutters hold incredible potential for creating unique, farmhouse-inspired photo galleries that feel both nostalgic and on-trend.
Table of Contents
Why Repurposed Shutters Make Perfect Photo Displays
Old shutters carry character that new décor simply can’t replicate. Their slatted design creates built-in organization for arranging photos vertically or horizontally, while the rustic texture adds dimension to flat walls. Unlike traditional frames, a shutter photo holder becomes a statement piece that anchors your gallery wall with architectural interest.
Repurposing broken shutters also taps into the sustainable decorating movement, giving worn materials a second life instead of contributing to landfill waste. The farmhouse shutter decor trend continues to dominate Pinterest boards and home magazines, blending cottagecore aesthetics with practical functionality. Plus, shutters work beautifully across design styles—from coastal beachy vibes to industrial loft spaces.
Before you begin your DIY shutters wall decor project, assess your shutters for structural integrity. Loose slats can be reglued with wood adhesive, and missing hardware can be replaced or removed entirely for a cleaner look. If you’re working with shutters that spent years outdoors, wear gloves and a dust mask while cleaning, as old paint may contain lead or accumulated mold.
Preparing Your Shutters for Indoor or Outdoor Display
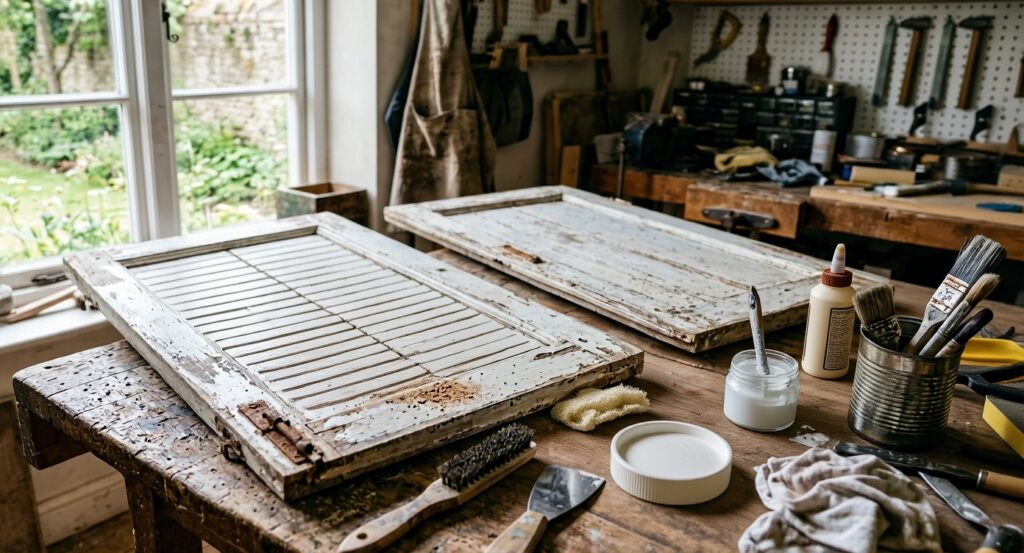
The first step in repurposing old window shutters into photo frames involves thorough cleaning and repair. Use a stiff brush to remove dirt and cobwebs from slats and crevices, then wipe down surfaces with a damp cloth mixed with mild soap. For stubborn grime, a mix of equal parts white vinegar and water works wonders without harsh chemicals.
Material choice matters depending on where you’ll hang your finished piece. Wooden shutters work beautifully indoors but need weatherproofing for outdoor use—apply a marine-grade sealant or exterior polyurethane to protect against moisture and UV damage. Vinyl or composite shutters naturally resist weather but may require sanding before paint adheres properly.
Once clean, decide whether to embrace the distressed look or refresh with paint. Eco-friendly paint options such as milk paint, chalk paint, or low-VOC latex offer safer alternatives to traditional finishes while still delivering rich color. Milk paint creates an authentic vintage patina that complements the functional repurposed shutter design aesthetic, while chalk paint allows for easy distressing with sandpaper after drying.
For a cottagecore window shutters vibe, consider soft whites, sage greens, or dusty blues. Farmhouse styles lean toward weathered grays, creamy neutrals, or barn red. If you prefer the raw wood look, simply seal with clear wax or polyurethane to protect the surface while maintaining natural texture.
Creative Attachment Methods for Your Rustic Shutter Photo Holder

The beauty of shutters photo display DIY projects lies in the variety of ways to attach and arrange your favorite memories. Twine or jute rope creates a casual, organic feel—simply string it horizontally across slats and clip photos with mini wooden clothespins. This method makes swapping images effortless and adds touchable texture.
For a more permanent display, use small finishing nails or decorative tacks to secure photos directly to the shutter frame or between slats. Space nails at varying heights to create visual interest and accommodate different photo sizes. Corner photo holders—small metal triangles that grip photo edges—offer another damage-free option that keeps your prints removable.
Wire with clips provides industrial charm perfect for loft-style spaces. Thread galvanized or copper wire through shutter slats, securing ends with small eye hooks screwed into the frame. Attach binder clips or wire clips to hold photos, postcards, or even dried flowers for seasonal variety.
Magnets work surprisingly well if you back your shutter with a thin sheet of galvanized steel or magnetic paint. This approach creates flexibility for constantly changing displays—ideal for families with kids whose artwork deserves regular rotation. You can explore similar creative upcycling techniques for furniture and décor throughout your home.
Styling Your Farmhouse Shutter Decor Display
Thoughtful styling transforms a simple repurposed shutters photo display from craft project to curated gallery. Start by considering your photo mix—combine black-and-white prints with color images for visual contrast, or stick to a single tone for cohesive elegance. Vary photo sizes to create rhythm, grouping smaller images in clusters and featuring larger prints as focal points.
Layer in non-photo elements to build dimension. Tuck sprigs of dried eucalyptus, lavender bundles, or seasonal greenery between slats. Small succulent planters attached with picture hanging strips add living texture, while vintage keys, antique postcards, or handwritten recipe cards introduce storytelling elements.
The coastal approach to repurposed shutter art pairs perfectly with beach vacation photos. Add seashells, driftwood pieces, or nautical rope for thematic consistency. For cottagecore shutters photo display DIY projects, incorporate pressed flowers, lace ribbons, or vintage buttons that echo romantic, countryside aesthetics.
Don’t forget about lighting. Position your shutter display where natural light can highlight textures without causing photo fade. If wall space is limited, prop a smaller shutter on a mantel or console table, leaning it against the wall for casual elegance. Battery-operated fairy lights woven through slats create magical ambiance for evening gatherings.
Customizing for Different Photo Sizes and Seasonal Displays
One major advantage of shutters as photo holders is their adaptability to various print dimensions. Standard 4×6 prints fit beautifully between typical shutter slats, while 5×7 or 8×10 photos can be centered on solid panels or mounted across multiple slats for drama.
Create pockets using clear adhesive photo sleeves for a polished look that protects prints from dust and fingerprints. These work especially well if your shutter hangs near high-traffic areas or in homes with curious pets. For Instagram-style square prints, arrange them in grids using evenly spaced clips or corner holders.
Seasonal rotation keeps your rustic shutter photo holder fresh year-round. Spring displays might feature pastel-matted family photos surrounded by faux cherry blossoms. Summer calls for vibrant vacation snapshots accented with seashells or sunflowers. Autumn invites warm-toned prints paired with miniature pumpkins and fall foliage, while winter displays sparkle with holiday cards and pine garland.
Consider dedicating one shutter to rotating children’s artwork or school photos that change throughout the year. Another idea gaining traction involves creating a gratitude display where family members add photos or notes about things they’re thankful for each month.
For those who love crafting with unexpected materials, decorative flower projects using everyday items can complement your shutter gallery with handmade charm.
Installation and Safety Considerations
Proper installation ensures your repurposed shutters photo display remains securely mounted and safe. Shutters—especially wooden ones—can be surprisingly heavy, so wall anchors rated for the combined weight of shutter plus photos are essential. Use a stud finder to locate wall studs for the most secure mounting, or install heavy-duty drywall anchors if studs aren’t positioned where you want your display.
Attach D-ring hangers or sawtooth brackets to the back of your shutter, positioning them about one-third down from the top edge for proper balance. For extra-large shutters, use two hanging points to distribute weight evenly. Always hang your display at eye level—typically 57 to 60 inches from floor to center—for optimal viewing.
Safety matters when working with salvaged materials. Old shutters may have splinters, rusty hardware, or sharp edges that need addressing. Sand rough areas smooth with medium-grit sandpaper, and replace or remove any corroded hinges or hooks. If you’re uncertain about paint age, test kits available at hardware stores can detect lead—an important step if young children will be near the finished piece.
For outdoor installations, ensure your hanging hardware is rust-resistant and that the shutter’s weatherproofing is thorough. Check mounting security seasonally, as temperature fluctuations and moisture can affect both wall anchors and shutter integrity over time.
Beyond Photos: Alternative Uses for Your Shutter Display
While photos are the primary focus, your DIY shutters wall decor can serve multiple purposes. Transform it into a memo board by adding small hooks between slats for hanging keys, jewelry, or shopping lists. The card holder concept using repurposed shutters extends beautifully to displaying greeting cards, invitations, or inspirational quotes.
In home offices, shutters become organized vision boards where you can pin project inspiration, deadlines, and motivational images. Craft rooms benefit from shutters fitted with small baskets or mason jars to hold supplies while displaying finished projects. Kitchen shutters can showcase recipe cards, herb bundles, and culinary photos for functional farmhouse charm.
Create a memory timeline by arranging photos chronologically across your shutter—perfect for anniversary celebrations or documenting a child’s growth. Wedding shutters featuring ceremony and reception photos make heartfelt anniversary gifts or beautiful additions to master bedrooms.
For more comprehensive guidance on transforming your space with DIY projects, explore complete home improvement resources that complement your repurposing efforts.
Making Your Project Uniquely Yours
The magic of repurposing old window shutters into photo frames lies in personalization. No two shutters age identically, which means your creation will be genuinely one-of-a-kind. Embrace imperfections—that chip in the paint or weathered corner tells a story and adds authenticity mass-produced décor can’t match.
Experiment with mixed materials for added interest. Combine a painted shutter with raw wood photo clips, or pair distressed white shutters with modern metallic accents for eclectic contrast. Stencil family names, meaningful dates, or favorite quotes directly onto shutter slats for personalized touches.
Don’t hesitate to mix sizes by creating a gallery wall featuring multiple repurposed shutters in varying dimensions. Arrange them asymmetrically for contemporary edge, or line them up symmetrically for traditional farmhouse order. The beauty of DIY is that you control every creative decision.
Document your process with photos and notes—not only does this help you remember successful techniques for future projects, but sharing your journey on social media or DIY blogs inspires others while building community connections. Many crafters find that their first shutter project sparks ideas for entire rooms filled with thoughtfully repurposed treasures.
Your broken shutters aren’t destined for the trash—they’re waiting to become conversation-starting décor that celebrates your memories while honoring sustainable style. With basic supplies, a few creative techniques, and your personal touch, those forgotten architectural remnants transform into cherished displays that make your house feel unmistakably like home. Grab those shutters, gather your favorite photos, and start creating a display that’s as unique as the moments it celebrates.