Making the switch to natural personal care products is one of the most empowering steps you can take toward a healthier lifestyle. While commercial deodorants and antiperspirants line pharmacy shelves with promises of 24-hour protection, many contain questionable ingredients that health-conscious consumers are increasingly questioning. Learning how to make homemade natural deodorant not only gives you complete control over what touches your skin but also provides an effective, affordable, and customizable alternative to conventional products.
This comprehensive guide will walk you through creating your own natural deodorant, explain the science behind why these ingredients work, and help you troubleshoot common issues that many DIY enthusiasts encounter. Whether you’re concerned about aluminum compounds, synthetic fragrances, or simply want to reduce your environmental footprint, homemade deodorant offers a practical solution that’s easier to make than you might think.
Benefits of Natural Ingredients
Understanding why natural ingredients work is key to appreciating the value of homemade deodorant. Unlike antiperspirants that block sweat glands with aluminum-based compounds, natural deodorants work by neutralizing odor-causing bacteria and absorbing moisture without interfering with your body’s natural detoxification process.
Coconut Oil: Antimicrobial Powerhouse
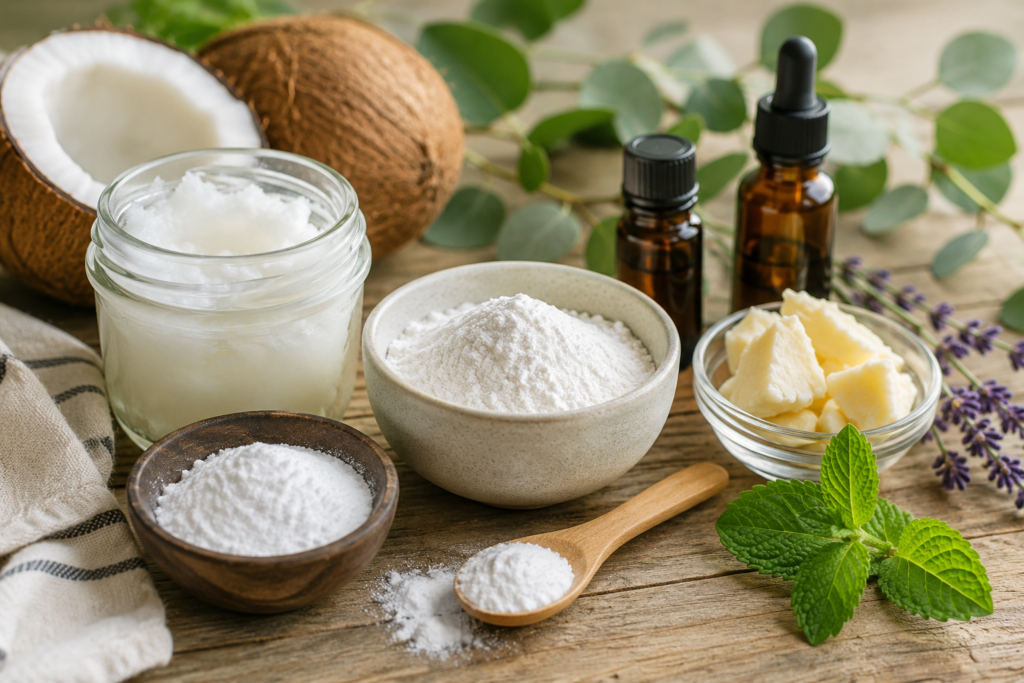
Coconut oil serves as the base for most natural deodorant recipes, and for good reason. Research published in the Journal of Medicinal Food demonstrates coconut oil’s potent antimicrobial properties, particularly against bacteria that cause body odor. The lauric acid in coconut oil creates an inhospitable environment for odor-causing microorganisms while simultaneously moisturizing your skin. This dual action makes it superior to the harsh alcohols found in many commercial deodorants that can dry out and irritate delicate underarm skin.
Baking Soda: pH Balancing and Odor Neutralization
Sodium bicarbonate, commonly known as baking soda, is a pH-balancing agent that creates an alkaline environment where odor-causing bacteria struggle to thrive. Rather than masking odors with artificial fragrances, baking soda neutralizes them at the source. It also helps absorb excess moisture, keeping you feeling fresh throughout the day. However, some individuals with sensitive skin may experience irritation from baking soda, which is why we’ll discuss alternatives later in this guide.
Arrowroot Powder or Cornstarch: Natural Moisture Absorption
These powdery starches excel at absorbing moisture without clogging pores or disrupting your skin’s natural barrier. Arrowroot powder is particularly favored by those seeking to make homemade natural deodorant because DIY natural homemade beauty it’s hypoallergenic and works well even in humid climates. Cornstarch is an equally effective and more affordable alternative, though some prefer arrowroot for its silkier texture.
Essential Oils: Therapeutic and Aromatic
Beyond providing pleasant scents, essential oils contribute genuine antimicrobial and skin-soothing properties. Tea tree oil, lavender, and eucalyptus are particularly effective against bacteria while offering aromatherapy benefits. Unlike synthetic fragrances that can contain dozens of undisclosed chemicals, pure essential oils provide transparency and therapeutic value.
If you’re concerned about the safety profile of commercial deodorants, the Environmental Working Group’s Skin Deep database provides comprehensive safety ratings for thousands of personal care products, highlighting why many consumers are seeking natural alternatives.
Step-by-Step Recipe
Now that you understand the science behind the ingredients, let’s walk through an easy-to-follow recipe for making your own natural deodorant. This beginner-friendly formula yields approximately 4 ounces of deodorant—enough to last 2-3 months with regular use.
Ingredients:
- 3 tablespoons coconut oil (preferably organic, unrefined)
- 3 tablespoons baking soda (or substitute with additional arrowroot for sensitive skin)
- 2 tablespoons arrowroot powder or cornstarch
- 15-20 drops of your favorite essential oils (optional but recommended)
- 1 tablespoon shea butter or cocoa butter (optional, for extra moisturization)
Equipment Needed:
- Small mixing bowl
- Spoon or small whisk
- Storage container (empty deodorant tube, small glass jar, or tin)
- Double boiler or microwave-safe bowl
Instructions:
Step 1: Melt the Oils
If your coconut oil is solid, gently melt it using a double boiler or microwave in 10-second intervals. If you’re adding shea or cocoa butter, melt these together with the coconut oil. The goal is to create a smooth liquid base without overheating, which can degrade some of coconut oil’s beneficial properties. Let the melted oils cool slightly but remain liquid.
Step 2: Combine Dry Ingredients
In your mixing bowl, combine the baking soda and arrowroot powder. Whisk these together thoroughly to eliminate any lumps. This step ensures even distribution throughout your final product, preventing grainy patches that could irritate skin.
Step 3: Mix Wet and Dry
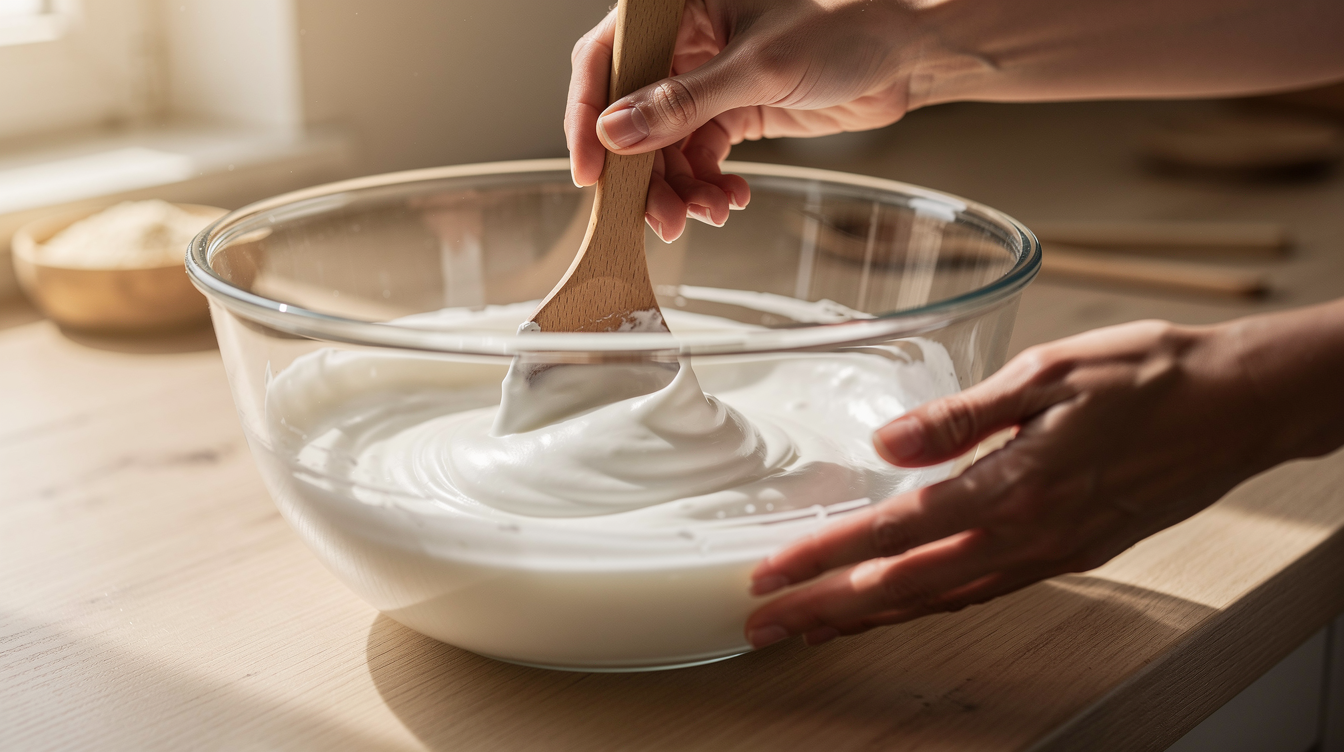
Slowly pour the melted coconut oil mixture into the dry ingredients while stirring continuously. Mix thoroughly until you achieve a smooth, uniform paste. The consistency should resemble thick frosting. If it seems too thick, add a tiny bit more melted coconut oil; if too thin, add a small amount of arrowroot powder.
Step 4: Add Essential Oils
Once the mixture has cooled to room temperature (this prevents essential oils from evaporating), add your chosen essential oils. Popular combinations include:
- Lavender and tea tree (calming and antimicrobial)
- Peppermint and eucalyptus (refreshing and cooling)
- Lemon and rosemary (uplifting and energizing)
- Frankincense and sandalwood (earthy and grounding)
Stir thoroughly to ensure even distribution of the scent.
Step 5: Transfer to Container
Quickly transfer your mixture to your chosen storage container before it begins to solidify. If using a deodorant tube, pour carefully and tap the container on the counter to remove air bubbles. For jar storage, simply spoon the mixture in and smooth the top. Allow the deodorant to cool completely at room temperature before use—this typically takes 2-4 hours, or you can refrigerate it for faster setting.
Troubleshooting Common Issues:
- Too grainy: This usually means insufficient mixing or using baking soda crystals that are too large. Try sifting your baking soda before use or mixing more vigorously.
- Too soft: Add more arrowroot powder, one teaspoon at a time, until you achieve the desired consistency.
- Too hard: Increase the coconut oil ratio slightly in your next batch.
- Separating: This indicates inadequate mixing. Remelt and stir more thoroughly.
Customizing Scents and Textures
One of the greatest advantages of learning how to make homemade natural deodorant is the ability to customize it perfectly for your preferences and needs. Unlike homemade deodorants guide commercial products with one-size-fits-all formulations, you can adjust everything from scent to consistency.
Scent Customization
Essential oils allow for endless scent possibilities. Consider these factors when choosing your aromatics:
For Active Lifestyles: Peppermint, eucalyptus, and tea tree provide cooling, antimicrobial protection that’s ideal after workouts.
For Sensitive Skin: Chamomile, lavender, and frankincense offer gentle, anti-inflammatory properties without potential irritation.
For Masculine Scents: Cedarwood, sandalwood, vetiver, and cypress create earthy, woodsy aromas.
For Feminine Scents: Rose, geranium, ylang-ylang, and jasmine provide floral notes.
Unscented Option: Simply omit essential oils entirely. The coconut oil will provide mild, natural scent without added aromatics.
Texture Modifications
Cream Deodorant: Increase coconut oil and decrease powders for a softer, cream-like consistency that spreads easily. This works well in hot climates where solid sticks might become too soft.
Firm Stick: Add more arrowroot powder and include beeswax (1 tablespoon per recipe) for a firmer stick that won’t melt in summer temperatures. This is ideal if you prefer the convenience of a traditional deodorant stick.
Spray Deodorant: Create a liquid version by mixing 1/4 cup witch hazel, 2 tablespoons of water, 1 tablespoon of baking soda dissolved completely, and 10-15 drops of essential oils in a spray bottle. Shake before each use.
Powder Deodorant: Combine equal parts baking soda, arrowroot powder, and bentonite clay with essential oils. Apply with a powder puff or large makeup brush.
Specialized Additions
Activated Charcoal: Add 1/2 teaspoon for extra detoxification and odor absorption. This creates a gray-black color but provides superior odor control.
Bentonite Clay: Include 1 tablespoon for enhanced detoxification and a silkier texture. Clay also helps absorb moisture and toxins.
Vitamin E Oil: Add 1/4 teaspoon to extend shelf life and provide additional skin-nourishing benefits.
Probiotic Powder: Mix in the contents of 1-2 probiotic capsules to support healthy skin bacteria and potentially reduce odor even more effectively.
Storage and Usage Tips
Proper storage and application techniques ensure your homemade natural deodorant remains effective and pleasant to use throughout its lifespan.
Storage Guidelines
Temperature Matters: Coconut oil melts at 76°F (24°C), so storage location significantly impacts consistency. In warm climates or during summer, store your deodorant in the refrigerator or a cool, dark cabinet. Winter storage can be at room temperature in most homes.
Container Choices: Glass jars with tight-fitting lids prevent contamination and don’t leach chemicals. Tin containers work well and travel easily. If using a push-up tube, refrigerate it before your first use to ensure it’s fully solidified.
Shelf Life: Homemade natural deodorant typically lasts 3-6 months when stored properly. The addition of vitamin E oil can extend this to 6-9 months. Watch for changes in smell, texture, or color as signs of spoilage.
Labeling: Always date your deodorant and list the ingredients used. This helps you track what works best and identify any problematic ingredients if irritation occurs.
Application Best Practices
Clean, Dry Skin: Always apply to freshly washed, completely dry underarms. Moisture can prevent proper absorption and reduce effectiveness.
Amount Needed: A little goes a long way. Use about a pea-sized amount for each underarm. Overapplication can leave residue on clothing.
Warming It Up: If your deodorant is very firm, hold the container against your underarm for a few seconds to warm it slightly before application. This makes spreading much easier.
For Jar Storage: Use clean fingers or a small spatula to scoop product. Never double-dip with unwashed hands to prevent bacterial contamination.
Transition Period: Your body may need 1-3 weeks to adjust when you’re learning how to make homemade natural deodorant and switching from natural beauty product recipes conventional antiperspirants. During this detox period, you might experience increased sweating or odor as your body purges accumulated chemicals and adjusts to functioning naturally.
Clothing Considerations: Natural deodorants won’t stain clothing like aluminum-based antiperspirants, but coconut oil can leave marks on delicate fabrics. Allow deodorant to fully absorb before dressing, or wear an undershirt during the transition period.
Travel Tips: For air travel, pour your deodorant into containers under 3.4 ounces or make solid, beeswax-based versions that won’t melt. Alternatively, create travel-sized portions in small tins.
Reapplication: Unlike 24-hour commercial products, you may need to reapply natural deodorant after intense physical activity or in extremely hot weather. Keep a small jar in your gym bag or purse for touch-ups.
Frequently Asked Questions
Is homemade natural deodorant as effective as commercial antiperspirant?
Natural deodorant works differently than commercial antiperspirant, which is important to understand. Antiperspirants use aluminum compounds to physically block sweat glands, preventing perspiration entirely. Homemade natural deodorant doesn’t stop sweating—which is actually a healthy bodily function—but it effectively neutralizes odor-causing bacteria and absorbs moisture. Most users find that after a brief transition period, natural deodorant provides excellent odor protection throughout the day. However, if you’re accustomed to staying completely dry, there’s an adjustment period as your body learns to regulate perspiration naturally. Sweating is healthy and helps your body eliminate toxins, so while you may feel slightly more moisture, you shouldn’t experience noticeable odor with a well-formulated natural deodorant.
How long does homemade natural deodorant last?
When stored properly in a cool, dry location, homemade natural deodorant typically lasts 3-6 months. The shelf life depends on several factors: storage temperature, container cleanliness, and whether you’ve added preservation ingredients like vitamin E oil. Coconut oil naturally resists bacterial growth due to its antimicrobial properties, but it can still go rancid over time, especially in warm environments. Signs that your deodorant has expired include an off smell (rancid or sour), change in texture (excessive separation or graininess), or discoloration. To maximize shelf life, always use clean hands or tools when applying, store in airtight containers, and keep in cool locations. Making smaller batches more frequently ensures you’re always using fresh product.
Can baking soda in deodorant cause a rash, and what are the alternatives?
Yes, baking soda can cause irritation, redness, or rash in some individuals, particularly those with sensitive skin. Baking soda is alkaline (pH around 9), while healthy skin is slightly acidic (pH 4.5-5.5). This pH difference can disrupt your skin’s acid mantle, leading to irritation, especially with daily use. If you experience rashes, burning, or darkening of underarm skin, baking soda is likely the culprit. Fortunately, several alternatives work well: arrowroot powder or cornstarch can replace baking soda entirely, though they provide less odor-fighting power.
Magnesium hydroxide (milk of magnesia) offers similar pH-balancing benefits with less irritation—use 1-2 tablespoons in place of baking soda. Bentonite or kaolin clay provides odor absorption and detoxification without alkalinity. You can also reduce the baking soda ratio by half and increase arrowroot powder, which many find offers sufficient protection with reduced irritation risk. Always patch test new formulations on your inner arm before full application.
What’s the best way to transition to homemade natural deodorant?
Transitioning to natural deodorant requires patience and understanding of what’s happening in your body. When you stop using aluminum-based antiperspirants, your body undergoes a detoxification period lasting 1-4 weeks. During this time, you may experience increased sweating and odor as blocked sweat glands reopen and your body eliminates accumulated chemicals. To ease this transition: Start on a weekend or during a less stressful period when you’re not concerned about potential odor. Exfoliate your underarms gently 2-3 times weekly to unclog pores and remove buildup.
Consider doing an underarm detox mask using bentonite clay, apple cider vinegar, and water before beginning—this can shorten the adjustment period. Stay well-hydrated and maintain good hygiene with daily washing. Be prepared to reapply your natural deodorant midday during the first few weeks. Wear breathable, natural fabrics that allow your skin to breathe. Most importantly, stick with it—the initial adjustment period passes, and most people find their bodies regulate better than ever with natural products.
Can I use homemade deodorant on sensitive skin?
Yes, with the right formulation, homemade deodorant is often better for sensitive skin than commercial products containing synthetic fragrances, parabens, and harsh chemicals. The key is customizing your recipe to avoid known irritants. For sensitive skin, eliminate or significantly reduce baking soda, using magnesium hydroxide or extra arrowroot powder instead. Choose gentle, anti-inflammatory essential oils like lavender, chamomile, or frankincense, and use fewer drops (5-10 instead of 15-20). Add skin-soothing ingredients like colloidal oatmeal, aloe vera gel, or calendula-infused oil.
Include extra moisturizing butters like shea or mango butter to create a protective barrier. Always perform a patch test on your inner wrist or elbow before applying to underarms. If you have conditions like eczema or psoriasis, consult your dermatologist before trying new products. Apply only to clean, completely dry, unbroken skin—never immediately after shaving, as this increases irritation risk. Many people with sensitive skin who couldn’t tolerate commercial deodorants find that customized homemade versions work beautifully because they can control every ingredient.
Conclusion
Learning how to make homemade natural deodorant empowers you to take control of your personal care routine while avoiding potentially harmful chemicals found in many commercial products. This simple DIY project requires just a few affordable ingredients and minimal time investment, yet provides months of effective, customizable odor protection.
The basic recipe of coconut oil, baking soda (or gentle alternatives), arrowroot powder, and essential oils creates a foundation you can endlessly customize to match your specific needs, preferences, and skin sensitivities. Whether you prefer cream, stick, spray, or powder formulations, floral or earthy scents, or need accommodations for sensitive skin, homemade deodorant adapts to you—not the other way around.
While the transition from conventional antiperspirants requires a brief adjustment period, most people find that natural deodorant not only meets but exceeds their expectations once their bodies adapt. You’ll enjoy knowing exactly what you’re putting on your skin, save money compared to premium natural brands, and reduce plastic waste from disposable deodorant containers.
Start with the basic recipe provided, then experiment with different ingredients and combinations until you discover your perfect formula. Keep notes on what works best for your body chemistry, climate, and lifestyle. Share your creations with friends and family, or package them in beautiful containers as thoughtful, personalized gifts.
Making your own natural deodorant isn’t just about avoiding chemicals—it’s about embracing a more intentional, sustainable approach to self-care. Once you experience the effectiveness and satisfaction of homemade deodorant, you’ll wonder why you didn’t make the switch sooner. Your underarms, your health, and the environment will thank you for choosing natural.
