How to Make DIY Lip Balm at Home in 6 Easy Steps
Creating your own DIY lip balm recipe is easier than you might think, and it offers numerous advantages over purchasing commercial alternatives. Whether you’re looking to avoid synthetic ingredients, save money, or simply enjoy a fun crafting project, homemade lip balm provides the perfect solution. This comprehensive guide will walk you through everything you need to know to create personalized, nourishing lip care products right in your own kitchen.
Why Make Homemade Lip Balm
Making your own lip balm comes with several compelling benefits that extend beyond the simple satisfaction of creating something yourself. The primary advantage is complete control over the ingredients that touch your lips. Commercial lip balms often contain synthetic fragrances, artificial colors, and preservatives that some people prefer to avoid. When you create 10 easy DIY natural your own lip balm using natural ingredients, you know exactly what’s going into your product.
Cost-effectiveness is another significant benefit. A single batch of homemade lip balm can fill multiple tubes or tins for just a few dollars, whereas purchasing the same quantity of premium natural lip balms from stores could cost significantly more. The initial investment in base ingredients pays for itself after making just a couple of batches.
Customization is perhaps the most exciting aspect of DIY lip balm creation. You can adjust the texture from soft to firm, add natural tints for subtle color, incorporate therapeutic essential oils, or create flavored varieties that suit your personal preferences. This level of personalization simply isn’t available with mass-produced products.
From a health perspective, natural ingredients like beeswax, coconut oil, and shea butter provide genuine moisturizing benefits. According to research on natural ingredients in cosmetics, many plant-based oils and butters contain vitamins and fatty acids that support skin health. These ingredients work to lock in moisture rather than just coating the lips with petroleum-based products.
Ingredients and Tools
Before you begin your DIY lip balm recipe, gathering the right ingredients and tools will ensure a smooth crafting experience. The beauty of homemade lip balm lies in its simplicity—you’ll need only a few basic components.
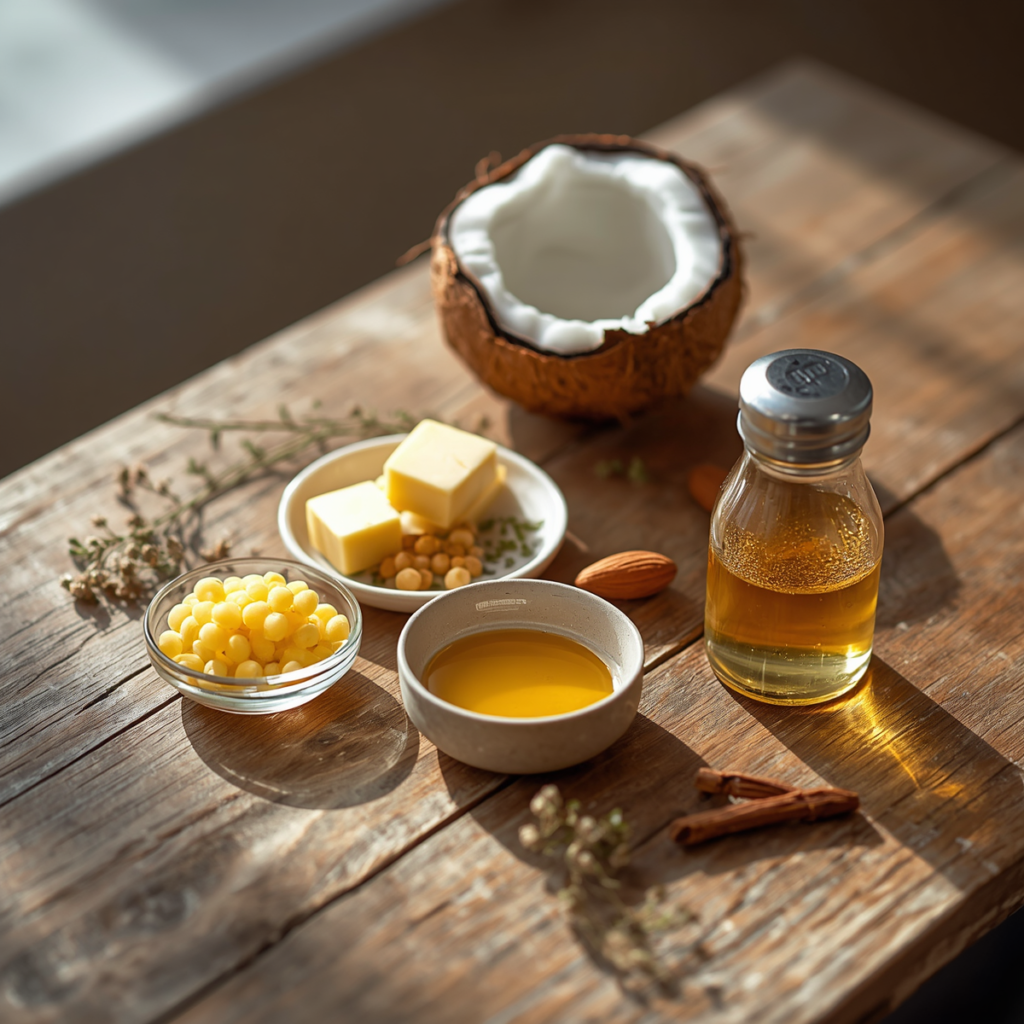
Essential Ingredients:
- Beeswax: 2 tablespoons (provides structure and protective barrier). According to the FDA’s information on beeswax, it’s a safe and commonly used cosmetic ingredient.
- Carrier oil: 2 tablespoons (sweet almond oil, coconut oil, or jojoba oil work wonderfully)
- Butter: 1 tablespoon (shea butter or cocoa butter for extra moisturizing properties)
- Vitamin E oil: 1/4 teaspoon (acts as a natural preservative and skin conditioner)
Optional Add-ins:
- Essential oils for scent (3-5 drops maximum)
- Natural flavor extracts (vanilla, peppermint, or citrus)
- Natural colorants for tinted versions
- Honey for added moisture (1/2 teaspoon)
Tools Required:
- Double boiler or heat-safe glass bowl over a pot of water
- Measuring spoons
- Stirring utensil (glass or stainless steel)
- Lip balm tubes or small tins (0.15 oz size is standard)
- Pipettes or small funnel for easy pouring
- Labels for finished products
All ingredients should be cosmetic-grade or food-grade quality. You can find these supplies at health food stores, online retailers specializing in DIY cosmetics, or craft stores with soap-making sections.
Basic Lip Balm Recipe
This foundational DIY lip balm recipe is perfect for beginners and serves as the base for all variations. The process is straightforward and takes approximately 20 minutes from start to finish, with most of that time being cooling and solidifying.
Ingredients:
- 2 tablespoons beeswax pellets or grated beeswax
- 2 tablespoons sweet almond oil
- 1 tablespoon shea butter
- 1/4 teaspoon vitamin E oil
- 3-5 drops essential oil (optional)
Preparation Time: 10 minutes active, 10 minutes cooling
Yield: Approximately 10-12 standard lip balm tubes
Instructions:
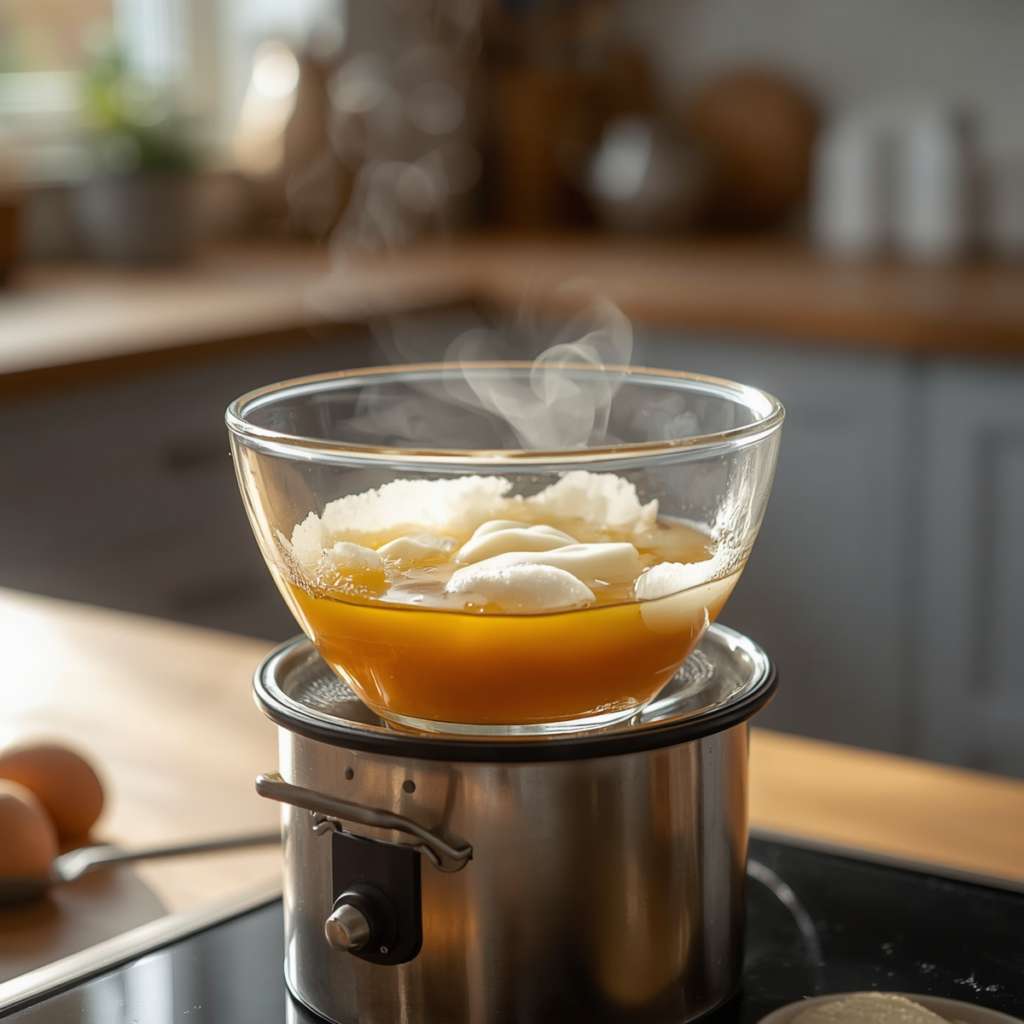
Step 1: Set up your double boiler by filling a small pot with 1-2 inches of water and placing it over medium heat. Place your heat-safe glass bowl on top, ensuring the bottom doesn’t touch the water.
Step 2: Add the beeswax to the bowl first, as it has the highest melting point. Stir occasionally until it begins to melt, which typically takes 3-4 minutes.
Step 3: Once the beeswax is halfway melted, add the sweet almond oil and shea butter. Continue stirring gently until all ingredients are completely liquified and well combined. The mixture should be clear with no visible chunks.
Step 4: Remove the bowl from heat and let it cool for about 1 minute. This slight cooling prevents the essential oils from evaporating too quickly when added.
Step 5: Add the vitamin E oil and your chosen essential oil if using. Stir thoroughly to distribute the oils evenly throughout the mixture. This is when you might incorporate make your own cosmetics natural flavoring or other optional ingredients depending on your preferences.
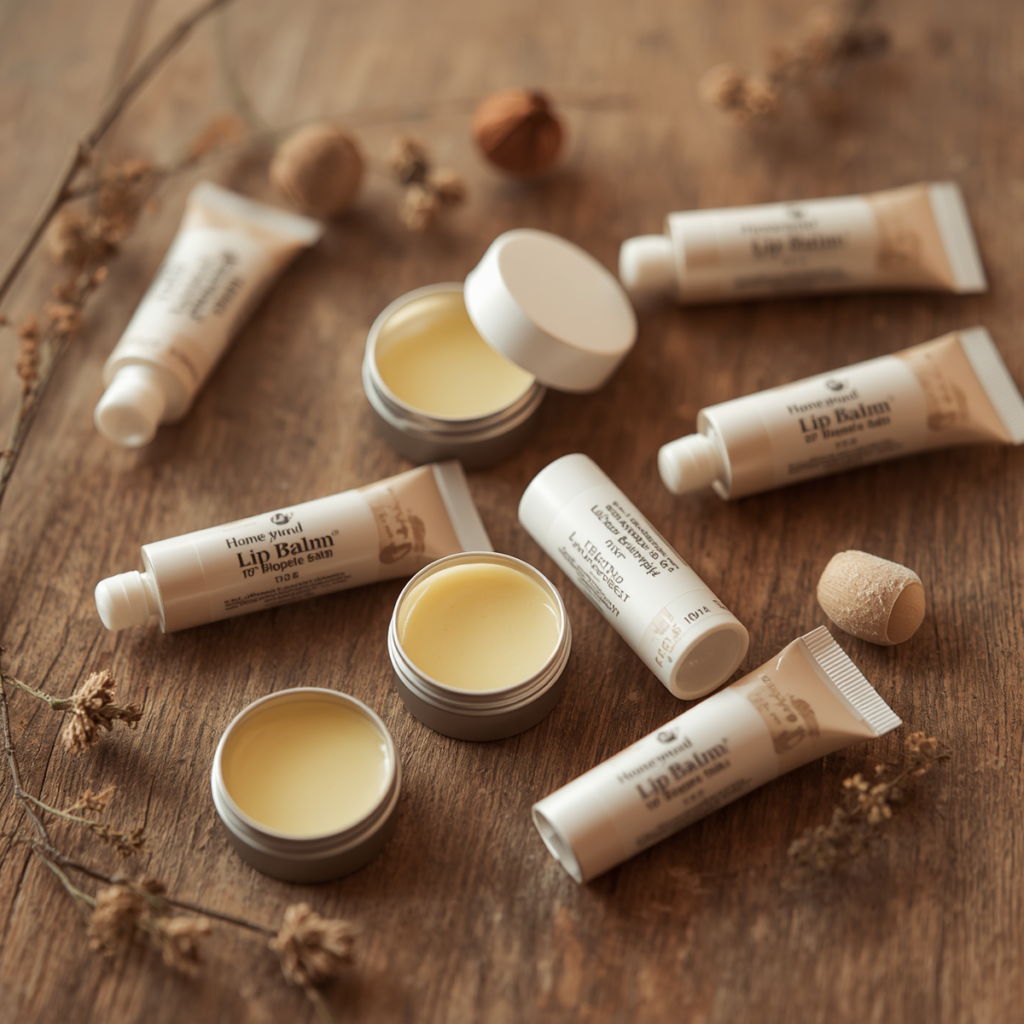
Step 6: Carefully pour the liquid mixture into your prepared lip balm tubes or tins. Work quickly but carefully, as the mixture begins to solidify as it cools. If the mixture becomes too thick, you can gently reheat it.
Natural Flavor Ideas:
- Peppermint essential oil (refreshing and cooling)
- Sweet orange essential oil (uplifting and sweet)
- Vanilla extract (warm and comforting)
- Lavender essential oil (calming and floral)
- Cinnamon essential oil (spicy and warming—use sparingly, just 1-2 drops)
Allow the lip balm to cool completely at room temperature for at least 30 minutes before capping. Resist the urge to move them during this time, as movement can create an uneven surface.
Tinted Lip Balm Variation
Adding a subtle hint of color to your DIY lip balm recipe creates a product that provides both moisturization and a touch of natural beauty. This variation follows the basic recipe with the addition of natural colorants.
Additional Ingredients:
- 1/8 teaspoon beetroot powder (for pink to berry shades)
- Or 1/8 teaspoon cocoa powder (for brown tones)
- Or 1/16 teaspoon mica powder in desired shade (for more color variety)
Instructions:
Follow steps 1-4 of the basic recipe. After removing from heat and adding vitamin E and essential oils, add your chosen colorant. Start with a small amount—you can always add more, but you can’t remove color once it’s mixed in.
Whisk vigorously to ensure the colorant is fully dispersed with no clumps. For beetroot or cocoa powder, you may want to use a small handheld milk frother for the smoothest consistency. Test the color by placing a small drop on a white paper towel; remember that the color will appear lighter once set than it does in liquid form.
Pour into containers immediately and allow to set completely. Tinted lip balms make excellent gifts and can be customized to match different preferences or seasons.
Vegan Lip Balm Option
For those following a vegan lifestyle or simply wishing to avoid animal-derived ingredients, creating a vegan DIY lip balm recipe is entirely possible. The key is replacing beeswax with plant-based alternatives that provide similar structure and protection.
Ingredients:
- 2 tablespoons candelilla wax or carnauba wax (beeswax replacement)
- 2 tablespoons coconut oil
- 1 tablespoon cocoa butter or mango butter
- 1/4 teaspoon vitamin E oil
- 3-5 drops essential oil (optional)
Special Notes:
Candelilla wax is approximately twice as hard as beeswax, so you may need to adjust the ratio slightly. If using candelilla wax, reduce the amount to 1.5 tablespoons and increase the oils by 0.5 tablespoon for a similar consistency to traditional lip balm.
Carnauba wax is even firmer than candelilla, making it ideal for lip balms that will be used in hot climates. Use 1 tablespoon carnauba wax combined with 1 tablespoon candelilla wax for the best texture.
Follow the same preparation method as the basic recipe, noting that plant-based waxes may take slightly longer to melt. Stir consistently to prevent any graininess in the final product. According to research on cosmetic ingredients and their properties, plant-based alternatives offer comparable moisturizing benefits to traditional formulations.
How to Pour and Store It
Proper pouring and storage techniques ensure your DIY lip balm recipe results in professional-looking products that last.
Pouring Tips:
Prepare your containers before melting your ingredients. Line them up on a flat, stable surface that won’t need to be moved for at least an hour. If using tubes, ensure they’re standing upright in a holder or small box.
Pour the liquid lip balm slowly and steadily, filling each container to just below the rim (about 1/8 inch from the top). This prevents overflow when capping and accounts for slight settling as the mixture cools.
If you notice small bubbles forming on the surface, you can gently wave a heat source (like a hair dryer on low) over the tops for a few seconds to pop them and create a smooth finish.
For a layered effect, pour a small amount of one color, let it partially set (about 5 minutes), then pour a different colored mixture on top. This creates look beautiful naturally beautiful, professional-looking lip balms that make impressive gifts.
Storage Guidelines:
Store finished lip balms in a cool, dry place away from direct sunlight. Heat can cause the balm to soften or melt, while sunlight may degrade some natural ingredients over time.
Avoid storing lip balm in cars, bathrooms with high humidity, or near heat sources like radiators. A drawer in your bedroom or a cabinet in a climate-controlled room works perfectly.
Keep unused lip balm in sealed containers to prevent contamination and oxidation. Glass or metal tins are preferable to plastic for long-term storage.
Label your lip balms with the date made and ingredients used. This helps track freshness and is especially important if you make multiple varieties or plan to gift them.
Shelf Life
Understanding the shelf life of your DIY lip balm recipe helps ensure you’re using fresh, effective products.
Expected Lifespan:
Basic lip balm made with the ingredients outlined in this guide typically lasts 6-12 months when stored properly. The addition of vitamin E oil acts as a natural antioxidant, extending the shelf life by preventing the oils from becoming rancid.
Vegan lip balms using plant-based waxes have a similar shelf life, though coconut oil-heavy formulations may solidify more in cold temperatures and soften more readily in heat.
Tinted lip balms with natural colorants like beetroot powder may have a slightly shorter shelf life of 6-9 months, as natural colorants can fade over time.
Signs of Expiration:
- Rancid or “off” smell (different from the original scent)
- Change in texture (excessive hardness or unusual softness)
- Color changes or fading
- Separation of ingredients
- Mold growth (rare but possible if water was introduced)
Extending Freshness:
Adding vitamin E oil or rosemary oleoresin extract acts as a natural preservative. Use clean hands or applicators when applying lip balm to prevent introducing bacteria. Make smaller batches if you won’t use multiple tubes within the expected shelf life.
For gifting purposes, include a small label with the creation date and a “best by” date 6 months in the future.
Common Problems
Even with simple recipes, you may encounter occasional issues. Here are solutions to the most common problems with DIY lip balm recipes.
Problem: Grainy or Gritty Texture
This frustrating issue typically occurs when the lip balm cools too quickly or unevenly, causing the wax to crystallize. To prevent graininess, ensure all ingredients are completely melted and well-combined before pouring. Allow the mixture to cool slightly (about 1 minute) before pouring, but not so long that it begins to solidify.
If your lip balm becomes grainy after setting, you can remelt it slowly, allow it to cool slightly, then pour it again. This time, let it cool more gradually at room temperature without moving or disturbing it.
Problem: Lip Balm Too Soft
If your lip balm doesn’t solidify properly or melts too easily, you’ve used too much oil relative to wax. The fix is to remelt the batch and add an additional 1/2 tablespoon of beeswax or plant-based wax alternative. Mix thoroughly and pour again.
Different climates require different ratios—those in warmer areas may need to increase wax content by 25% for optimal consistency.
Problem: Lip Balm Too Hard
Conversely, lip balm that’s too hard or difficult to apply needs more oil. Remelt and add an additional 1/2 tablespoon of your carrier oil, mix well, and pour.
Problem: Uneven Surface
If the top of your lip balm isn’t smooth or has a crater in the center, it was likely moved before fully setting. Always pour on a completely level surface and resist checking on them for at least 30 minutes.
Problem: Separation in Container
Ingredients separating after pouring indicates they weren’t mixed thoroughly enough while melted. Always stir for at least 30 seconds after all ingredients have liquified to ensure proper emulsification.
Frequently Asked Questions
What are the best essential oils to use in homemade lip balm?
The best essential oils for lip balm are food-safe and gentle on sensitive skin. Peppermint and spearmint provide a refreshing tingle and natural plumping effect. Sweet orange, lemon, and grapefruit offer uplifting citrus notes. Lavender provides calming properties and a subtle floral scent. Vanilla (though technically an extract) creates a sweet, dessert-like flavor. Always use therapeutic-grade essential oils and limit to 3-5 drops per batch, as the lip area is sensitive and these oils are highly concentrated.
Can I make lip balm without beeswax?
Yes, you can absolutely make lip balm without beeswax using vegan alternatives. Candelilla wax, derived from a small Mexican shrub, is the most popular substitute and provides similar structure. Use about 1.5 tablespoons of candelilla wax for every 2 tablespoons of beeswax called for in a recipe, as it’s approximately twice as firm. Carnauba wax, from Brazilian palm trees, is another option but creates a harder balm. Some crafters also use soy wax, though it creates a softer product. You can even combine different plant-based waxes to achieve your preferred consistency.
How can I make my homemade lip balm taste better?
Improving the taste of DIY lip balm involves using food-grade flavor oils specifically designed for lip products. Natural vanilla extract, peppermint extract, or almond extract can be added at 1/4 teaspoon per batch. Stevia powder in tiny amounts (just a pinch) adds sweetness without sugar. Cocoa powder or cocoa butter naturally provides chocolate flavor. You can also use flavor oils from cake decorating suppliers, ensuring they’re safe for lip products. Remember that essential oils contribute flavor as well as scent—citrus oils like sweet orange or tangerine create pleasant taste experiences. Start with small amounts and adjust to taste, keeping in mind that some of the flavor will dissipate as the balm cools.
Why is my DIY lip balm grainy?
Grainy lip balm results from temperature issues during the cooling process. When the mixture cools too quickly or experiences temperature fluctuations, the wax (especially beeswax) can crystallize and create a gritty texture. To prevent this, ensure all ingredients are fully melted and smoothly combined before pouring. After pouring, let the lip balm cool gradually at room temperature without moving the containers or exposing them to drafts, air conditioning, or refrigeration. The cooling process should take 30-45 minutes naturally. If graininess occurs, you can fix it by remelting the lip balm slowly in a double boiler, stirring well, allowing it to cool for about 1 minute, then pouring again and letting it set undisturbed in a location with stable temperature.
How much lip balm does one recipe make?
The basic recipe provided in this guide yields approximately 10-12 standard lip balm tubes (0.15 oz or 4.25g size) or 6-8 small tins (0.25 oz or 7g size). The exact amount depends on how full you fill each container and the specific size of tubes or tins you’re using. If you’re making lip balm for personal use, one batch typically provides a year’s supply. For gifting or craft fairs, you can easily double or triple the recipe, maintaining the same proportions. It’s helpful to have all your containers prepared and counted before starting so you know you have enough for your entire batch.
Conclusion
Creating your own DIY lip balm recipe is a rewarding project that combines creativity, natural ingredients, and practical skin care. Whether you choose the basic recipe, experiment with tinted variations, or opt for vegan alternatives, you’ll enjoy personalized lip care products that are healthier and more cost-effective than commercial options. With just a few simple ingredients and basic tools, you can craft professional-quality lip balms tailored to your exact preferences.
The beauty of DIY lip balm lies not just in the finished product, but in the process itself—experimenting with different essential oils, adjusting textures, and creating custom colors. As you become more comfortable with the basic technique, you’ll discover endless possibilities for customization and gift-giving. Start with the foundational recipe presented here, and don’t hesitate to adjust ratios and add-ins until you create your perfect lip balm formula.