12 Easy DIY Clothing Alterations You Can Do at Home
Every wardrobe has them—those jeans that are just a little too long, the shirt that fits perfectly everywhere except the waist, or the sleeves that bunch up at your wrists. Rather than letting these pieces collect dust in your closet or spending money on professional alterations, you can tackle many common clothing fixes yourself. DIY clothing alterations not only save you money but also reduce textile waste, making them an eco-friendly choice that extends the life of your favorite garments.
Whether you’re a complete beginner or have some sewing experience, this guide will walk you through 12 practical alterations you can master at home. From basic hemming to creative customization, you’ll discover that transforming your wardrobe is more accessible than you might think. Best of all, many of these alterations require minimal equipment and can be completed in under an hour.
Basic Sewing Tools
Before diving into alterations, you’ll need to stock your sewing kit with essential tools. Having the right equipment makes every project easier and produces professional-looking results.
Essential Tools:
- Fabric scissors: Sharp shears dedicated solely to cutting fabric (never use them on paper, which dulls the blades)
- Measuring tape: A flexible 60-inch tape for accurate measurements
- Pins and pin cushion: Glass-head pins are ideal as they won’t melt if you iron over them
- Seam ripper: For removing unwanted stitches without damaging fabric
- Hand sewing needles: Various sizes for different fabric weights
- Thread: Multiple colors to match your garments
- Fabric marker or tailor’s chalk: For marking alterations that wash away
- Iron and ironing board: Essential for crisp, professional results
Optional but Helpful:
- Sewing machine (though many alterations can be done by hand)
- Thimble for pushing needles through tough fabric
- Small embroidery scissors for detailed work
- Fabric weights for holding patterns in place
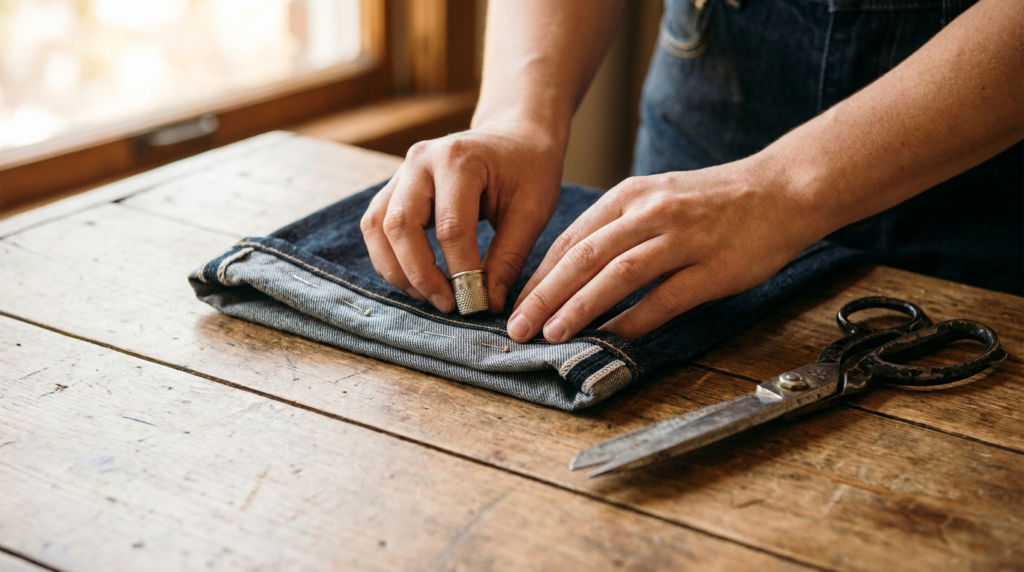
DIY Pants Shortening at Home
Difficulty Level: Beginner Time Required: 30-45 minutes Tools Needed: Measuring tape, pins, fabric scissors, iron, needle and thread or sewing machine
Shortening pants is one of the most common alterations and surprisingly straightforward once you understand the process.
Step-by-Step Instructions:
1. Try on the pants with the shoes you’ll typically wear with them. Fold the hem up to your desired length and pin it in place.
2. Mark the length by placing pins around the entire leg while wearing the pants, or have someone help you.
3. Remove the pants and lay them flat on a table. Measure from the bottom of the existing hem to your pin line, ensuring consistency around the leg.
4. Add hem allowance: Mark an additional 1.5 to 2 inches below your desired length for the new hem.
5. Cut the excess fabric along your marked line with fabric scissors.
6. Fold and press: Fold the raw edge up by half an inch and press with an iron. Then fold up again to your desired length and press once more.
7. Sew the hem using a blind stitch by hand or a straight stitch on your machine. For jeans, use denim thread and a heavy-duty needle.
Pro Tip: To maintain the original hem appearance on jeans, use the “original hem” method by carefully removing the existing hem, shortening the leg, and reattaching the original hem.
DIY Shirt Alterations for a Better Fit
Difficulty Level: Intermediate Time Required: 45-60 minutes Tools Needed: Pins, fabric marker, seam ripper, sewing machine or needle and thread, iron
A baggy shirt can be transformed into a flattering fit with side seam adjustments.
Step-by-Step Instructions:
1. Turn the shirt inside out and put it on.
2. Pin the excess fabric along the side seams, creating a smooth line from underarm to hem. The amount you take in should feel comfortable when you move your arms.
3. Remove the shirt carefully (so pins stay in place) and lay it flat.
4. Mark your new seam line with fabric marker, following your pin line. Ensure both sides are symmetrical by measuring.
5. Use a seam ripper to remove 3-4 inches of the original side seam above and below your alteration area for a smooth transition.
6. Sew the new seam along your marked line, tapering into the original seam at the top and bottom.
7. Try on the shirt to check the fit before trimming excess fabric. If it fits well, trim the excess to about half an inch from your new seam.
8. Finish the raw edges with a zigzag stitch or serger to prevent fraying.
DIY Waistband Alterations Made Easy
Difficulty Level: Intermediate Time Required: 30-40 minutes Tools Needed: Seam ripper, elastic (if needed), pins, needle and thread or sewing machine
Waistbands that are too loose or too tight can make otherwise perfect pants unwearable. Fortunately, adjustments are manageable for DIY enthusiasts who understand basic sewing techniques.
For Elastic Waistbands:
1. Locate the elastic opening in the waistband (usually at the back seam).
2. Use a seam ripper to open a 2-inch section of the waistband stitching.
3. Pull out the elastic and try on the pants to determine how much to tighten or loosen.
4. Adjust the elastic: Either trim excess and sew the ends together for tightening, or add elastic sections for loosening.
5. Resew the opening in the waistband.
For Fitted Waistbands:
1. Remove the waistband from the back center seam area using a seam ripper.
2. Take in or let out the center back seam of both the waistband and pants body.
3. Reattach the waistband, ensuring the center back seam aligns properly.

DIY Sleeve Shortening at Home
Difficulty Level: Beginner to Intermediate Time Required: 20-30 minutes per sleeve Tools Needed: Measuring tape, pins, scissors, iron, needle and thread or sewing machine
Long sleeves that cover your hands or bunch awkwardly can be shortened to the perfect length.
Step-by-Step Instructions:
1. Try on the garment and fold the sleeve to your desired length. Mark with a pin.
2. Measure from the shoulder seam to your pin on both sleeves to ensure they’re even.
3. Add 1.5 inches to your desired length for hem allowance and cut off the excess.
4. For sleeves with cuffs: Remove the cuff, shorten the sleeve, then reattach the cuff at the new length.
5. For plain sleeves: Fold the raw edge under half an inch, press, fold again to desired length, and press once more.
6. Sew the hem using a blind stitch or machine straight stitch.
7. Press the completed hem for a professional finish.
Add Decorative Patches
Difficulty Level: Beginner Time Required: 15-20 minutes Tools Needed: Patches, iron (for iron-on patches) or needle and thread, scissors
Patches serve double duty—they repair damaged areas while adding personality to your garments.
Iron-On Method:
1. Position the patch over the area you want to cover or decorate.
2. Set your iron to the temperature recommended on the patch packaging (usually cotton setting).
3. Place a thin cloth over the patch to protect it.
4. Press firmly for 30-45 seconds without moving the iron.
5. Allow to cool completely before wearing.
Sew-On Method:
1. Pin the patch in position on your garment.
2. Thread your needle with matching or contrasting thread.
3. Sew around the edges using a whip stitch or running stitch, keeping stitches about 1/8 inch from the edge.
4. Secure with a knot on the inside of the garment.
Creative Ideas:
- Cover elbow holes in sweaters
- Repair knee tears in jeans
- Personalize plain jackets
- Hide small stains that won’t wash out
The evolution of clothing repair and alteration has a rich history, dating back to the invention of the sewing machine in the 19th century, which revolutionized how people maintained their wardrobes:
Hem a Skirt or Dress
Difficulty Level: Beginner Time Required: 30-45 minutes Tools Needed: Measuring tape, pins, scissors, iron, needle and thread or sewing machine
Instructions:
1. Put on the garment with appropriate shoes and have someone measure from the floor to your desired length at multiple points around the skirt.
2. Mark the hemline with pins or fabric marker, ensuring it’s level all around.
3. Add 2 inches below your marked line for hem allowance and trim excess fabric.
4. Fold the raw edge up half an inch and press, then fold up again to your hemline and press.
5. Sew the hem using a blind hem stitch for invisible results or a decorative stitch for a visible finish.
Taper Pants Legs
Difficulty Level: Intermediate Time Required: 45-60 minutes Tools Needed: Pins, fabric marker, seam ripper, sewing machine, iron
Transform wide-leg pants into a more modern, tapered silhouette.
Instructions:
1. Turn pants inside out and put them on.
2. Pin along the inseam and outer seam from knee to ankle, creating your desired taper.
3. Remove pants and lay flat. Mark your new seam lines, ensuring both legs match.
4. Sew new seams, tapering smoothly into the original seam above the knee.
5. Trim excess fabric to half an inch from the new seam and finish edges to prevent fraying.
Replace Buttons
Difficulty Level: Beginner Time Required: 5-10 minutes per button Tools Needed: Replacement button, needle, thread, scissors, optional: toothpick
Instructions:
1. Thread your needle with doubled thread and knot the end.
2. Position the button on the fabric and bring the needle up through one hole.
3. Insert a toothpick on top of the button between the fabric and button (this creates necessary slack).
4. Sew through all holes 4-6 times, keeping the toothpick in place.
5. Remove the toothpick and wrap the thread around the stitches beneath the button several times to create a shank.
6. Push the needle to the back and knot securely.
Fix a Broken Zipper
Difficulty Level: Beginner to Advanced (depending on issue) Time Required: 10-60 minutes Tools Needed: Pliers, replacement zipper slider or entire zipper, seam ripper (for full replacement), sewing machine
For a Slider That Won’t Stay Up:
1. Use pliers to gently squeeze the sides of the slider closer together, which increases tension.
2. Test the zipper—it should now stay closed.
For a Missing Slider:
1. Purchase a replacement slider matching your zipper size.
2. Use a seam ripper to remove the metal stops at the top of the zipper.
3. Slide the new slider onto the zipper teeth.
4. Hand-sew a few stitches at the top to create a new stop.
For Complete Zipper Replacement: This is more advanced and involves removing the old zipper entirely, purchasing a matching replacement, and sewing in the new one along the same seam lines.
Create a Tapered Neckline
Difficulty Level: Intermediate Time Required: 30 minutes Tools Needed: Scissors, needle and thread or sewing machine, pins
Instructions:
1. Put on the shirt and pin the neckline to your desired depth.
2. Remove the shirt and cut carefully along your marked line, adding half an inch for seam allowance.
3. Fold the raw edge inward and pin.
4. Sew around the neckline using a stretch stitch if working with knit fabric.
5. Press the seam for a finished look.
Add Elastic to Loose Sleeves
Difficulty Level: Beginner Time Required: 20 minutes per sleeve Tools Needed: Elastic, scissors, pins, needle and thread or sewing machine, safety pin
Instructions:
1. Measure elastic to fit comfortably around your arm where you want the gathering.
2. Create a casing by folding the sleeve hem inward and sewing, leaving a small opening.
3. Attach a safety pin to one end of the elastic and thread it through the casing.
4. Sew the elastic ends together and close the casing opening.
5. Distribute the gathers evenly around the sleeve.
No-Sew Alterations

Not everyone has access to a sewing machine or feels comfortable with needle and thread. Fortunately, several effective no-sew methods exist for common alterations. These budget-friendly fixes pair perfectly with our tips on how to dress expensive on a budget.
Hemming Tape:
- Perfect for pants, skirts, and curtains
- Simply fold to desired length, insert tape, and iron
- Washable varieties available for permanent fixes
- Difficulty: Beginner, 15 minutes
Fabric Glue:
- Ideal for appliques, patches, and small repairs
- Allow 24 hours to cure for maximum strength
- Choose flexible fabric glue for items that will be worn
- Difficulty: Beginner, 10 minutes plus drying time
Safety Pins:
- Quick temporary fixes for fallen hems
- Secure loose straps or adjust lengths for special occasions
- Use small safety pins that blend with fabric color
- Difficulty: Beginner, 2 minutes
Fashion Tape:
- Double-sided tape for keeping necklines, straps, and gaps in place
- Particularly useful for delicate fabrics
- Temporary solution that doesn’t damage clothing
- Difficulty: Beginner, 1 minute
Elastic Thread Technique:
- Available as a no-sew option with special adhesive backings
- Creates gathered or shirred effects
- Follow manufacturer instructions carefully
- Difficulty: Beginner, 20 minutes
Belt and Accessory Solutions:
- Add a belt to cinch loose waists
- Use scarf rings to gather excess fabric
- Employ clip-on suspenders to adjust pants length temporarily
- Difficulty: Beginner, 2 minutes
When to Visit a Tailor
While DIY alterations save money and offer satisfaction, some projects are best left to professionals. Knowing your limits prevents frustration and potential damage to beloved garments.
Complex Alterations Requiring Professional Help:
Suit Jackets and Blazers:
- Shoulder adjustments
- Collar alterations
- Lining repairs
- Multiple-seam modifications requiring perfect symmetry
Formal Wear:
- Wedding dresses with intricate beading or lace
- Tuxedos and formal suits
- Evening gowns with complex construction
Significant Restructuring:
- Changing garment silhouettes dramatically
- Working with expensive fabrics like silk, leather, or cashmere
- Alterations requiring pattern adjustment
- Zip-to-button conversions
Signs You Need a Professional:
- The garment is very expensive or holds sentimental value
- You’ve attempted the alteration and made mistakes
- The project requires specialized equipment you don’t own
- Multiple fitting sessions are necessary
- You’re working with delicate, vintage, or unique fabrics
- The construction involves tailored elements like darts, princess seams, or set-in sleeves
Cost-Benefit Analysis:
Consider the garment’s value versus alteration costs. A $30 shirt needing $40 in professional alterations might not be worthwhile, while a $200 dress deserving a $50 hem is a sound investment. Professional tailors typically charge:
- Simple hems: $10-$30
- Taking in sides: $20-$50
- Zipper replacement: $20-$60
- Complex alterations: $50-$150+
Compare these costs against your time, skill level, and the importance of perfect results.
Frequently Asked Questions
What is the easiest clothing alteration for beginners?
The easiest alteration for beginners is hemming pants or skirts with a straight edge. This project requires minimal tools, involves straightforward techniques, and provides immediate visible results. Start with casual garments made from forgiving fabrics like cotton or denim. Hemming tape offers an even simpler no-sew alternative that requires only an iron and basic measuring skills. Once you’ve mastered basic hems, you can progress to more complex alterations with confidence.
Can I really alter clothes without a sewing machine?
Absolutely! Many alterations can be accomplished by hand or with no-sew methods. Hand-sewing produces durable results when using proper techniques like the backstitch or slip stitch. For hems, hemming tape activated by heat provides permanent alterations without any stitching. Fabric glue works well for patches and appliques. While hand-sewing takes longer than machine sewing, the results can be equally professional, especially for smaller projects. The key is using strong thread, making small stitches, and maintaining even tension throughout your work.
How much fabric do I need to leave for a hem allowance?
The standard hem allowance depends on the garment type and fabric weight. For most pants and skirts, leave 1.5 to 2 inches for a double-fold hem, which involves folding the raw edge under half an inch, then folding again to create the finished hem. Lightweight fabrics can use a 1-inch allowance, while heavy fabrics like denim work better with 1.5 to 2 inches. Formal garments often use deeper hems (2-3 inches) for better drape and weight. Always mark and measure twice before cutting—you can always trim more, but you can’t add fabric back.
What’s the difference between tailor tacks and regular pins?
Tailor tacks are temporary thread markings that transfer pattern marks or alteration lines through multiple layers of fabric, remaining in place even after you remove the pattern or separate fabric layers. They’re particularly useful for marking dart points, pocket placements, or matching seam points. Regular pins, by contrast, are straight pins used to temporarily hold fabric layers together during cutting or sewing.
Pins must be removed before the sewing machine needle reaches them, while tailor tacks stay in place until the alteration is complete, then are snipped away. For most simple DIY alterations, regular pins suffice, but tailor tacks become invaluable for complex projects requiring precise marking.
How do I choose the right color thread for my alteration?
Select thread that matches your fabric’s dominant color as closely as possible by bringing a fabric swatch to the store or examining thread in natural light. When you can’t find an exact match, choose thread one shade darker rather than lighter, as thread appears slightly lighter when sewn into fabric.
For multicolored or patterned fabrics, match the background color or the color that appears most frequently. Neutral colors like gray, tan, or navy work well for general repairs. For topstitching meant to be visible, you might choose contrasting thread as a design element. Always test your thread choice on a fabric scrap to ensure you’re satisfied with how it looks when sewn.
Conclusion
DIY clothing alterations empower you to take control of your wardrobe, saving money while reducing fashion waste. These 12 alterations cover the most common adjustments needed to keep your clothes fitting perfectly and looking fresh. Starting with basic projects builds your confidence and skills, preparing you for more complex alterations over time.
Remember that every expert tailor was once a beginner. Don’t be discouraged by initial imperfections—each project teaches valuable lessons that improve your technique. Invest in quality basic tools, take your time with measurements, and always test techniques on scrap fabric before working on actual garments.
By mastering these alterations, you’ll extend the life of your favorite pieces, customize your style, and develop a valuable skill that serves you throughout your life. Whether you’re hemming pants, taking in a shirt, or adding creative patches, each alteration represents a step toward a more sustainable, personalized, and budget-friendly approach to fashion. So gather your tools, choose a simple project, and discover the satisfaction of transforming your wardrobe with your own hands.