20 DIY Wall Decor Ideas That Look More Expensive Than They Are
Transforming your walls from blank canvases into stunning focal points doesn’t require a designer budget or professional skills. With the right approach, inexpensive materials can create wall decor that rivals high-end pieces from luxury boutiques. The secret lies in thoughtful execution, quality finishing touches, and understanding design principles that elevate simple projects into sophisticated statements. Whether you’re a seasoned crafter or a complete beginner, these 20 DIY wall decor ideas prove that creativity trumps cost every time.
Gallery Wall Ideas
A gallery wall remains one of the most impactful ways to fill empty wall space while showcasing your personality. The beauty of this approach is that you can start small and build over time, mixing personal photos with art prints and interesting finds.
Project 1: Thrifted Frame Gallery
Materials:
Estimated Cost: $25-40
Difficulty Level: Easy
Step-by-Step Instructions:
1. Collect frames of various sizes from thrift stores, focusing on interesting shapes rather than matching styles 2. Remove glass and backing, then spray paint all frames in the same color (matte black, white, or gold work beautifully) 3. Let frames dry completely for 24 hours 4. Select your artwork—free printables, personal photos, or scans of book pages work wonderfully 5. Arrange frames on the floor first to plan your layout 6. Start with the center piece and work outward, maintaining 2-3 inches between frames 7. Use a level and measuring tape to ensure proper alignment
Pro Tip for Looking Expensive: The unified frame color creates cohesion that appears intentional and curated. Mat your prints with white or cream matting to add depth and a gallery-quality finish.
As explored in this fascinating article about the enduring appeal of the gallery wall, this decorating technique has remained popular because it allows for personal expression while creating visual impact.
Project 2: Floating Frame Grid
Create a contemporary grid layout using identical frames for a minimalist, museum-quality appearance. This approach works particularly well with botanical prints, abstract art, or black-and-white photography. The key to making this repurposed shutters photo display look expensive is precise spacing and alignment—use a level and measure carefully for that professional touch.
DIY Canvas Art
Canvas art offers incredible versatility and can be customized to match any decor style. The texture of canvas automatically elevates the perceived value of your artwork.
Project 3: Abstract Acrylic Pour
Materials:
Estimated Cost: $15-25
Difficulty Level: Easy to Moderate
Step-by-Step Instructions:
1. Mix each paint color with pouring medium in separate cups (2 parts pouring medium to 1 part paint) 2. Add a few drops of water to achieve honey-like consistency 3. Layer colors in one cup without mixing 4. Place canvas on a raised surface over your drop cloth 5. Pour paint mixture onto canvas center and tilt to spread 6. Allow to dry flat for 48 hours 7. Apply clear varnish for a professional finish
Pro Tip for Looking Expensive: Choose a sophisticated color palette inspired by high-end home decor—think muted jewel tones, monochromatic schemes, or elegant neutrals with metallic accents.
Project 4: Gold Leaf Canvas
Apply gold leaf in geometric patterns or organic shapes on a painted canvas background. The addition of metallic elements instantly adds luxury. Use navy, emerald, or blush backgrounds for maximum impact.
Project 5: Textured Plaster Canvas
Create dimensional art using joint compound or plaster on canvas, then paint with subtle colors. The three-dimensional texture catches light beautifully and mimics expensive gallery pieces.
Fabric Wall Hangings
Fabric wall hangings bring warmth, texture, and softness to your space. This category of wall decor has roots in ancient traditions, and as seen in historical examples like these Egyptian wall decorations, textile art has been valued across cultures for millennia.
Project 6: Macramé Wall Hanging
Materials:
Estimated Cost: $20-30
Difficulty Level: Moderate
Step-by-Step Instructions:
1. Cut 16 pieces of cord, each 8 times the length of your desired finished piece 2. Attach cords to dowel using lark’s head knots 3. Create your pattern using square knots and spiral knots 4. Work in sections, maintaining even tension 5. Continue pattern for 24-36 inches 6. Trim ends evenly and comb out for fringe effect 7. Hang using leather cord or twine
Pro Tip for Looking Expensive: Use natural cotton rope in its original cream color for an organic, upscale look. Avoid synthetic materials that appear cheap.
Project 7: Embroidery Hoop Art
Stretch beautiful fabric or create simple embroidered designs in wooden hoops. Group multiple hoops together for greater impact. Choose linen or high-quality cotton fabrics in sophisticated patterns.
Project 8: Fabric Tapestry with Dowel
Purchase one yard of stunning fabric—look for designer remnants at discount prices—and simply hem the edges before hanging from a wooden dowel with leather straps.
Wood Wall Decor
Wood brings natural warmth and architectural interest to walls. These projects leverage the inherent beauty of natural materials for an elevated aesthetic.
Project 9: Geometric Wood Wall Art
Materials:
Estimated Cost: $15-20
Difficulty Level: Moderate
Step-by-Step Instructions:
1. Cut wood pieces into uniform lengths 2. Sand all pieces smooth 3. Apply stain or paint and let dry 4. Arrange pieces on plywood in geometric pattern (chevron, herringbone, or sunburst) 5. Glue pieces down one at a time 6. Weight down while drying 7. Add sawtooth hanger to back
Pro Tip for Looking Expensive: Mix different wood tones or use a single sophisticated stain color. The precision of your pattern makes all the difference—take time to measure and align perfectly.
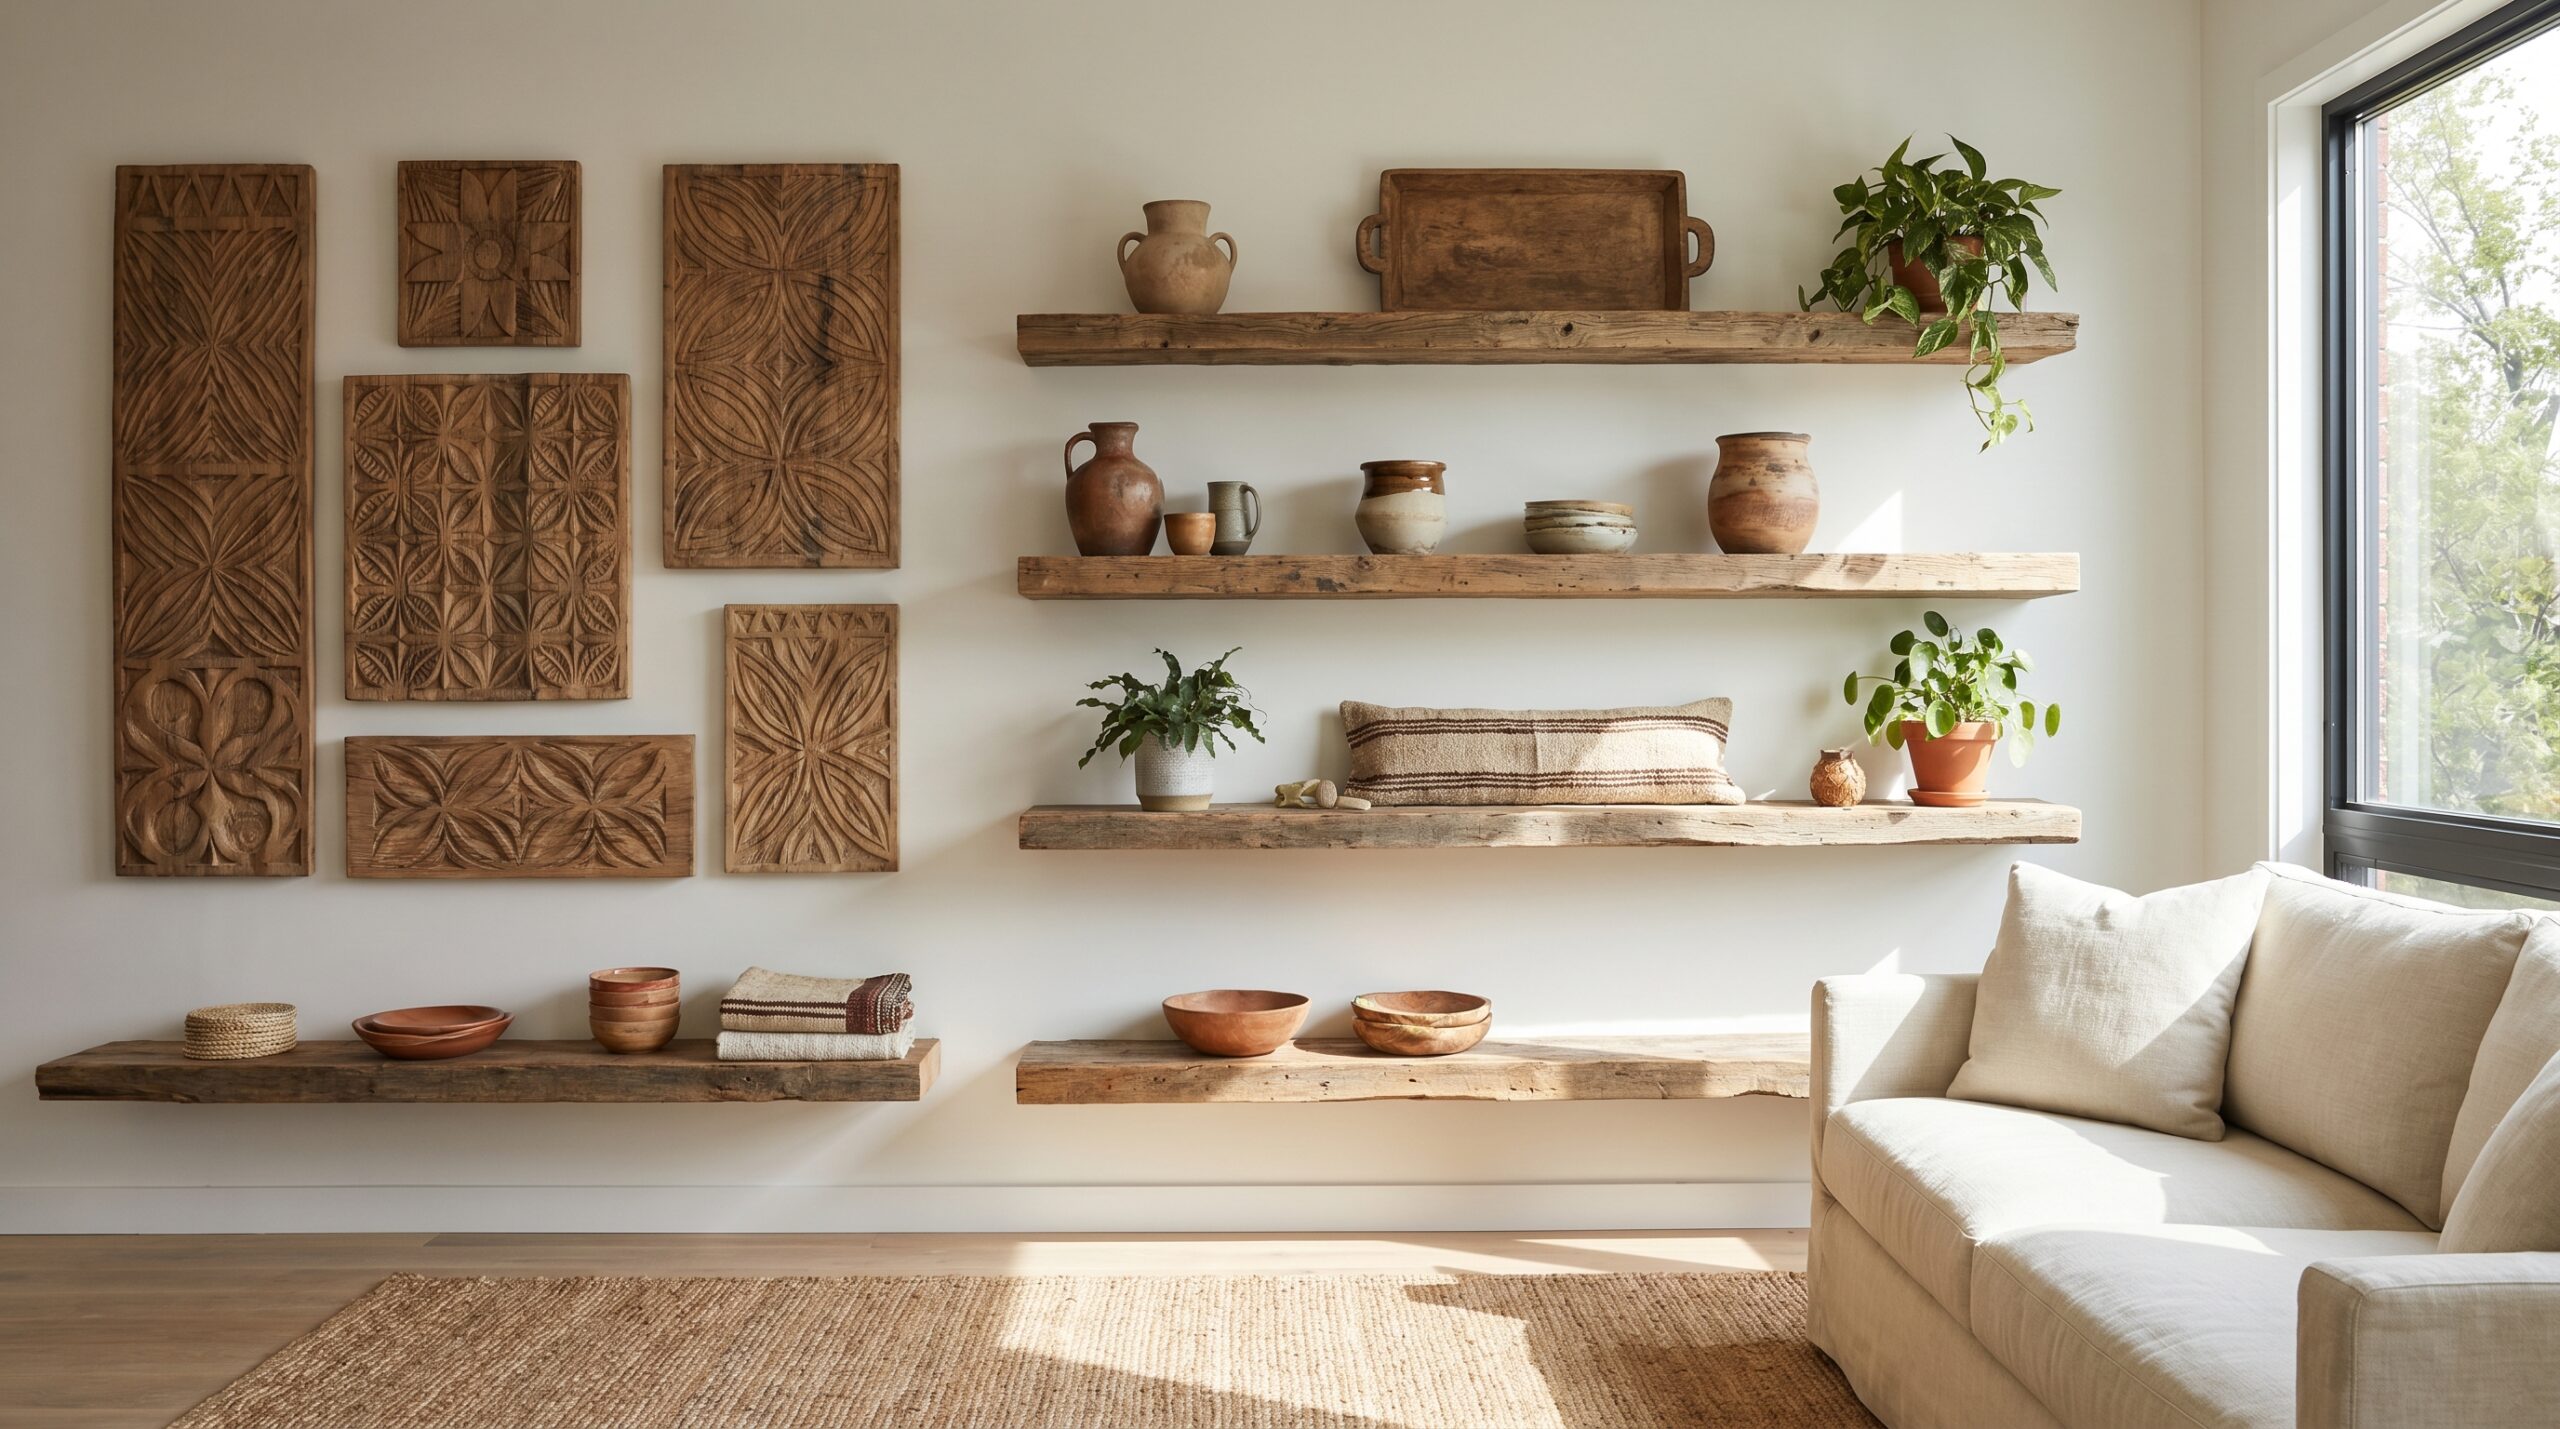
Project 10: Floating Wood Shelves with Decor
Install simple wood floating shelves and style them thoughtfully with books, plants, and small art objects. The styling matters as much as the shelves themselves for DIY cotton pad flower decor achieving that expensive, curated look.
Project 11: Wood Dowel Hanging System
Create a simple yet striking hanging system using wood dowels and leather cord to display prints, postcards, or artwork that can be easily swapped.
Mirror Projects
Mirrors reflect light and make spaces feel larger, adding both function and style to your walls. A well-executed mirror project can serve as a stunning focal point.
Project 12: Sunburst Mirror
Materials:
Estimated Cost: $20-35
Difficulty Level: Moderate
Step-by-Step Instructions:
1. Cut cardboard circle 4 inches larger than mirror diameter 2. Spray paint all wooden pieces gold 3. Mark circle into equal sections for dowel placement 4. Hot glue dowels radiating from center, alternating lengths 5. Create multiple layers for dimension 6. Glue mirror in the center once dowels are secure 7. Add hanging hardware to back
Pro Tip for Looking Expensive: Use high-quality metallic spray paint with a smooth, even finish. Add multiple layers of “rays” at varying lengths for sophisticated depth.
Project 13: Frame Cluster Mirror Gallery
Arrange multiple small mirrors of different shapes and sizes in a cluster. Paint frames in matching colors for cohesion.
Project 14: Rope-Wrapped Mirror
Transform a basic round mirror by wrapping thick nautical rope around its frame, securing with hot glue. This adds texture and coastal elegance.
Paper Wall Art
Paper is perhaps the most budget-friendly material, yet it can create surprisingly sophisticated wall decor when used thoughtfully.
Project 15: 3D Paper Flower Wall
Create oversized paper flowers in elegant colors and arrange them in an artistic cluster. Use heavyweight cardstock for durability and dimension. Metallic or textured paper adds luxury.
Project 16: Folded Paper Art
Origami-inspired geometric paper folding creates dramatic shadows and dimension. Mount on contrasting backgrounds and frame for a museum-quality piece.
Project 17: Vintage Book Page Collage
Arrange pages from old books in overlapping patterns under glass. This technique looks especially expensive when using pages with illustrations or interesting typography, then mounting in rental decor hacks with no drilling an oversized frame with wide matting.
Renter-Friendly Wall Decor
Renting doesn’t mean sacrificing style. These damage-free options let you create beautiful walls without losing your security deposit.
Project 18: Removable Wallpaper Accent
Use peel-and-stick wallpaper to create an accent wall or geometric pattern. Choose sophisticated patterns in muted colors for a high-end look. This completely transforms a space without any commitment.
Project 19: Washi Tape Wall Art
Create geometric designs, mountain ranges, or abstract patterns using high-quality washi tape in coordinating colors. The key is precision—use a level and ruler for clean lines.
Project 20: Leaning Art and Mirrors
Large-scale art and mirrors can lean against walls on floors or atop furniture, creating an effortlessly chic look without any holes. Layer multiple pieces for an gallery-inspired aesthetic.
Styling Tips
The execution and presentation of your DIY projects dramatically impact their perceived value. Follow these professional styling tips to ensure your handmade pieces look like expensive designer finds.
Color Coordination: Choose colors that complement your existing decor. Monochromatic schemes or analogous color palettes appear more sophisticated than random color combinations. When in doubt, stick to neutrals with one accent color.
Scale and Proportion: Large-scale art makes a bigger impact than numerous small pieces. A single oversized canvas or large gallery wall appears more intentional and expensive than scattered small decorations.
Proper Spacing: Wall decor should hang at eye level (center of piece at 57-60 inches from floor). Leave adequate space between pieces—overcrowding cheapens the look.
Quality Finishing: Never skip final steps like varnishing, proper framing, or clean edges. These finishing touches separate DIY projects from professional-looking pieces.
Lighting Matters: Install picture lights or position accent lighting to highlight your wall decor. Proper illumination elevates everything.
Edit Ruthlessly: Less is more when creating an expensive aesthetic. Remove pieces that don’t serve your vision, leaving only your best work displayed.
Frame Quality: Invest in decent frames even if the art inside is budget-friendly. A cheap poster in an excellent frame looks better than original art in a flimsy frame.
Create Cohesion: Repeat elements throughout your space—similar frames, complementary colors, or consistent themes. This intentional approach signals thoughtful design.
Frequently Asked Questions
What supplies do I need to start DIY wall decor?
Basic supplies include a hot glue gun, scissors, ruler, level, hammer, picture hanging kit with various hooks and nails, and Command strips for damage-free hanging. For specific projects, you’ll need materials like canvas, paint and brushes, frames, or fabric depending on your chosen technique. Start with versatile supplies that work across multiple projects, then purchase specialized materials as needed.
How can I make my DIY wall art look professional and not cheap?
The key to professional-looking DIY wall art lies in attention to detail. Use quality materials whenever possible—cheap supplies produce cheap-looking results. Take time with finishing touches like sanding rough edges, applying even coats of paint or varnish, and ensuring clean lines. Choose sophisticated color palettes inspired by high-end design rather than bright, primary colors. Proper framing and matting elevate any artwork. Finally, precise measurements and careful installation make a tremendous difference in the final appearance.
What are some renter-friendly DIY wall decor options?
Renters can create beautiful walls using removable solutions like Command strips, picture hanging strips, washi tape designs, peel-and-stick wallpaper, and leaning art. Create gallery walls using damage-free hooks, hang lightweight pieces from existing picture rails or molding, or use freestanding easels and shelving units. Fabric wall hangings can hang from tension rods installed in doorways or windows. All these options allow full creative expression while keeping your security deposit safe.
How do I choose the right size and placement for my wall decor?
Wall decor should fill approximately two-thirds to three-quarters of the available wall space for balanced proportions. For above furniture pieces like sofas or beds, art should be about two-thirds the width of the furniture. Hang pieces with their center at eye level (57-60 inches from the floor) or slightly higher in rooms with tall ceilings. In gallery walls, treat the entire arrangement as one piece and center the collective middle at eye level. Consider the room’s function—dining rooms can handle more dramatic pieces while bedrooms benefit from calming artwork.
Can I mix different styles of DIY wall decor on one wall?
Yes, mixing different styles creates visual interest and personal character, but requires a unifying element for cohesion. Connect disparate pieces through consistent frame colors, a coordinated color palette throughout the artwork, similar themes or subjects, or consistent matting. The gallery wall specifically celebrates mixing various styles, sizes, and mediums. Start with one dominant piece and build around it, ensuring each addition complements rather than competes with existing pieces. Step back frequently to assess the overall balance and edit ruthlessly if something doesn’t work.
Conclusion
Creating wall decor that looks expensive while staying within a modest budget is entirely achievable with creativity, patience, and attention to detail. These 20 DIY wall decor ideas prove that stunning, personalized spaces don’t require professional designers or unlimited funds. The secret lies in thoughtful material selection, precise execution, and professional finishing touches that elevate simple projects into sophisticated statements.
Whether you’re drawn to the natural warmth of wood projects, the elegance of mirror arrangements, the versatility of canvas art, or the texture of fabric hangings, there’s a perfect project for every skill level and style preference. Renters need not feel limited—numerous damage-free options allow for complete creative expression without sacrificing security deposits.
Remember that the most expensive-looking DIY wall decor shares common characteristics: cohesive color schemes, quality materials, proper scale and proportion, and flawless finishing. Invest time in planning your layouts, measuring precisely, and completing those final details that separate amateur projects from professional-looking pieces.
Start with one or two projects that speak to your personal style, master the techniques, and gradually build your wall decor collection. Your walls will soon showcase your creativity and taste in ways that appear far more expensive than their actual cost—proving that the best design ingredient isn’t money, but imagination and effort.