15 Decluttering Tips for Beginners Who Feel Overwhelmed
Looking around at piles of belongings and wondering where to even start? You’re not alone. Many people feel paralyzed by the sheer volume of stuff they’ve accumulated over the years. The good news is that decluttering doesn’t have to be an all-or-nothing marathon that leaves you exhausted and discouraged. With the right approach and mindset, even complete beginners can transform their spaces into organized, peaceful environments.
These decluttering tips for beginners are designed to help you overcome that initial overwhelm and make steady, sustainable progress. Rather than attempting to tackle your entire home in one weekend, you’ll learn how to break the process down into manageable steps that fit into your regular routine. By the end of this guide, you’ll have a clear roadmap and practical strategies to start your decluttering journey with confidence.
Start With One Small Area
The biggest mistake beginners make is trying to declutter their entire home at once. This approach almost always leads to burnout, frustration, and abandoned projects that leave your space looking worse than when you started.
Instead, choose one small, contained area for your first decluttering session. This could be a single drawer, a bathroom cabinet, your nightstand, or even just the top of your dresser. The key is selecting something you can completely finish in one sitting—ideally within 15 to 30 minutes.
Why start small? Because completing even a tiny decluttering project gives you a sense of accomplishment and momentum. You’ll see immediate results, which motivates you to continue. That clean drawer becomes visual proof that you can do this, making it easier to tackle the next small area.
As you gain confidence and experience, you can gradually expand to larger spaces. But for now, resist the urge to jump ahead. Starting with one small area and experiencing quick success is far more effective than starting with an overwhelming project and giving up halfway through, especially when you’re DIY home projects learning fundamental organizational principles for the first time.
Use the Four-Box Method
One of the most effective decluttering techniques for beginners is the four-box method. This simple system helps you make quick, decisive choices about every item you encounter, eliminating the paralysis that comes from having too many options.
Here’s how it works: Get four boxes, bins, or bags and label them as follows:
1. Keep: Items you use regularly and truly need in this space 2. Donate/Sell: Items in good condition that you don’t need but someone else could use 3. Trash: Broken items, expired products, or things beyond repair 4. Relocate: Items that belong in a different room or area of your home
As you sort through your belongings, pick up each item and immediately place it in one of the four boxes. Don’t set anything aside to “decide later”—that’s how piles of indecision form. Make your best judgment and move on.
The beauty of this method is that it keeps you moving forward and prevents you from simply shuffling items around without actually reducing clutter. According to research on the psychology of decluttering, making quick decisions about possessions becomes easier with practice, and having a clear framework helps override the emotional attachments that make letting go difficult.
Once you’ve sorted everything, immediately take action on your boxes: put away the “Keep” items, take the “Relocate” box to distribute items where they belong, remove the trash, and place donations in your car to drop off soon.

Set a Timer
Time pressure can actually be your friend when decluttering. Setting a timer creates a sense of urgency that helps you make faster decisions and prevents overthinking.
For beginners, start with short sessions of 15 to 20 minutes. This timeframe is short enough that it doesn’t feel overwhelming, but long enough to make meaningful progress. You can fit a 15-minute decluttering session into almost any day, whether it’s during your morning routine, before dinner, or while waiting for laundry to finish.
The timer serves another important purpose: it gives you permission to stop. Many beginners burn out because they feel like they need to finish entire rooms in one go. When your timer buzzes, you can walk away guilt-free, knowing you’ve put in your time and made progress.
As you build stamina and confidence, you can gradually increase your sessions to 25 or 30 minutes. Some people find the Pomodoro Technique helpful—working for 25 minutes, then taking a 5-minute break before starting another session.
Remember, consistency beats intensity. Seven days of 15-minute decluttering sessions will accomplish more than one exhausting 3-hour marathon that leaves you too discouraged to continue.
Declutter by Category
Once you’ve practiced on small areas and feel ready for something more systematic, consider decluttering by category rather than by room. This approach, popularized by organizational experts, helps you see exactly how much of any one thing you own.
Common categories to tackle include:
Start with an easier category before tackling more challenging ones. For most people, expired pantry items or old magazines are easier to part with than clothing or books.
When working by category, you’ll often discover you own multiples of items you forgot about—three can openers, five measuring cups, or a dozen black t-shirts. This realization makes it much easier to let go of excess because you can clearly see the redundancy.
The category method also helps you establish personal limits. Maybe you decide you only need enough dishes for your household plus four guests, or that your book collection should fit on your existing shelves. These Home Depot DIY projects boundaries help guide future purchasing decisions as well.
Handle Sentimental Items
Sentimental items present the biggest challenge for most people decluttering. These objects carry emotional weight that has nothing to do with their practical use, making them the hardest to part with.
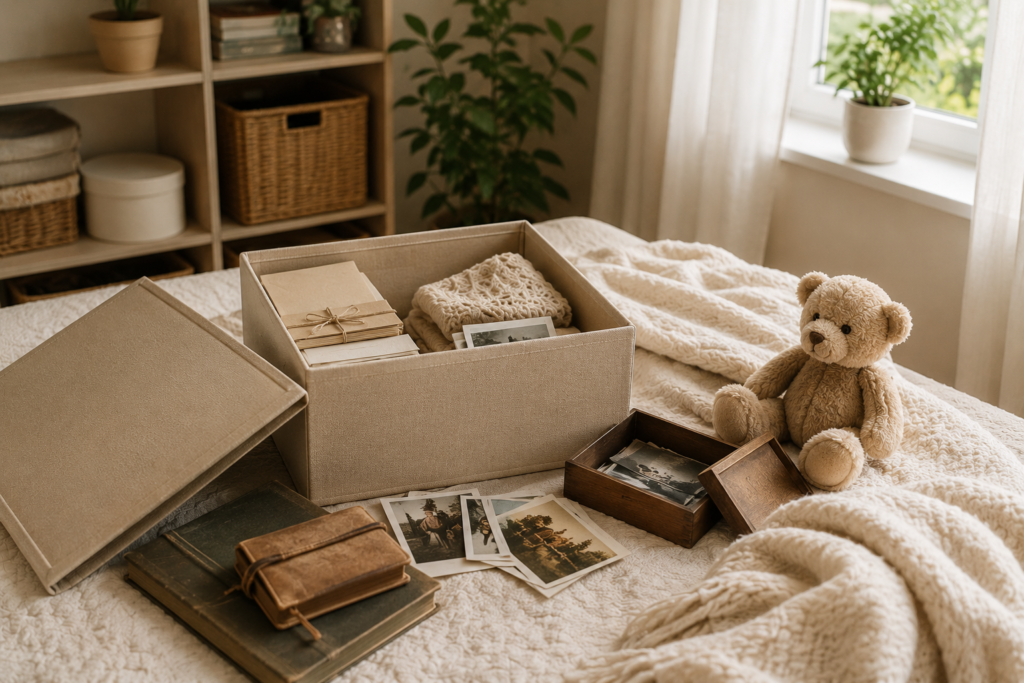
Here’s the key principle for beginners: save sentimental items for last. Don’t start your decluttering journey by sorting through childhood photos or your grandmother’s letters. Begin with easier categories to build your decision-making skills and emotional resilience.
When you do reach sentimental items, try these strategies:
Take photos: You can preserve the memory of an item without keeping the physical object. Photograph sentimental items before letting them go, creating a digital album of memories without the storage burden.
Keep the best, release the rest: If you have multiple items from the same person or event, choose one or two favorites to keep and release the others. You don’t need every craft project from your child’s preschool years—keeping a few meaningful examples is enough.
Create a memory box: Designate one specific, limited container for sentimental items. When it’s full, you need to curate what stays and what goes. This creates a natural boundary.
Ask yourself honest questions: Will you realistically ever use this? Does it bring you joy when you see it, or guilt when you think about getting rid of it? Are you keeping it for yourself or because you feel obligated?
Remember, letting go of an object doesn’t mean dismissing the memory or the person who gave it to you. The relationship and experience remain, regardless of whether you keep every physical reminder.
Decide What to Donate
Knowing what to do with items you no longer need makes the decluttering process much easier. Many beginners struggle to let go because they feel guilty about waste. Creating a donation plan addresses this concern while clearing your space.
Good candidates for donation include:
Research local donation centers before you start decluttering. Knowing exactly where items will go makes it psychologically easier to let them go. Options include:
For items that can be recycled rather than trashed, check the EPA’s recycling resources to find programs for electronics, batteries, and other special materials.
One important rule: once you’ve boxed items for donation, remove them from your home within 24 hours. Don’t let donation boxes sit around for weeks becoming a new form of clutter, and resist the temptation to “shop” from them and bring things back.
Prevent Future Clutter
Decluttering is only half the equation—keeping clutter from accumulating again is equally important. For beginners, establishing a few simple habits now will prevent you from needing to do another major decluttering project in the future.
Implement the “one in, one out” rule: Whenever you bring something new into your home, remove something similar. Buy a new shirt? Donate an old one. Add a new book to your shelf? Pass along one you’ve already read.
Practice the 24-hour rule for purchases: Before buying something non-essential, wait 24 hours. This cooling-off period helps you distinguish between true needs and impulse wants. You’ll be surprised how often the urge to buy passes.
Establish a clutter-free zone: Designate at least one surface in your home that must remain clear at all times—perhaps your dining table or kitchen counter. This creates a visual reminder of how peaceful an uncluttered space feels.
Create homes for everything: Items without designated spots end up as clutter. As you beginner DIY tips organize your newly decluttered spaces, assign every keeper item a specific location.
Do a nightly 10-minute pickup: Each evening, spend just 10 minutes returning items to their homes. This simple habit prevents the gradual creep of clutter that accumulates when you’re too tired to put things away properly.
Unsubscribe and opt out: Reduce incoming paper clutter by opting for digital statements, unsubscribing from catalogs, and removing your address from marketing lists.
Be selective about freebies: Just because something is free doesn’t mean you need it. Politely decline swag bags, promotional items, and hand-me-downs you don’t truly want or need.
Preventing clutter is ultimately about being intentional with what you allow into your space. Every item you bring home requires your time, energy, and physical space to store and maintain. Choose wisely.
Seven-Day Decluttering Plan
Ready to get started? This seven-day challenge is designed specifically for beginners who feel overwhelmed. Each day focuses on one small, achievable task that takes 15-30 minutes. By the end of the week, you’ll have built momentum and developed confidence in your decluttering abilities.
Day 1: Your Purse, Wallet, or Bag Empty your everyday bag completely. Throw away trash, relocate items that don’t belong, and organize what remains. Clean the interior and return only what you actually use daily.
Day 2: One Drawer Choose any drawer in your home—junk drawer, sock drawer, bathroom drawer. Remove everything, wipe it clean, and use the four-box method to sort contents. Only return items that belong in that drawer and that you actually use.
Day 3: Medicine Cabinet Check expiration dates on all medications, vitamins, and first-aid supplies. Safely dispose of anything expired or no longer needed. Organize what remains so you can easily see everything.
Day 4: Under Your Bathroom Sink Pull out everything stored under the sink. Throw away empty bottles, duplicates, and products you don’t like. Group similar items together and return only what you’ll realistically use.
Day 5: Your Nightstand Clear the top and clean any drawers or shelves. Keep only items that directly support your sleep and evening routine—everything else should be relocated or removed.
Day 6: Coffee Table or Side Table Remove all items from this surface. Return only 2-3 things that are both useful and beautiful. Everything else should find a proper home or be discarded.
Day 7: Your Car Remove all trash, return items that belong in your home, and organize what needs to stay in your vehicle. Vacuum if possible. A clean car sets a positive tone for every trip.
What happens after seven days? You’ll have decluttered seven distinct areas and built a habit of daily progress. You can repeat the challenge with seven new areas, or feel confident tackling slightly larger projects. The key is maintaining this gradual, consistent approach rather than attempting extreme makeovers.
Frequently Asked Questions
How do I start decluttering if I have a lot of stuff?
Start with the smallest possible area—even just one shelf or drawer. Don’t try to visualize decluttering your entire home; that’s overwhelming. Focus only on the space you can completely finish in one short session. Success with small areas builds the confidence and skills you need for larger projects. Set a timer for 15 minutes and commit to working on just that one small space. Once you finish, you can either stop (you’ve made progress!) or ride that momentum to tackle another small area.
What should I do with things I might need later but don’t use now?
Create a “maybe” box for these questionable items. Put them in a labeled box with today’s date written on it, then store it out of sight. If you don’t retrieve anything from that box within six months, donate the entire box without opening it. This approach removes the items from your daily space while giving you the security of knowing they’re still available if truly needed. Most people find they never open these boxes, which confirms the items weren’t actually necessary.
How long should it take to declutter a room for a beginner?
There’s no standard timeline because rooms vary dramatically in size and clutter levels. For beginners, it’s better to think in terms of sessions rather than trying to finish entire rooms at once. Plan to spend 15-30 minutes per session, and accept that a typical bedroom might take 4-6 sessions, while a cluttered garage might take 15-20 sessions. Working slowly and consistently is far more effective than trying to rush through in one exhausting day. Remember, it took years to accumulate this clutter; give yourself permission to take weeks or even months to thoughtfully declutter your space.
Take the First Step Today
Decluttering doesn’t require perfection, massive time commitments, or dramatic before-and-after transformations. It simply requires starting small, being consistent, and making gradual progress. The decluttering tips for beginners outlined in this guide give you everything you need to overcome overwhelm and create a more organized, peaceful home.
The most important thing is to actually begin. Choose one small area right now—perhaps that junk drawer or your nightstand—and commit to spending just 15 minutes on it today. Don’t wait for the perfect time, the right storage containers, or a free weekend. Start where you are with what you have.
Remember, every item you remove creates more space, more peace, and more clarity in your life. You don’t need to transform your entire home overnight. You just need to take one small step, then another, then another. Before you know it, those small steps will add up to significant change.
Your decluttering journey begins with a single decision. Make that decision today.