fbpx
Tag:

Eco-Friendly Living

DIY Compost Bins for Beginners

Creating a DIY compost bin is a great way to start reducing your environmental impact. It’s easy to make your own compost bin with a simple guide. This lets you turn food scraps and yard waste into rich soil for your garden.

This method is perfect for beginners. It’s a cost-effective and eco-friendly way to meet your gardening needs.

DIY compost bins help you reduce waste and make gardening more sustainable. By following a step-by-step guide, you can build your own bin. This makes it simple to start composting today.

A step-by-step guide is key for beginners. It shows you how to build a compost bin easily. With this guide, you can make a composting system that turns waste into nutrient-rich soil for your garden.

Why You Should Start Composting Today

Starting a composting project might seem hard at first, but it’s really important for gardeners. You can make your own compost bins easily. This way, you can cut down on waste and make your soil better for plants.

Composting is easy on your wallet and can be done by anyone. It turns kitchen scraps and yard waste into something good for your garden. This method is good for the planet and saves money because you don’t need to buy expensive fertilizers.

Benefits of Composting for Your Garden

  • Improves soil structure and fertility
  • Increases plant growth and health
  • Reduces the need for synthetic fertilizers

For beginners, starting composting is easy. Just set up a DIY compost bin in your backyard. It’s cheap and easy to keep up, making your garden better and helping the planet.

Environmental Impact of Composting

Composting helps a lot with the environment. It cuts down on greenhouse gases and fights climate change. It also saves water, prevents soil erosion, and helps animals.

Cost-Effective Gardening Solution

Composting is a smart way to keep your garden healthy. It lets you avoid expensive fertilizers. This saves money and helps your garden and the planet.

Understanding the Basics of Composting

As a beginner, knowing the basics of composting is key. Composting turns organic matter into a rich soil amendment. This is vital for a healthy, sustainable garden. With a simple guide, you can set up and keep your compost bins running smoothly.

The composting process needs microorganisms, oxygen, moisture, and temperature. Microorganisms like bacteria and fungi are essential for breaking down materials. Balancing these elements is critical for a thriving compost bin. This will help you make high-quality compost to enrich your soil.

What Is Composting?

Composting is a natural process that turns organic materials into a stable, humus-like product. It’s a biological process that can be helped along with compost bins and a guide. By understanding composting, you can make a nutrient-rich soil amendment for your garden.

How Does Composting Work?

The composting process involves physical, chemical, and biological changes. Microorganisms break down organic matter, influenced by temperature, moisture, and oxygen. By controlling these factors and following a guide, you can create the perfect composting environment.

For beginners, starting with a simple guide is best. It will help you set up and maintain your compost bins. With practice, you’ll become skilled at composting and enjoy its many benefits.

Choosing the Right Location for Your Compost Bin

Choosing the right spot for your DIY compost bins is key. A good location can greatly improve your composting success. As you set up your bin, think about what will help it work best.

It’s important to find a spot with the right amount of sunlight and shade. Some sunlight helps heat the compost, but too much can dry it out. Too little shade slows down the process. Look for a spot with partial shade, more so in warmer places.

Also, make sure the spot is easy to get to. You’ll want to add materials and get your compost without hassle.

Factors to Consider

  • Drainage: Ensure the area drains well to avoid waterlogged compost
  • Air circulation: Provide adequate airflow to help the composting process
  • Proximity to a water source: Make it easy to add water as needed

By thinking about these points and following a guide, you can make a great spot for your compost bins. Remember, the secret to good composting is finding the right balance and keeping up with it.

Selecting Your Compost Bin Style

Choosing a compost bin can be a bit overwhelming. As a beginner, picking the right bin is key. There are many styles to choose from, each with its own pros and cons. DIY fans will find that the bin they pick can really shape their composting journey.

First, you must decide between an enclosed or open bin. Enclosed bins keep pests out and look nice. Open bins are cheaper and easier to get into. Tumbler bins are great for beginners because they’re simple to use and turn.

Compost Bin Options

  • Enclosed bins: better pest control, more aesthetically pleasing
  • Open bins: easier access, cost-effective
  • Tumbler compost bins: easy to use, efficient turning and aeration
  • Worm composting bins: ideal for indoor composting, space-efficient

Worm composting bins are perfect for small spaces or indoor composting. They use worms to break down food waste, making a rich compost. By picking the right bin, you can start a DIY composting project that helps your garden and the planet.

Materials You’ll Need for Your DIY Compost Bin

Starting your DIY compost bin project? You’ll need the right materials for success. A simple guide will help you build a compost bin. This bin will turn waste into nutrient-rich soil for your garden.

You’ll need basic tools like a shovel, wire mesh, and wooden planks. You can also use old pallets or containers. For compost, add organic stuff like food scraps, leaves, and grass clippings.

Essential Tools and Supplies

  • Shovel
  • Wire mesh
  • Wooden planks
  • Hammer
  • Nails

Types of Compostable Materials

You can compost many things, like fruit and vegetable scraps, tea bags, and coffee grounds. Don’t forget to add brown materials like leaves and twigs. They balance out the green stuff.

What to Avoid in Your Compost

Don’t add meat, dairy, pet waste, or weeds with seeds to your compost. They attract pests and smell bad. Follow a DIY compost bin guide to avoid these problems.

Material Compostable
Fruit and vegetable scraps Yes
Meat and dairy products No
Leaves and twigs Yes

Step-by-Step Instructions to Build a Wooden Compost Bin

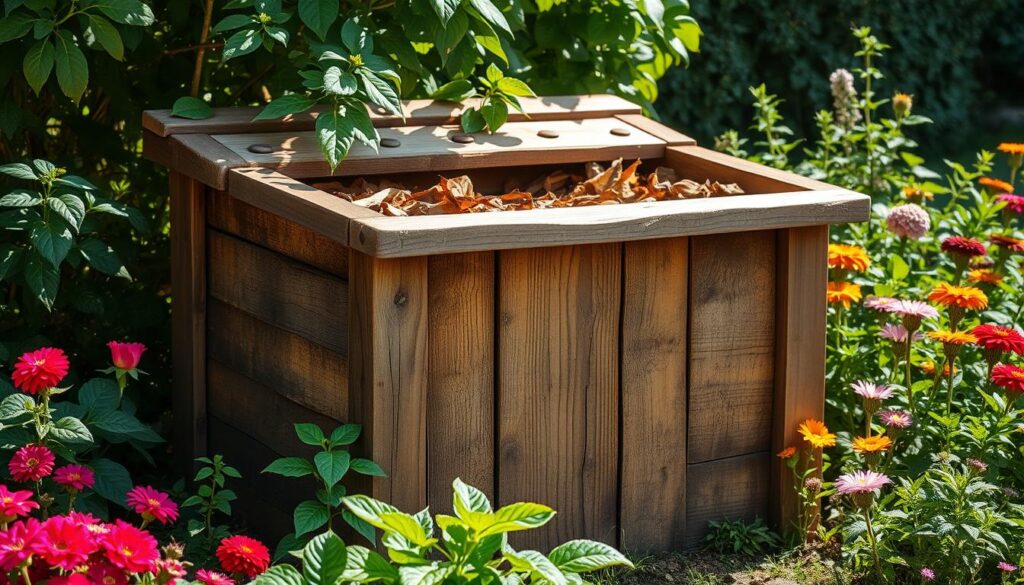
Building a wooden compost bin might seem hard at first. But with a clear guide, you can make a useful DIY compost bin. First, prepare your wood. Make sure it’s treated for outdoor use and can handle the weather.

Assembling the frame is key. You need to plan well and pay attention to details. Think about the bin’s size, the wood type, and features like ventilation and access points. For beginners, following a step-by-step guide is vital to make a strong and useful bin.

Preparing Your Wooden Materials

Choose cedar or cypress wood because they resist rot and insects well. Cut and sand the wood to make it smooth.

Assembling the Compost Bin Frame

Use screws or nails to put the sides, bottom, and back together. Don’t forget to add ventilation and access points like a lid or door. A solid frame is essential for a good DIY compost bin.

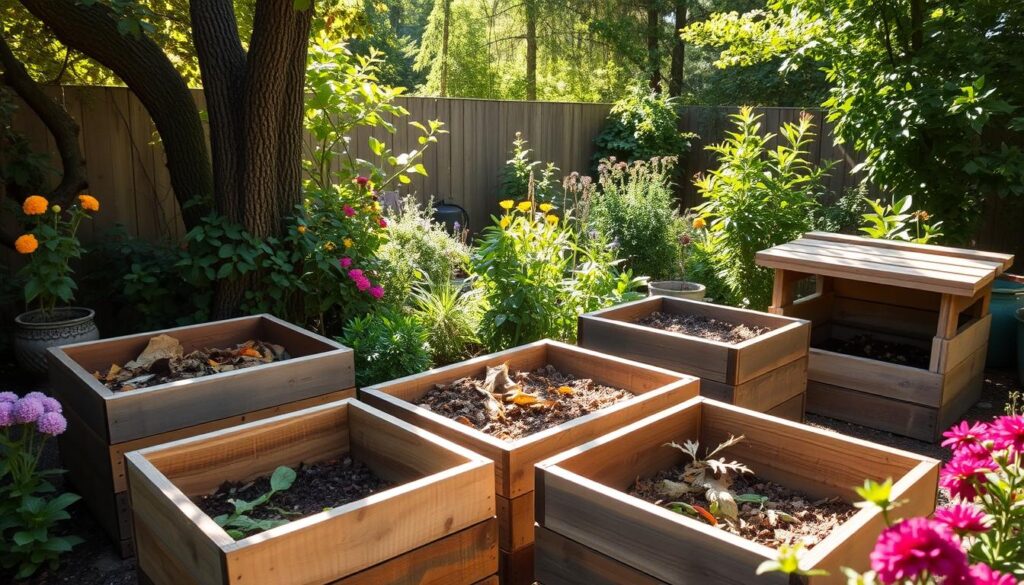
DIY compost bins

Sealing and Finishing Touches

After building the frame, seal any gaps or holes to keep pests and moisture out. Use waterproof sealant or wood glue. With these steps, you’ll have a great wooden compost bin ready for beginners.

Creating a Simple Wire Mesh Compost Bin

Starting a DIY compost bin can seem hard, but it’s easy with a guide. A simple wire mesh bin is perfect for beginners. It’s cheap and easy to make. First, pick the right wire mesh for your bin.

The wire mesh should have holes of 1-2 inches for good airflow and drainage. You can pick from metal, plastic, or wood. Choose one that’s durable and easy to clean. A smooth surface makes cleaning easier.

After picking your wire mesh, build your wire frame. You can use wood or metal, or buy a pre-made one. The frame must be strong and easy to take apart for upkeep.

Here are some tips for your wire mesh compost bin:

  • Choose a spot with good airflow and drainage
  • Use a mix of “green” and “brown” materials for best composting
  • Keep the bin clean to avoid pests and bad smells

By following these steps and tips, you can make a great wire mesh compost bin. Always use a guide and the right materials for a good composting experience.

Material Benefits
Wire Mesh Allows for airflow and drainage
Wooden Frame Sturdy and easy to assemble
Metal Frame Durable and long-lasting

Building a Pallet Compost Bin

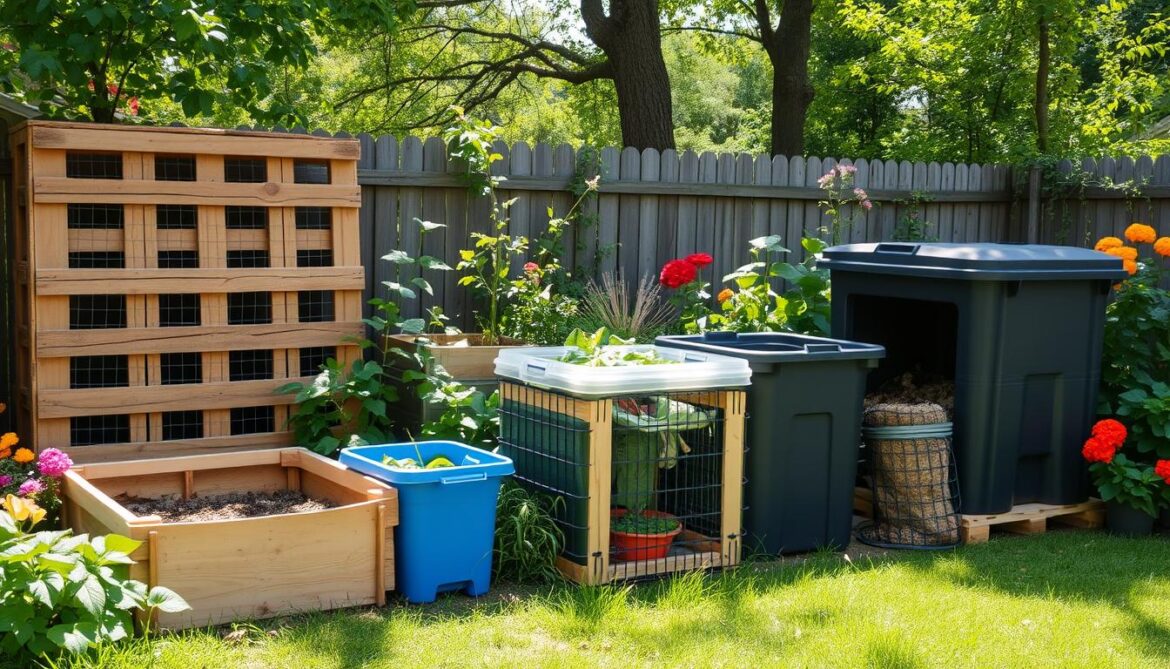
Using recycled pallets is a great way to make your own compost bins. It’s both affordable and good for the planet. This guide will help you build a pallet compost bin. It’s perfect for beginners who want to cut down on waste and make rich soil.

First, find pallets that are safe to use. Make sure they’re made from untreated wood and don’t have pests or mold. After you’ve found your pallets, you can start putting them together.

Sourcing Pallets Safely

Here are some tips for finding pallets:

  • Ask local businesses if they have spare pallets
  • Look for pallets made from untreated wood
  • Stay away from pallets with pests or mold

Assembly Process

To make your compost bin, you’ll need to modify the pallets. Use wire or twine to hold them together. Add a lid to keep pests out. Don’t forget to make aeration holes for better airflow and moisture control.

Enhancing Airflow and Moisture

It’s important to improve airflow and manage moisture in your compost bin. Add brown materials like dried leaves or straw to soak up extra moisture. Turning your compost regularly helps it decompose faster.

By following this guide, you can make a useful compost bin from pallets. Keep an eye on your compost and add materials as needed. With patience and effort, you’ll soon have nutrient-rich compost for your garden. This will help reduce your environmental impact.

How to Maintain Your Compost Bin

As a beginner, keeping your compost bin in good shape is key. A well-kept compost bin helps your compost break down well. It’s important to regularly check and maintain your bin. This includes turning the compost, watching moisture levels, and fixing any problems that come up.

Turning your compost is a big part of the process. It helps mix the compost, speeds up breakdown, and stops clumps. Use a pitchfork or compost turner to mix it. Beginners should follow a guide to keep their bin right.

Here are some tips for keeping your compost bin in top shape:

  • Turn your compost every 7-10 days
  • Check moisture levels to keep it just right
  • Use a mix of green and brown materials

By following these tips and a step-by-step guide, you can keep your compost bin working well. Always look after your bin’s health and safety. If problems come up, don’t worry, just fix them. With the right care, your compost bin will do great, and you’ll enjoy composting soon.

For more composting tips and bin maintenance advice, check out online resources or talk to experienced composters. With the right info and tools, you can make a composting system that’s good for your garden and the planet.

Compost Bin Maintenance Tips Frequency
Turn your compost Every 7-10 days
Monitor moisture levels Daily
Add green and brown materials Weekly

What to Compost: A Comprehensive Guide

Starting your DIY compost bins is exciting. But, knowing what to compost is key. You need to mix “green” and “brown” materials. Green stuff like food scraps has nitrogen, while brown stuff like leaves has carbon.

For good compost, use 2/3 brown materials and 1/3 green. This mix helps microorganisms break down waste. Green materials include fruit and vegetable peels, tea bags, and coffee grounds. Brown materials are dried grass clippings, shredded newspaper, or small twigs.

Don’t add certain things to your compost bins. Avoid meat, dairy, pet waste, and chemical-treated materials. Following these tips will help you make nutrient-rich compost for your garden. For more tips, check online resources or talk to local gardening experts.

Being careful about what you compost makes your garden healthier and more sustainable.

Harvesting Your Finished Compost

After weeks of waiting, your compost is ready. You’ve made your own compost bins following a guide. Now, it’s time to enjoy the fruits of your labor. Check if your compost is ready by looking for a rich smell, dark color, and crumbly texture.

Appearance, smell, and texture show if compost is done. If it looks, smells, and feels right, it’s ready. You can take it out of your bins in different ways, like sifting or turning.

After harvesting, use your compost in your garden. It makes the soil better, helps with drainage, and supports plants. Mix 2-4 inches of compost into the top 6-8 inches of soil. This helps your plants grow well.

Using compost in your garden has many benefits. It makes the soil better, increases nutrients, and helps plants grow strong.

  • Improved soil structure
  • Increased nutrient availability
  • Enhanced plant growth and health

Adding compost to your garden makes it more sustainable. Start composting today and see how it changes your garden.

Innovations in Composting Techniques

Exploring composting, you’ll find many ways to boost your DIY compost bins. Beginners should know about different methods to improve composting. Bokashi composting is one innovation, allowing you to compost more kitchen scraps, like meat and dairy.

Composting comes in two main types: cold and hot. Cold composting is slower, adding materials and letting them break down over time. Hot composting speeds up decomposition by actively managing the process. Your choice depends on your needs and preferences.

Bokashi Composting

Bokashi composting is perfect for composting food waste, including meat and dairy. It uses microorganisms to break down organic matter, creating a nutrient-rich compost.

Cold vs. Hot Composting

Cold composting is easy and requires little effort. Hot composting, though, needs more attention. You must watch the temperature and moisture levels for best results.

Using Compost Tea for Your Plants

Compost tea is a liquid made by steeping compost in water. It’s a great way to feed your plants, promoting healthy growth. Use it as fertilizer, foliar spray, or soil drench, adding versatility to your gardening.

compost bins for beginners

Exploring these composting innovations can elevate your DIY composting. Whether you’re new or experienced, these methods help create quality compost. They reduce waste and support sustainability.

How to Encourage Faster Composting

Working on your DIY compost bins might make you wonder how to make composting faster. A step-by-step guide can help you understand what affects decomposition. Aeration is key to keeping your compost pile healthy.

To speed up composting, focus on increasing oxygen flow in your bin. Turn the pile often, add bulking agents like straw or shredded newspaper, and make sure your bin breathes well. Shredding materials before adding them helps too, as it increases their surface area for microbes to work on.

It’s also important to keep your bin balanced. Aim for a mix of green materials (like food scraps and grass clippings) and brown materials (like dried leaves and shredded paper). A good rule is to have 2/3 brown materials and 1/3 green materials. This balance supports microbial growth, leading to faster composting.

By following these tips and using a step-by-step guide, you can make a compost pile that’s full of life. It will give you rich, nutrient-dense soil for your garden. Keep an eye on your compost bin and adjust as needed to keep decomposition going well.

  • Turn your compost pile regularly to increase oxygen flow
  • Shred materials before adding them to the bin to speed up decomposition
  • Maintain a balance of green and brown materials to create an optimal environment for microbial growth

DIY Compost Bin Alternatives and Tips

Are you thinking about making your own compost bin? Building one can be fun and rewarding. But, it’s not the only way to compost. You can also buy a pre-made bin, which is great for those who are busy or not good with tools.

Buying a pre-made bin is a good start for beginners. It’s easy to use and gets you composting quickly. On the other hand, making your own bin is creative and can save money. You can make it fit your space and needs.

Upcycling Household Items

Upcycling items like old pallets or containers is another DIY option. It’s a fun way to reduce waste and get creative. Here are some ideas:

  • Using an old plastic bin or container
  • Creating a pallet compost bin
  • Turning an old wire mesh fence into a compost bin

Creative Compost Bin Ideas

There are many creative ways to make DIY compost bins. You can use old tires or make a worm composting bin. Here are a few ideas:

Compost Bin Idea Description
Worm Composting Bin A bin for worm composting, using red wiggler worms to break down food scraps
Tire Compost Bin A bin from an old tire, filled with compost materials for nutrient-rich soil
Pallet Compost Bin A bin from old pallets, for a large composting area

These ideas are just the start. With a bit of creativity, you can make a DIY compost bin that meets your needs and reduces waste.

Joining the Composting Community

Starting your DIY compost bin journey? Look into the composting community around you. Local gardening groups and online forums offer insights, tips, and camaraderie with other composting fans.

Local Gardening Groups

Find gardening clubs, Master Gardener programs, or community gardens in your area. These groups have workshops, share resources, and host events on sustainable gardening, including composting. Joining can teach you from experienced composters and help find materials.

Online Forums and Resources

The internet is full of info and support for composters. Check out online forums from gardening enthusiasts or environmental groups. You can ask questions, share your journey, and connect with compost bin fans worldwide.

Workshops for Composting Enthuasiasts

Local authorities, environmental groups, and colleges offer composting workshops. These hands-on sessions can improve your composting skills, solve problems, and teach advanced techniques.

Being part of the composting community offers support, inspiration, and helps grow sustainable gardening practices. Together, we’re making a difference, one compost pile at a time.

FAQ

What are the key benefits of composting?

Composting improves soil quality and reduces landfill waste. It’s also cost-effective for gardeners. This method creates nutrient-rich soil that supports plant growth and cuts down on chemical fertilizers.

What materials can I compost?

You can compost “green” materials like fruit and vegetable scraps, coffee grounds, and grass clippings. “Brown” materials include dry leaves, shredded paper, and sawdust. But, avoid meat, dairy, and pet waste to prevent pests and odors.

How do I choose the right location for my compost bin?

Choose a spot with partial sunlight and good drainage. It should be easy to access and close to your house. This makes maintenance simpler.

What are the different types of compost bins I can choose from?

There are many compost bin styles, like enclosed, open, tumbler, and worm bins. Each has its own benefits and suits different needs and spaces.

How do I maintain my compost bin and ensure it’s working properly?

To keep your bin in good shape, turn the materials regularly and check moisture. Troubleshoot any problems like odors or slow decomposition. Balance “green” and “brown” materials and ensure good aeration for best results.

How do I know when my compost is ready to use?

Your compost is ready when it’s dark, crumbly, and smells earthy. It should have broken down a lot. At this point, you can use it to enrich your garden soil.

Are there any innovative composting techniques I should consider?

Yes, try Bokashi composting for fermenting a variety of materials or hot composting for faster breakdown. Also, learn about compost tea to enhance plant health.
0 comment
0 FacebookTwitterPinterestEmail
DIY Sustainable Living Projects

Thinking of making your home more eco-friendly? You might wonder where to begin. Sustainable living means less harm to our planet. DIY projects are a great way to start.

By adding sustainable habits to your life, you help the Earth. These 10 DIY projects will make your home greener. They also help the environment.

These DIY projects can cut down on energy and water use. Start with small changes, like green cleaning products or a compost bin. As you get more into it, try bigger projects like solar panels or rainwater systems.

These actions lower your carbon footprint. They help create a better future for you and your community. It’s all about living sustainably and doing DIY projects.

Understanding Sustainable Living

Sustainable living means making choices that help the environment. By doing so, you make the planet healthier and improve your life.

What Is Sustainable Living?

Sustainable living is about using resources wisely. It’s about meeting your needs without harming future generations. This includes saving energy, reducing waste, and picking eco-friendly products.

Benefits of Sustainability

Choosing sustainability has many benefits:

  • Environmental Protection: It cuts down pollution and saves natural resources.
  • Economic Savings: It lowers your bills and cuts down on costs.
  • Healthier Lifestyle: It promotes using safe materials and cleaner air.

How DIY Projects Support Sustainability

DIY projects are a great way to live sustainably. They help you avoid waste and use recycled or natural materials. These projects save money and let you control your environmental impact.

Benefit Description
Environmental Protection Minimizes pollution and preserves natural resources.
Economic Savings Reduces household expenses through efficient resource use.
Healthier Lifestyle Encourages the use of safe, non-toxic materials.

Getting Started with DIY Projects

Starting your journey to a greener lifestyle means getting the right tools and materials. You’ll need a hammer, screwdriver, and measuring tape for many tasks. Also, think about using recycled materials like reclaimed wood or repurposed glass jars. This helps reduce waste and lessens your impact on the environment.

Before you start any project, make sure you know what to do and what risks might be involved. Safety is key, so read instructions well and wear gloves and safety glasses when needed.

  • Begin with simple projects and then tackle harder ones
  • Always follow instructions and don’t hesitate to ask for help
  • Choose eco-friendly materials and methods whenever you can

By following these tips and using eco-friendly materials, you’re on your way to a more sustainable lifestyle. Always keep safety in mind and enjoy the learning and creating process.

Tool Description
Hammer Used for driving nails and fitting parts together
Screwdriver Used for driving screws and other fasteners
Measuring Tape Used for measuring distances and sizes

Create a Rainwater Harvesting System

Starting a rainwater harvesting system is a great DIY project for sustainable living. It lets you collect and reuse rainwater. This can cut down your household’s water use a lot.

Benefits of Collecting Rainwater

Collecting rainwater has many benefits. It saves water, cuts down on utility bills, and helps the environment. It reduces runoff that can harm the soil and pollute water.

Step-by-Step Installation Guide

Here’s how to set up your rainwater harvesting system:

  1. Choose a rainwater collection system that meets your needs, like rain barrels or cisterns.
  2. Put up gutters and downspouts to guide rainwater to your storage containers.
  3. Place storage containers in a spot that’s easy to get to and safe.
  4. Connect overflow pipes to handle extra water during heavy rains.
  5. Keep your system in good shape by cleaning gutters and checking for leaks.

Benefit Description
Water Conservation Reduces reliance on municipal water supply.
Cost Savings Lowers water bills by utilizing free rainwater.
Environmental Impact Decreases stormwater runoff and erosion.

Build Your Own Compost Bin

Creating a compost bin is a rewarding DIY project that supports sustainable living. It turns kitchen scraps and yard waste into rich soil for your garden. This reduces trash and boosts plant growth.

Benefits of Composting

Composting has many benefits. It cuts down landfill waste and lowers greenhouse gas emissions. It also makes your soil richer with essential nutrients.

Plus, it reduces the need for chemical fertilizers. This promotes a healthier garden ecosystem.

Materials Needed for Your Compost Bin

To start building your compost bin, gather the right materials. You’ll need:

  • Wooden pallets or recycled wood
  • Metal screws and nails
  • Hinges and a latch for the lid
  • Drill and saw for assembly
  • Wire mesh to cover ventilation holes

These eco-friendly tips help make your compost bin durable and efficient. This makes your DIY project a success.

Start a Vegetable Garden

Starting a vegetable garden is a great way to live more sustainably. It cuts down on carbon emissions and gives you fresh, organic food right at home.

Choosing the Right Plants

Choosing the right plants is key for a successful garden. Pick native species that fit your climate well. Vegetables like tomatoes, lettuce, and herbs are easy to grow and keep.

Companion planting helps plants grow better and keeps pests away naturally.

Tips for Container Gardening

Container gardening is perfect for small spaces. Use pots with good drainage and light materials for easy moving. Make sure containers are big enough for the roots.

Water regularly and use organic fertilizers to keep plants healthy.

Seasonal Planting Guide

Knowing the seasons helps plan your garden better. In spring, plant cool-season veggies like spinach and peas. Summer is best for warm-season plants like peppers and cucumbers.

Fall is great for growing hearty greens like kale and Swiss chard. Adjust your planting to fit your local climate for the best results all year.

Make Eco-Friendly Cleaning Products

Switching to homemade cleaners is a simple way to reduce chemicals in your home. With some basic ingredients, you can create effective solutions. These are safe for your family and the environment.

Ingredients for Natural Cleaners

  • White vinegar
  • Baking soda
  • Castile soap
  • Essential oils
  • Water

Easy Recipes for DIY Cleaners

  1. All-Purpose Cleaner: Mix 1 part white vinegar, 1 part water, and a few drops of essential oil.
  2. Glass Cleaner: Combine 2 cups water, 1/2 cup white vinegar, and 1/4 cup rubbing alcohol.
  3. Bathroom Cleaner: Create a paste with baking soda and water for scrubbing surfaces.

These DIY projects not only save money but also provide eco-friendly tips. They help maintain a healthy home environment.

Create a Solar Oven

Use the sun’s power to cook your meals with a solar oven. This DIY project saves energy and supports sustainable living.

How Solar Ovens Work

Solar ovens use reflective materials to focus sunlight on a cooking area. This sunlight turns into heat, letting you bake, boil, or roast without needing electricity or gas.

Materials Needed for Construction

  • Cardboard boxes
  • Aluminum foil
  • Plastic wrap
  • Black construction paper
  • Thermal insulation material
  • Glue and tape

Step-by-Step Construction Guide

  1. Start by making the cardboard boxes sturdy with tape.
  2. Line the inside with aluminum foil to reflect sunlight.
  3. Make a window with plastic wrap to keep heat in.
  4. Put black construction paper at the bottom to soak up heat.
  5. Add thermal insulation around the edges to keep warmth in.
  6. Face the solar oven towards the sun and start cooking.
Material Purpose
Cardboard Boxes Structure and insulation
Aluminum Foil Reflects sunlight into the oven
Plastic Wrap Creates a greenhouse effect
Black Construction Paper Absorbs and retains heat
Thermal Insulation Maintains consistent temperature

Upcycle Household Items

Upcycling turns everyday items into something special. It reduces waste and adds a personal touch to your home. DIY projects make sustainable living fun and easy.

Ideas for Upcycling Furniture

Give old furniture a new life with these creative ideas:

  • Paint an outdated chair or table to match your current decor.
  • Replace old knobs and handles with stylish new ones for a modern update.
  • Turn an old ladder into a unique bookshelf or plant stand.

Repurposing Glass Jars and Bottles

Glass containers can be turned into useful and beautiful items with simple tips:

  • Create charming planters for your indoor garden.
  • Use bottles as elegant storage solutions for kitchen essentials.
  • Transform jars into beautiful candle holders for ambient lighting.

Upcycled Household Items

Item Upcycling Idea Benefits
Old Chair Paint and reupholster for a fresh look Cost-effective, personalized decor
Glass Jars Use as storage for spices or crafts Organized, eco-friendly
Wooden Ladder Convert into a decorative bookshelf Functional, adds character to space

Install Energy-Efficient Lighting

Upgrading your home lighting is a smart move towards sustainable living. Energy-efficient options cut down on carbon emissions and lower your electricity bills. This makes your home greener, following eco-friendly tips.

Benefits of LED Bulbs

  • Use up to 80% less energy than traditional incandescent bulbs
  • Last significantly longer, reducing waste
  • Available in various styles and brightness levels

How to Transition Your Home Lighting

Start by swapping out old bulbs for LED ones. Look for products with the ENERGY STAR label for top efficiency. Add dimmers or smart switches to control light use, supporting sustainable living.

Use Natural Pest Control Methods

Keeping your garden healthy doesn’t need harmful chemicals. Eco-friendly tips help your plants grow well and keep your space safe. Here are some DIY projects to control pests naturally.

Homemade Solutions for Common Pests

  • Neem Oil Spray: Mix neem oil with water and a few drops of dish soap. This natural spray repels many pests.
  • Garlic and Chili Spray: Blend garlic and chili peppers with water, then strain. Apply to plant leaves to keep insects away.
  • Soap Solution: A mild soap and water mix can kill soft-bodied pests like aphids and spider mites.

Preventative Tips for a Pest-Free Garden

  • Crop Rotation: Move the location of your plants each season. This stops pests from making a home.
  • Encourage Beneficial Insects: Plant flowers like marigolds and sunflowers. They attract predators that control pests.
  • Proper Maintenance: Remove weeds and dead plants often. This takes away hiding spots for pests.
Solution How to Make Best For
Neem Oil Spray Mix 2 tablespoons neem oil with a gallon of water and a few drops of dish soap. Aphids, caterpillars, and other soft-bodied insects.
Garlic and Chili Spray Blend 4 cloves garlic and 2 hot chilies with a quart of water, strain, and spray. Beetles, mites, and other common garden pests.
Soap Solution Combine 1 tablespoon liquid soap with a gallon of water. Aphids, spider mites, and whiteflies.

Create a Home Recycling Station

Setting up a home recycling station is key to living sustainably. It cuts down on waste and encourages eco-friendly habits every day.

Organizing Your Recycling Area

First, pick a spot in your home for recycling. Make sure it’s easy to get to for everyone.

  • Containers: Use separate bins for paper, plastics, glass, and metals.
  • Labels: Clearly label each bin to avoid confusion.
  • Storage: Keep the area tidy by regularly emptying and cleaning the bins.

Tips for Effective Recycling Practices

Here are some tips to make recycling better:

  1. Rinse containers before recycling to prevent contamination.
  2. Break down cardboard boxes to save space.
  3. Stay informed about your local recycling guidelines.
  4. Encourage family members to participate actively.

By organizing your recycling area and following these tips, you help the environment a lot. It also makes your home more responsible.

Do’s Don’ts
Use clearly labeled bins Mix different types of waste
Rinse recyclables Throw non-recyclable items in recycling bins
Follow local guidelines Leave recyclables unorganized

Design a DIY Green Roof

Turn your rooftop into a green oasis with a DIY green roof. It makes your home look better and helps the planet.

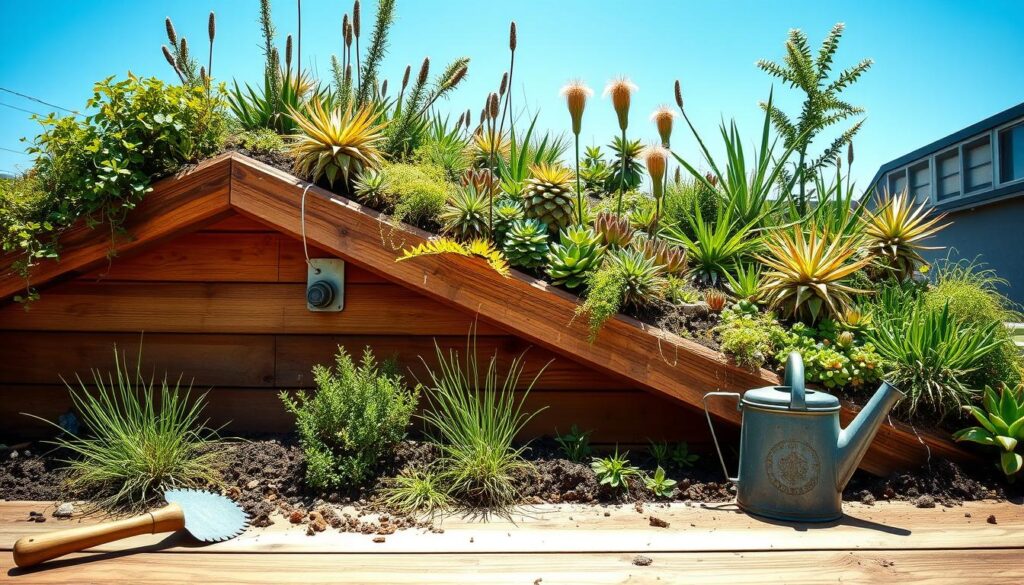
DIY green roof project

Benefits of Green Roofing

Green roofs are great for many reasons. They keep your home cool, saving on energy bills. They also handle rainwater, cutting down on flooding and pollution.

Plus, they support local wildlife by providing a home for plants and insects.

Simple Steps for Creating a Green Roof

  1. Prepare the Roof: Make sure your roof can handle the extra weight of a green roof. Strengthen it if needed.
  2. Install Waterproofing: Put on a waterproof layer to protect your roof from water damage.
  3. Add a Root Barrier: Use a root barrier membrane to stop plant roots from damaging the waterproof layer.
  4. Lay the Drainage Layer: Set up a drainage system to handle extra water.
  5. Insert the Growing Medium: Use special light soil for green roofs to help plants grow.
  6. Plant Selection: Pick plants that do well in rooftop conditions, like succulents or native grasses.
  7. Maintenance: Keep your green roof watered and cared for to keep it healthy and long-lasting.

Starting this DIY project improves your living space and helps the environment. It’s a step towards a greener future.

Create an Indoor Plant Oasis

Turn your home into a lush oasis with indoor plants. They make your space look better and help keep the air clean. This is a great way to live more sustainably.

Best Plants for Indoor Air Quality

  • Snake Plant: It filters out toxins and is very low maintenance.
  • Spider Plant: It’s good at removing pollutants and easy to spread.
  • Peace Lily: Its flowers not only look nice but also clean the air.
  • Boston Fern: It’s great for making the air moist and clean.

Maintenance Tips for Indoor Gardens

  • Proper Lighting: Make sure plants get enough light or use grow lights.
  • Watering Schedule: Water them regularly but don’t overdo it.
  • Regular Pruning: Cut off dead leaves to help them grow well.
  • Use Sustainable Soil: Choose organic, eco-friendly potting mixes.

Follow these tips to keep your indoor garden healthy and thriving. It will make your home better and support sustainable living.

Use Repurposed Wood in Your Projects

Using repurposed wood in DIY projects adds charm to your home. It also helps the environment by reducing waste. Choosing reclaimed wood supports eco-friendly tips.

Finding Reclaimed Wood

Looking for quality reclaimed wood is simpler than you think. Check local salvage yards, architectural salvage stores, and online marketplaces. Community groups and social media are also great for finding materials.

Project Ideas Using Reclaimed Wood

  • Furniture: Create unique tables, chairs, or shelves that showcase the wood’s natural textures.
  • Decorative Pieces: Make picture frames, mirrors, or wall art to enhance your home’s aesthetic.
  • Garden Projects: Build planters, garden beds, or outdoor benches that blend seamlessly with natural surroundings.
  • Home Improvement: Use reclaimed wood for flooring, accent walls, or ceiling beams to add warmth and history to your living spaces.

Benefits of Using Repurposed Wood

Choosing repurposed wood for DIY projects has many benefits. It reduces environmental impact and adds unique charm to your creations. These eco-friendly tips make your projects beautiful and sustainable.

Source Description Contact Information
Local Salvage Yards Wide range of reclaimed wood from old buildings and structures. 123-456-7890
Architectural Salvage Stores Specialized in high-quality reclaimed wood and architectural elements. [email protected]
Online Marketplaces Platforms like Craigslist or Facebook Marketplace offer various options. www.facebook.com/marketplace

Implement Water-Saving Techniques

Reducing water usage is key for sustainable living. By using eco-friendly tips, you can cut your household’s water use a lot.

Installing Low-Flow Fixtures

Low-flow fixtures like showerheads and faucets save water well. They keep water pressure good but use less water. This helps you save money on bills.

Simple Habits for Water Conservation

Small changes in your daily life can save a lot of water:

  • Turn off the tap while brushing your teeth.
  • Take shorter showers.
  • Fix leaks quickly to avoid wasting water.
  • Use a dishwasher only when it’s full.

Water-Saving Tip Estimated Water Saved per Year
Installing low-flow showerheads 2,000 gallons
Turning off the tap while brushing 300 gallons
Fixing household leaks 1,500 gallons
Using full dishwasher loads 1,200 gallons

Share Your Sustainable Living Journey

Discovering sustainable living is rewarding and empowering. Your DIY projects have made your home better and helped the environment. Now, it’s time to share your journey and inspire others to live eco-friendly.

Engaging with Your Community

Look for local sustainability groups or organizations. Attend workshops, help at community gardens, or host a DIY workshop. This way, you can share ideas, learn from others, and work together for a greener future.

Social Media and Sustainable Projects

Use social media to show off your sustainable living projects. Share updates, DIY tutorials, and how your projects have helped. Encourage followers to join sustainable living challenges or share their own eco-friendly projects. This way, you can build an online community and inspire others to start their own sustainable living journeys.

FAQ

What is sustainable living?

Sustainable living means making choices that help the planet. It’s about using less, wasting less, and being kinder to the Earth. You can do this by making eco-friendly choices and trying DIY projects.

What are the benefits of sustainable living?

Living sustainably is good for the planet and for you. It saves money, improves your health, and helps the future. By living sustainably, you help protect our natural resources and the environment.

How can DIY projects support sustainability?

DIY projects let you make eco-friendly things and reduce waste. They help you understand how to live more sustainably. This way, you can make choices that are better for the Earth.

What tools and materials are needed for DIY sustainable living projects?

The tools and materials needed vary by project. You might need basic tools, power tools, and eco-friendly supplies. Always choose safe, sustainable materials.

What are the benefits of collecting rainwater?

Collecting rainwater saves water and money. It’s good for gardening and cleaning. It also helps reduce stormwater runoff and protects local water sources.

Why is composting important for sustainable living?

Composting turns waste into nutrient-rich soil. It reduces methane emissions and helps manage waste. It’s a natural way to fertilize your garden without chemicals.

What are the advantages of growing your own vegetables?

Growing your own veggies is fresh and healthy. It saves money and reduces carbon emissions. You can avoid pesticides and connect with nature.

How can homemade cleaning products be more eco-friendly?

Homemade cleaners use natural ingredients like baking soda and vinegar. They’re free from harsh chemicals. Making your own cleaners reduces harm to the environment and your health.

What are the benefits of using a solar oven?

Solar ovens cook food using the sun’s power. They save energy and reduce carbon emissions. They’re a clean, renewable way to cook.

How can upcycling household items contribute to sustainability?

Upcycling gives old items new life. It reduces waste and creates unique items. It supports a circular economy and promotes sustainability.

What are the benefits of using LED bulbs for energy-efficient lighting?

LED bulbs use less energy and last longer. They save money and are more efficient. LEDs are a greener choice for lighting.

How can natural pest control methods be more sustainable?

Natural pest control uses homemade solutions and prevention. It avoids harmful chemicals. It’s better for the environment and your health.

What are the benefits of creating a home recycling station?

A recycling station makes recycling easier. It helps reduce waste and conserve resources. It teaches your family to recycle more.

Why is a green roof a sustainable design choice?

Green roofs cool buildings, save energy, and support wildlife. They manage stormwater and last longer. They’re a sustainable choice for buildings.

How do indoor plants improve air quality?

Indoor plants clean the air by removing pollutants. They release oxygen, improving air quality. They make your home healthier.

What are the advantages of using reclaimed wood in DIY projects?

Reclaimed wood saves trees and reduces waste. It’s unique and sustainable. It adds character to your home while being eco-friendly.

How can you implement water-saving techniques in your home?

Use low-flow fixtures and water wisely. Turn off taps and wait for full loads. These steps save water and help the planet.

How can you engage with your community and share your sustainable living journey?

Join local events and volunteer. Share your journey on social media. This inspires others to live sustainably. You help create a greener future.

0 comment
0 FacebookTwitterPinterestEmail
How to Save Energy at Home

How to Save Energy at Home

by Mary

Wondering how to cut down on your environmental impact and lower bills? Saving energy at home is a smart start. It helps the planet and your wallet. Simple changes and energy-efficient solutions can lead to big savings and a more efficient home.

There are many ways to use less energy and make your home more efficient. Adjusting your thermostat and using energy-saving lights are just a few examples. These actions save money and help the environment. This article will show you how to save energy at home, with easy changes and bigger investments. We’ll give you the tools and knowledge for better energy savings and home efficiency.

Understand Your Energy Consumption

To save energy and make your home more efficient, knowing how much energy you use is key. Start by looking at your utility bills. This will show you when and how much energy you use.

Check the total energy used in kilowatt-hours (kWh) and the cost per kWh. Also, see how much energy different appliances or systems use. This helps you find out which ones use the most energy and where you can cut back.

Review Your Utility Bills

When you look at your utility bills, keep an eye on a few things:

  • Peak energy usage hours
  • Average daily energy usage
  • Energy usage by appliance or system

Identify High-Usage Appliances

After you understand your energy use, find out which appliances or systems use the most. This might include:

  • Refrigerators and freezers
  • Heating and cooling systems
  • Water heaters
  • Lighting systems

Knowing which appliances use the most energy lets you make smart choices. You can then cut down on energy use and make your home more efficient. This will save you a lot of energy and money.

Upgrade to Energy-Efficient Appliances

Upgrading to energy-efficient appliances is a great way to save energy. It makes your home more efficient and lowers your bills. Look for appliances with the ENERGY STAR® label. This means they meet high energy standards set by the U.S. Environmental Protection Agency.

Smart appliances offer even more benefits. They help you use energy wisely and give insights into your usage. Some can be controlled from afar, saving energy when you’re not home. Using these tips daily can greatly reduce your energy use and support a greener lifestyle.

Here are some key factors to consider when selecting energy-efficient appliances:

  • Energy consumption: Look for appliances with low energy consumption rates to minimize your energy usage.
  • Cost: While energy-efficient appliances may be more expensive upfront, they can help you save money in the long run by reducing your energy bills.
  • Features: Consider the features that are important to you, such as smart technology or high-performance capabilities.

By choosing energy-efficient appliances and following these DIY tips, you can significantly improve your energy savings. Always look for the ENERGY STAR® label. Also, consider smart appliances to optimize your energy use.

Appliance Energy Consumption Cost
Refrigerator 100-200 kWh/month $800-$1,200
Dishwasher 30-50 kWh/month $400-$800
Washing Machine 50-100 kWh/month $600-$1,000

Insulate Your Home

Insulating your home is key to saving energy. It keeps your home warm in winter and cool in summer. Start by checking for air leaks and adding insulation to attics and walls.

For DIY insulation, consider using fiberglass, cellulose, or spray foam. Don’t forget to seal air leaks around doors, windows, and ducts. This stops heated or cooled air from escaping.

Here are some DIY tips for better insulation:

  • Sealing air leaks with caulk or weatherstripping
  • Adding insulation to your attic, such as fiberglass or cellulose
  • Using spray foam to insulate walls and ceilings
  • Installing storm windows to reduce heat loss

By using these tips and the right materials, you can save a lot on energy. Always follow safety guidelines when working with insulation. If unsure, consider getting professional help.

With the right insulation and DIY tips, you can cut down on energy use and bills. Start by checking your home’s insulation and making improvements. Your wallet and the environment will appreciate it.

Insulation Material Effectiveness Cost
Fiberglass High Moderate
Cellulose High Low
Spray Foam Very High High

Optimize Heating and Cooling

To save energy and make your home more efficient, focus on your heating and cooling systems. Simple changes can cut down your energy use and lower bills. Adjusting your thermostat is a key step, considering your daily life and preferences.

Try lowering the temperature when you’re out or asleep, and raise it when you’re home and active. Use programmable or smart thermostats to set these changes ahead of time. Also, ceiling fans can help your heating and cooling systems work less, saving energy.

Some helpful tips include:

  • Set your thermostat to energy-saving modes when possible
  • Use ceiling fans to circulate air and reduce the need for air conditioning
  • Regularly maintain your HVAC system to ensure it’s running efficiently

By optimizing your heating and cooling, you can save a lot of energy and make your home more efficient. Always look for ways to use less energy and save on bills. Consider getting energy-efficient appliances and systems for even more savings.

These easy changes can make your home more energy-efficient and help the environment. Start optimizing your heating and cooling today. Enjoy the benefits of saving energy and a more efficient home.

Energy-Saving Tip Estimated Energy Savings
Adjusting your thermostat 5-10%
Using ceiling fans 3-5%
Maintaining your HVAC system 10-15%

Use Energy-Efficient Lighting

Looking for ways to cut down on energy use? Lighting plays a big role. Making a few changes can greatly reduce your energy use and lower bills. Switching to energy-saving lights is a smart move.

LED bulbs are a top pick for energy-saving lighting. They use much less energy than old bulbs and last longer. This means you save money and help the planet by using them.

Switch to LED Bulbs

There are more DIY tips to save energy. Use natural light by opening curtains and blinds. This cuts down on the need for artificial light and saves energy.

Utilize Natural Light

Using energy-efficient lights and natural light together can save a lot of energy. Every small change helps a lot. It’s good for your wallet and the planet.

Other ways to save include using dimmer switches and motion sensors. These help turn off lights when not needed. They make your home more energy-efficient and lower your bills.

Manage Water Heating

Water heating uses a lot of energy. Making a few simple changes can save a lot of energy and make your home more efficient. By adjusting your water heater’s temperature and insulating it and its pipes, you can cut down on heat loss and lower your bills.

To begin, check your water heater’s temperature setting and adjust it to a good level. Most homes need water between 120°F and 140°F. This keeps the water hot without wasting energy. You might also want to get a temperature and pressure relief valve for safety and better efficiency.

Set Your Water Heater’s Temperature

  • Check your water heater’s current temperature setting
  • Adjust the temperature to a suitable level (120°F – 140°F)
  • Install a temperature and pressure relief valve for added safety

Insulate Your Water Heater

Insulating your water heater and pipes is another smart move for saving energy and improving your home’s efficiency. You can buy a pre-cut water heater blanket or use foam pipe insulation. This easy DIY project can help keep your water heater efficient and save energy.

By using these tips, you can save a lot of energy and make your home more efficient. Always follow safety rules when working with your water heater and pipes to avoid accidents and make your DIY project a success.

Strategy Energy Savings Home Efficiency
Optimize water heater temperature 3-5% Improved
Insulate water heater and pipes 5-10% Enhanced

Embrace Smart Home Technology

Smart home technology plays a big role in making your home more energy-efficient. By using smart devices, you can save a lot of energy and money. For example, smart thermostats can adjust the temperature based on your schedule, saving you money on bills.

Smart home tech also helps you understand how much energy you use. Devices like energy monitors show you where you can cut down on energy. This lets you make better choices about how you use energy, helping your home use less.

  • Remote access and control
  • Energy usage tracking and monitoring
  • Automated scheduling and optimization
  • Integration with other smart devices

By using smart home technology, you can make your home more efficient and comfortable. It helps you reach your goals of saving energy and making your home more eco-friendly.

Smart Home Device Benefits
Smart Thermostats Optimize heating and cooling, learn your schedule and preferences
Energy Monitors Track energy usage, identify areas for improvement

Make Smart Use of Electronics

To save energy, watch how your devices use power. TVs, computers, and chargers use power even when off but plugged in. This is called “phantom” or “standby” power. Simple DIY tips can cut down on waste and lower bills.

Unplugging devices when not used is a good start. This works for kitchen gadgets and entertainment systems too. Power strips help turn off many devices at once. These steps lead to big energy savings and help the planet.

Simple Energy-Saving Tips

  • Unplug chargers, TVs, and other devices when not in use to eliminate standby power consumption
  • Use power strips to control multiple devices with a single switch
  • Adjust your device settings to optimize energy efficiency, such as turning off screensavers and adjusting brightness levels

Adding these DIY tips to your daily life can greatly reduce energy use. Every little change helps, and smart electronics use is a good start.

Device Standby Power Consumption Energy Savings Tip
TV 5-10 watts Unplug when not in use or use a power strip
Computer 10-20 watts Turn off or put in sleep mode when not in use
Phone Charger 2-5 watts Unplug when not charging your phone

Seal Doors and Windows

To make your home more efficient, sealing gaps around doors and windows is key. This easy DIY task helps a lot in keeping your home warm in winter and cool in summer. It also saves you money on energy bills.

For sealing, you can use weather stripping and caulk. Weather stripping works well for gaps between doors and windows. Caulk is best for filling cracks and holes. First, check your doors and windows for gaps. Then, pick the right material for the job.

Use Weather Stripping

Weather stripping is a simple and effective way to seal gaps. It comes in materials like foam tape and felt. To use it, just cut it to size and press it into place.

Employ Caulk for Gaps

Caulk is perfect for filling cracks and holes. It’s easy to apply and can be painted to match your area. To use caulk, squeeze it into the gap and smooth it with a damp cloth.

By following these DIY tips and using the right materials, you can make your home more efficient. Always follow the manufacturer’s instructions for weather stripping or caulk. Take your time to ensure a good seal. With a bit of patience and effort, you can have a more comfortable and energy-efficient home.

home efficiency

  • Reduced heat loss and energy consumption
  • Improved home comfort and temperature control
  • Increased energy efficiency and cost savings
  • Enhanced overall home performance and value

By adding these DIY tips to your home maintenance routine, you can enjoy a more efficient and comfortable home. You’ll also save on energy bills and help the environment.

Maintain Your HVAC System

Keeping your heating, ventilation, and air conditioning (HVAC) system in good shape is key for saving energy and making your home more efficient. By taking care of your HVAC, you can cut down on energy use, lower your bills, and make your equipment last longer.

Doing regular maintenance, like changing air filters and getting professional checks, can spot problems early. This can save a lot of energy and make your home more efficient over time. For instance, a dirty air filter can use up to 20% more energy. But a well-kept HVAC system can cut your energy bills by up to 30%.

Change Air Filters Regularly

Changing your air filters often is a simple but effective way to keep your HVAC system running smoothly. You should change them every 1-3 months, depending on how much you use them and what the maker says. This can make the air in your home cleaner, use less energy, and protect your equipment.

Schedule Professional Inspections

Getting your HVAC system checked by a pro is also very important. A technician can look at your system, find any problems, and fix or replace what’s needed. This can stop big problems, use less energy, and make your home more efficient. Some benefits of getting your system checked include:

  • Improved energy efficiency
  • Extended equipment lifespan
  • Enhanced indoor air quality
  • Reduced energy bills

By following these tips, you can save energy, make your home more efficient, and live in a more comfortable space. Always remember to keep up with regular maintenance to make sure your HVAC system works well and efficiently.

Maintenance Task Frequency Benefits
Change Air Filters Every 1-3 months Improved indoor air quality, reduced energy consumption
Schedule Professional Inspections Annually Extended equipment lifespan, enhanced indoor air quality, reduced energy bills

Consider Renewable Energy Options

Looking for ways to make your home more efficient and save energy? Think about renewable energy. These sources can cut down on your need for grid electricity. They offer a cleaner, greener choice for your home.

Two top picks for renewable energy are solar panels and small-scale wind turbines.

Explore Solar Panel Installation

Solar panels are a great way to cut down on your energy bills. They use sunlight to make electricity, saving you money. Plus, they need little upkeep and can last up to 25 years or more.

Investigate Wind Energy Solutions

Wind turbines are another option for saving energy at home. They turn wind into electricity, reducing your use of grid power. While they need more care than solar panels, they’re a big step towards a greener future.

Choosing renewable energy is a big step towards a more efficient home. Whether you go for solar panels or wind turbines, you’re helping the planet. You’ll also save money on your energy bills.

  • Reduced energy bills
  • Increased home efficiency
  • Lower carbon footprint
  • Contribution to a more sustainable future
Renewable Energy Option Benefits Cost
Solar Panel Installation Energy savings, increased home efficiency Varies depending on system size and installation costs
Small-Scale Wind Energy Solutions Energy savings, reduced reliance on grid power Varies depending on turbine size and installation costs

Practice Efficient Laundry Habits

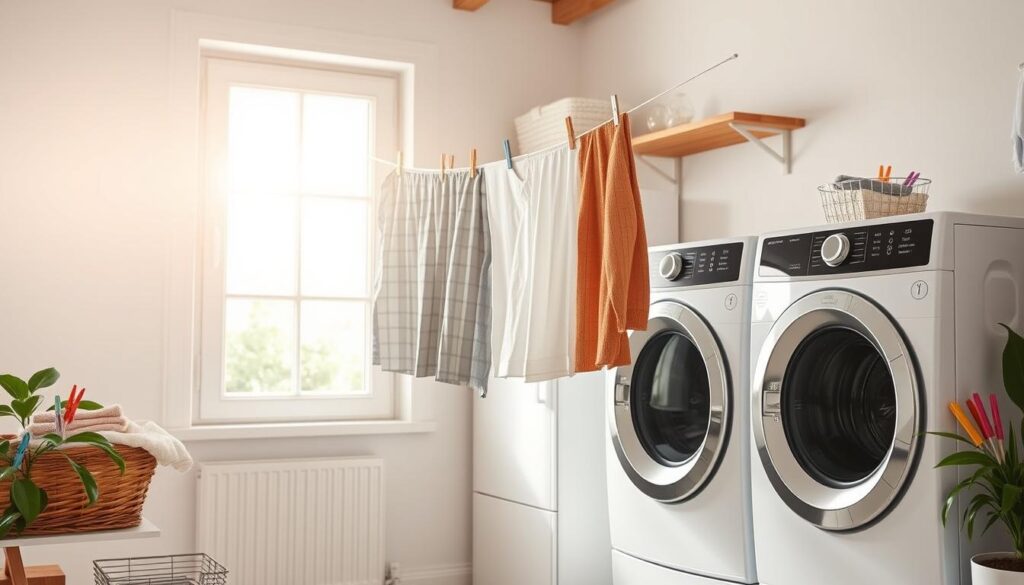
Every little bit helps when it comes to saving energy. Your laundry habits can greatly affect your home’s energy use. By following a few simple DIY tips, you can cut down on energy use and lower your bills. Start by washing clothes in cold water. This saves energy and keeps your clothes looking good.

Another smart move is to line-dry your clothes when you can. It’s good for the environment and your clothes. If you must use a dryer, clean the lint filter after each use. Also, try using the eco-cycle or low-heat setting on your washer and dryer.

Here are some more DIY tips for better laundry habits:

  • Wash full loads to cut down on cycles
  • Choose a laundry detergent made for cold water
  • Use a clothesline or drying rack for delicate items

energy savings tips

By following these simple tips, you can make a big difference in energy savings. Every small change helps a lot over time. So, start making these changes today and help create a more sustainable future.

Laundry Habit Energy Savings
Washing in cold water Up to 90% energy savings
Line-drying Up to 60% energy savings
Using energy-efficient settings Up to 30% energy savings

Maximize Your Refrigerator’s Efficiency

To save a lot of energy, focus on your refrigerator. It uses a lot of power in your home. A few easy steps can make it work better and save you money. Keeping your fridge organized helps it breathe better, which means it works less hard and uses less energy.

Here are some ways to make your fridge more efficient:

  • Organize items for better airflow, like not stuffing shelves and keeping often-used items up front
  • Set the fridge to 37°F to 40°F and the freezer to 0°F for the best temperature
  • Clean the condenser coils regularly to keep them dust-free

By doing these things, you can make your fridge more efficient. This leads to saving energy and making your home more efficient. Every little change helps a lot in cutting down energy use and lowering bills.

Also, think about getting a more energy-efficient fridge. Models with an ENERGY STAR label use even less energy. They help make your home more efficient and save you money.

Educate Yourself and Your Family

Saving energy at home is a journey that never ends. The key to success is to educate yourself and your family about how to save energy. Share the energy-saving tips you’ve learned with your loved ones. Encourage everyone to help make your home more energy-efficient.

Start a family energy challenge with friendly competitions or rewards. This can make everyone feel more involved. It leads to lasting energy savings.

Every small step by each household member can make a big difference. By working together and staying informed, you can make your home more eco-friendly and cost-effective.

FAQ

What are the key benefits of saving energy at home?

Saving energy at home is good for the planet and your wallet. It cuts down on carbon emissions and saves natural resources. Plus, it can lower your monthly bills, saving you money over time.

How can I review my home’s energy consumption patterns?

To see how much energy your home uses, start with your utility bills. Look for patterns in your energy use over time. Find out which appliances use the most energy to know where to start saving.

What are the advantages of upgrading to energy-efficient appliances?

Switching to ENERGY STAR®-rated appliances can cut your energy use and bills. They use new tech to work well with less energy. Smart appliances also let you fine-tune their efficiency.

How can proper insulation help improve home efficiency?

Good insulation keeps your home comfy and energy-smart. Check for air leaks and seal them up. Adding insulation to your attic and walls also helps keep your home warm or cool.

What are some tips for optimizing heating and cooling in my home?

Keep your thermostat at a good temperature. Think about getting a smart thermostat to adjust when you’re not home. Ceiling fans can also help circulate air and cut down on heating and cooling needs.

How can I make my home’s lighting more energy-efficient?

Switch to LED bulbs for better lighting and less energy use. They last longer than old bulbs. Use natural light and light-colored surfaces to brighten your home.

What can I do to manage my home’s water heating system more efficiently?

Lower your water heater to 120°F (49°C) to save energy. Insulate your water heater and pipes to prevent heat loss. This makes your water heating system more efficient.

How can smart home technology help me save energy?

Smart home devices like thermostats and monitors show you how much energy you use. They help you find ways to use less. Smart thermostats adjust for you, and monitors give you instant data to improve.

What are some easy ways to reduce energy use from electronics and appliances?

Unplug devices when not in use to avoid standby power. Use power strips to turn off many devices at once. Turn on energy-saving modes on your gadgets and appliances to use less energy.

How can I improve the energy efficiency of my HVAC system?

Keep your HVAC system in top shape with regular care. Change air filters often and get professional check-ups. These steps boost efficiency and make your system last longer.

0 comment
0 FacebookTwitterPinterestEmail