fbpx
Tag:

DIY Furniture Projects

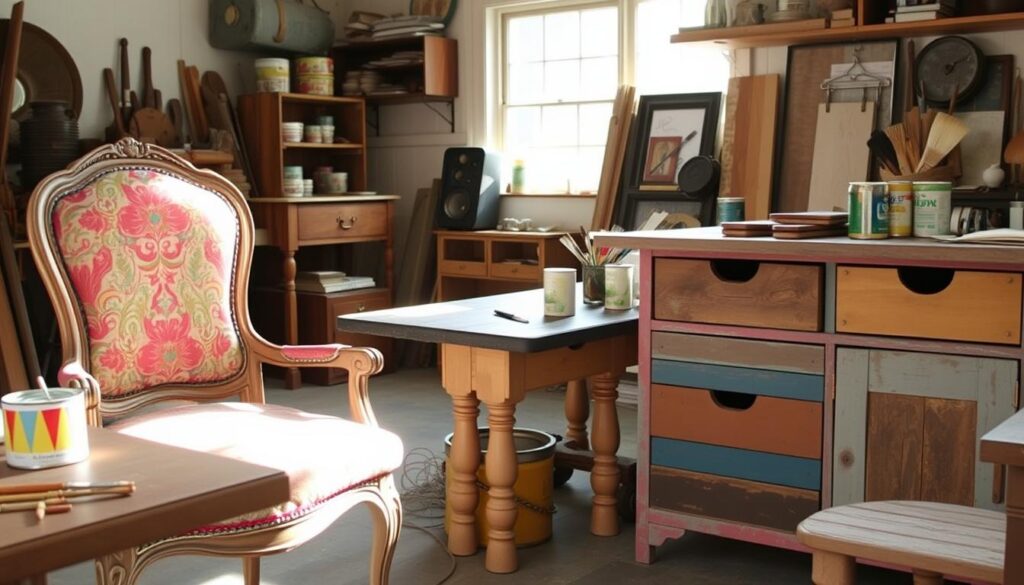
How to Upcycle Old Furniture

Imagine turning an old, worn-out piece of furniture into something beautiful and unique. This is what upcycling is all about. It’s a creative way to give old items a new life, making them functional and stylish.

Upcycling is good for the planet and your wallet. It lets you create pieces that are truly yours. Whether you love DIY projects or want to be eco-friendly, upcycling is a great choice.

Why Upcycle Old Furniture?

Upcycling old furniture is a creative and eco-friendly way to breathe new life into outdated items. It reduces waste, conserves resources, and lets you create unique pieces that show your style. This method is good for the environment and lets you express your creativity in your home.

Upcycling gives old furniture a new purpose. With a bit of imagination and DIY skills, you can turn an old piece into something stunning. For instance, an old dresser can become a kitchen island or coffee table. An old door can be repurposed as a headboard or room divider.

  • Reduced waste and conservation of resources
  • Cost savings compared to buying new furniture
  • Opportunity to express your creativity and add a personal touch to your living space

By upcycling, you can make your living space more sustainable and beautiful. It’s a way to renovate and repurpose old furniture in a creative and eco-friendly manner.

Benefits of Upcycling

Upcycling has many benefits, like reducing waste and saving money. It lets you create unique pieces that show your style and add personality to your home.

Environmental Impact

The environmental benefits of upcycling are huge. It cuts down on waste and saves natural resources. By giving old furniture a new life, you help reduce the need for new, resource-intensive furniture.

Cost Savings

Upcycling is also a budget-friendly way to update your home. It saves you money on new furniture and lets you create pieces that are both unique and functional.

Choosing the Right Furniture for Upcycling

When upcycling, picking the right furniture is key. Look for pieces with strong frames and unique features. High-quality materials are also important. Think about how you can turn them into something new and exciting.

When searching for furniture to upcycle, remember the importance of condition and material. Check if the piece is sturdy and if it has any damage. Look for materials like wood or metal that can be fixed or reused. Be creative and think differently when upcycling furniture.

Identifying Good Candidates

  • Look for pieces with unique details, such as carvings or intricacies
  • Consider the material and condition of the furniture
  • Think about the piece’s full possibility and how you can change it

Assessing Condition and Material

When checking a piece’s condition and material, consider these points:

Factor Considerations
Material Look for high-quality wood, metal, or other materials that can be refinished or repurposed
Condition Check for damage, wear, or structural issues that may affect the stability of the piece
Potential Think about how you can transform the piece and give it new life

By thinking about these points, you can find the perfect furniture to upcycle. You can create unique, one-of-a-kind pieces that show your style and creativity.

Essential Tools and Materials for Upcycling

To start upcycling old furniture, you need the right tools and materials. Upcycling needs basic and special tools to get the job done. You’ll need sandpaper, paint brushes, and more to fix and change your furniture.

Having the right tools and materials is key for upcycling. Some must-haves include:

  • Electric sander for smoothing out surfaces
  • Paint sprayer for even coats
  • Clamps for holding pieces together

You’ll also need various supplies like paints, stains, and finishes. The material you’re working with decides the best supplies. For example, a wooden chair might need a wood stain to show off the wood grain.

Remember to stay safe while upcycling. Wear gloves and safety glasses to avoid injuries. With the right tools, materials, and safety, you can make unique and useful furniture. Upcycling is a fun and rewarding DIY project.

Tool Description
Sandpaper For smoothing out surfaces
Paintbrushes For applying paint and stains
Clamps For holding pieces together

Preparation Steps Before Upcycling

Before starting your upcycling project, it’s key to prepare your furniture well. This ensures your final piece is of high quality and lasts long. Each type of furniture needs a different approach to preparation.

The condition of your furniture greatly affects your upcycling outcome. Cleaning your furniture is the first step. This means removing dirt, grime, and old wax from the surface. Use a gentle cleaner and a soft cloth to wipe down the furniture, ensuring you remove any stuck debris.

Cleaning and Repairing

After cleaning, repairing damages is vital. This includes fixing scratches, dents, or loose joints. Use wood filler for holes or cracks, then sand it down for a smooth finish. If the damage is severe, consider a professional’s help.

Once your furniture is clean and repaired, you can dive into the upcycling process. This is where you can get creative and transform your old furniture into something unique that shows your style.

Removing Old Finish and Hardware

Removing old finish and hardware is another critical step. This means stripping off old paint or varnish and taking off knobs or handles. You can use sanding or chemical strippers to remove the old finish. After removing it, you can think about the new finish you want, like a fresh coat of paint or varnish.

By following these steps, you can ensure your upcycling project is successful. Always work safely and wear protective gear when needed. With patience and creativity, you can make your old furniture into something beautiful and useful that you’ll enjoy for years.

Preparation Step Importance
Cleaning High
Repairing High
Removing Old Finish and Hardware Medium

Painting Techniques for Furniture Upcycling

Painting is a great way to give old furniture a new look. With the right techniques and materials, you can make unique pieces that show off your style. Upcycling means giving old items a new life, and painting is a big part of that.

First, pick the right paint for your furniture. Think about the material, finish, and how long it will last. You can choose from chalk paint, latex paint, or oil-based paint. Each has its own good and bad points, so do your homework before deciding.

Popular Painting Techniques

After picking your paint, try out different techniques. Some favorites include:

  • Distressing: making a piece look old by sanding or scraping paint off
  • Color washing: using a thin layer of paint for a soft look
  • Ombre: mixing colors for a cool, multi-tonal effect

These methods add depth and interest to your upcycled furniture. By mixing and matching, you can make pieces that really stand out.

Finishing Touches

After painting, apply a clear coat or sealant to protect it. This step is key to keeping your furniture looking good for a long time. By following these tips, you can make amazing pieces that show off your creativity.

Technique Description
Distressing Creating a worn, vintage look by sanding or scraping away paint
Color washing Applying a translucent layer of paint to achieve a soft, muted effect
Ombre Gradating colors to create a beautiful, multi-tonal effect

Staining and Refinishing Wood Furniture

Upcycling old furniture is a creative way to make new, useful items. Staining and refinishing wood furniture keeps the wood’s natural look. You need to pick the right stain for your project, thinking about the wood type and color you want.

There are many stains to choose from, like oil-based, water-based, and gel stains. Each has its own benefits and drawbacks. The right stain depends on your project’s needs. You can pick from light, natural colors to darker, more dramatic ones.

furniture upcycling

Popular ways to apply stain include foam brushes, lint-free cloths, or spray guns. It’s important to follow the stain’s instructions and be safe. This way, you’ll get a beautiful finish that highlights the wood’s grain, turning your furniture into a work of art.

Selecting the Right Stain

  • Consider the type of wood and its natural color
  • Think about the desired color and finish
  • Choose between oil-based, water-based, and gel stains

Techniques for Application

Apply the stain with a foam brush, lint-free cloth, or spray gun. Always follow the manufacturer’s instructions.

Adding New Hardware and Accessories

Upcycling furniture can be a game-changer with new hardware and accessories. A bit of creativity can transform an old piece into something stylish. Start by looking into DIY furniture ideas, like swapping old knobs for new handles or adding decorative legs.

It’s key to pick hardware and accessories that match your furniture’s style. For vintage pieces, choose hardware with a vintage vibe. Modern furniture calls for sleek, contemporary designs. Some great DIY ideas include:

  • Adding new handles or knobs to a dresser or cabinet
  • Installing decorative legs on a table or chair
  • Using metallic leaf or other decorative materials to add a touch of elegance

Remember, upcycling is all about being creative and having fun. Don’t hesitate to try new things and don’t worry if it doesn’t go as planned. With patience and practice, you can make unique furniture that shows off your style and adds personality to your home.

Upholstery Options for Furniture

Upholstery can greatly change how furniture looks and works. You can pick from many fabrics like cotton, linen, and velvet. For example, a vintage armchair can get a bold, patterned fabric for a colorful, textured look.

Think about the furniture and its use when choosing upholstery. A dining chair might need a tough, stain-resistant fabric. But a decorative ottoman could get a luxurious, high-pile fabric for elegance.

Selecting Fabric Types

When picking fabric, think about durability, comfort, and style. Also, consider the color, pattern, and any special features like stain resistance. Some good choices include:

  • Cotton: a durable, versatile fabric for many projects
  • Linen: a natural, textured fabric for elegance
  • Velvet: a luxurious, soft fabric for color and texture

DIY Upholstery Steps

After picking your fabric, start the DIY upholstery. This means removing old upholstery, fixing the structure, and attaching the new fabric. You can find tutorials online or take a class to learn.

Tips for Professional-Looking Results

For professional results, focus on details. Match patterns and stripes well, and use a consistent stitch. Adding trim or tassels can also make your piece unique. With practice, you can create beautiful, personalized furniture.

Incorporating Décor Elements

Exploring DIY ideas and upcycling opens up new ways to decorate. You can turn old furniture into beautiful pieces that show off your style. Upcycling is more than just giving old items a new life. It’s about adding special touches that make them stand out.

There are countless ways to add décor elements. You can use stencils and decals for detailed patterns or designs. Decoupage techniques let you add art by applying paper, fabric, or other materials. You can also add texture with fabrics, like tufted surfaces or fabric on drawer fronts.

Techniques for Adding Décor Elements

  • Stencils and decals: use them to create detailed patterns or designs on furniture surfaces
  • Decoupage techniques: apply paper, fabric, or other materials to furniture for an artistic effect
  • Adding texture with fabrics: create tufted surfaces or apply fabric to drawer fronts

By adding these décor elements, you can change a piece of furniture completely. Don’t be shy to try different techniques and see what works for your project. With patience and creativity, you can make unique and beautiful pieces that show off your style and add elegance to any room.

Sustainability in Upcycling Projects

Starting your furniture upcycling journey means thinking about the environment. Upcycling helps reduce waste and gives old furniture a new life. It’s important to do it in a way that’s good for the planet. Use eco-friendly materials like low-VOC paints, natural stains, and recycled fabrics to lower your project’s carbon footprint.

When upcycling, sustainability is very important. You can make a big difference by picking materials that are good for the environment. For example, use reclaimed wood, repurposed metal, or recycled glass. This way, you’ll not only cut down on waste but also create something unique that shows off your style.

  • Use eco-friendly materials, such as low-VOC paints and natural stains
  • Choose materials that are locally sourced and have a low carbon footprint
  • Repurpose and reuse materials whenever possible
  • Avoid using materials that are harmful to the environment, such as chemicals and pesticides

By following these tips, you can make beautiful, sustainable furniture. This not only reduces waste but also helps the environment. Upcycling is more than just giving old furniture a new look. It’s about making a positive change for our planet. So, be creative, think differently, and start upcycling your way to a greener future!

Material Environmental Impact
Low-VOC paints Low carbon footprint, non-toxic
Natural stains Biodegradable, non-toxic
Reclaimed wood Reduced waste, low carbon footprint

Showcasing Your Upcycled Creations

After finishing your upcycling project, it’s time to show off your work. You can place your upcycled furniture in different spots in your home. This makes it a highlight or fits right in with your decor.

When posting on social media, good photos are essential. Take clear, bright pictures of your furniture from all sides. Add a short story about your project, like what materials you used and any hurdles you faced. This way, you can connect with others who love upcycling and maybe even inspire them to try it too.

Styling Tips for Display

  • Choose a prominent location for your upcycled furniture, such as a living room or entryway.
  • Consider the color scheme and style of the room when selecting accessories and decor to complement your upcycled piece.
  • Don’t be afraid to experiment with different layouts and arrangements to find the perfect fit for your space.

Creating a Personal Portfolio

A personal portfolio is a great way to document your upcycling journey and showcase your creations to others. You can include photos of your projects, along with descriptions of the materials and techniques used. This will not only help you track your progress but also provide a valuable resource for others who are interested in DIY ideas and upcycling furniture.

Project Materials Used Techniques Employed
Upcycled Coffee Table Reclaimed wood, metal legs Sanding, staining, sealing
Refurbished Armchair Velvet fabric, wooden frame Upholstery, staining, varnishing

Common Mistakes to Avoid When Upcycling

Upcycling furniture can be a fun project, but it’s easy to make mistakes. Knowing these common errors can help you avoid them. This way, you can make your old furniture look new again.

Preparation is key in upcycling. Proper cleaning, sanding, and priming are essential. Without these steps, your project might not turn out right. Also, picking the right adhesives is important to avoid a weak bond.

upcycling furniture

Don’t forget about safety. Upcycling involves power tools and chemicals. Wearing safety gear like gloves and goggles is important. It keeps you safe while you work.

Common mistakes to watch out for:

  • Skiping preparation steps
  • Overlooking adhesive choices
  • Ignoring safety precautions

By avoiding these mistakes, you can make beautiful furniture. Upcycling is a creative hobby that lets you breathe new life into old items. With the right steps, you can create something truly unique and lasting.

Inspiring Upcycling Projects to Try

Starting your upcycling journey is exciting. You’ll find projects that spark your creativity and fit your skill level. Upcycling turns old items into unique, functional pieces that show off your style. It’s a great way to reduce waste and create something special.

Beginners can start with simple projects like painting a side table or changing drawer pulls. These projects help you learn and build confidence. As you get better, you can try more complex projects, like reupholstering a chair or making something new from old items.

Simple Projects for Beginners

  • Painting a side table or shelf to give it a fresh new look
  • Replacing drawer pulls or knobs with unique hardware
  • Upcycling old jars or containers into planters or vases

Intermediate Upcycling Ideas

  • Reupholstering a chair or stool to give it a modern twist
  • Creating a new piece of furniture from multiple old ones, such as a headboard from an old door
  • Adding decorative trim or molding to a piece of furniture

Upcycling is all about trying new things and being creative. Don’t worry about making mistakes – they can lead to amazing results. With practice and patience, you’ll become more confident in your upcycling skills. You’ll create unique, functional pieces that show off your style.

Resources for Further Learning

If you want to keep up with furniture upcycling, there’s a lot to learn. You can find books, guides, online courses, and blogs full of tips and tricks. These resources will help you get better at upcycling and understand more about it.

Books and Guides

Begin with books like “The Complete Guide to Furniture Upcycling” by Barb Blair or “Furniture Makeovers” by Sherry and John Petersik. These guides have detailed steps, creative ideas, and expert advice. They’ll teach you how to turn old furniture into beautiful new pieces.

Online Courses

For hands-on learning, try online courses on furniture upcycling. Sites like Skillshare and Udemy have classes on painting, upholstery, and more. They’re taught by pros who know their stuff.

Blogs and YouTube Channels

Check out blogs and YouTube channels for upcycling inspiration. Sites like “Furniture Fashion” and “Salvage Sisters” show off amazing upcycled projects and share DIY tips. Channels like “Serena & Lily” and “The Rehab Life” give you visual ideas and step-by-step guides.

No matter if you’re new or have been upcycling for a while, these resources will help. They’ll give you the skills and ideas to make your furniture look new again.

FAQ

What is furniture upcycling?

Furniture upcycling is turning old furniture into new, unique pieces. It’s about giving old furniture a fresh look. This can make it look like something entirely new.

What are the benefits of upcycling old furniture?

Upcycling old furniture lets you be creative and save money. It also helps the environment by reducing waste. Plus, it’s a fun way to make something special.

How do I identify good candidates for upcycling?

Look for furniture that’s solid but needs a makeover. Check its material, condition, and design to see if it can be transformed. This will help you choose the right piece for your project.

What are the essential tools and materials needed for furniture upcycling?

You’ll need sandpaper, paint brushes, and power tools like drills. Don’t forget safety gear like gloves and goggles. Also, have different paints, stains, sealers, and new hardware on hand.

What are the important preparation steps before starting an upcycling project?

Start by cleaning the furniture well. Then, fix any damage and remove old finishes and hardware. This gets the surface ready for your makeover.

What are some popular painting techniques for upcycling furniture?

Try techniques like distressing, color washing, and ombre effects for interesting finishes. Choose the right paint for the look you want and for durability.

How can I add new hardware and accessories to upcycled furniture?

Pick unique hardware like handles and knobs to enhance your furniture. You can also add creative accessories like decorative legs or glass panels to make it truly yours.

What are some tips for sustainable upcycling practices?

Use eco-friendly materials like low-VOC paints and recycled fabrics. Try to waste less and use resources wisely. This makes your projects more sustainable.

How can I showcase my upcycled furniture creations?

Post your projects on social media and create a portfolio. Show off your pieces in your home. Join the online upcycling community to share your work and get inspired.
0 comment
0 FacebookTwitterPinterestEmail
DIY Coffee Table

Thinking about your skincare routine? You might want to add natural skincare to your daily life. Making your own skincare products can help you avoid harsh chemicals. You can use natural ingredients to create a routine that fits your skin perfectly.

DIY skincare lets you choose what goes on your skin. You pick ingredients that are good for you and your skin. It’s a great way to keep your skin healthy and glowing.

Exploring DIY skincare opens up a world of natural ingredients and methods. You can make your own cleansers, moisturizers, face masks, and scrubs. It’s a fun way to take care of your skin and see your natural beauty shine.

Introduction to Self-Made Skincare

Exploring skincare, you might have seen self-made products. These DIY items help you get healthy, glowing skin. You can make them with natural ingredients that fit your skin type and needs.

DIY skincare avoids harsh chemicals found in store-bought items. Instead, you use natural stuff like coconut oil, shea butter, and essential oils. Coconut oil, for example, is full of antioxidants and fatty acids, making it great for moisturizing.

What Are Self-Made Skincare Products?

Self-made skincare uses natural ingredients for a personalized routine. You can make everything from facial creams to body butters, scrubs, and masks. By picking the right ingredients, you can tackle issues like acne, dryness, or dark spots.

Benefits of Using DIY Products

DIY skincare has many perks. Some key benefits include:

  • Cost-effectiveness: Making your own products can save money compared to buying them.
  • Customization: DIY skincare lets you create products that match your skin’s needs.
  • Avoidance of harsh chemicals: Natural ingredients mean no harsh chemicals for your skin.

Common Ingredients in DIY Skincare

Some common DIY skincare ingredients are:

  • Coconut oil: It’s packed with antioxidants and fatty acids, making it a top moisturizer.
  • Shea butter: It deeply hydrates and nourishes, keeping your skin moist for a long time.
  • Essential oils: They offer benefits like reducing inflammation and helping you relax.

Essential Tools for DIY Skincare

Creating your own skincare products needs the right tools and equipment. DIY skincare tools like mixing bowls and measuring cups are key. They help make your products better and safer. Good skincare equipment, like blenders and mixers, ensures the right texture and consistency.

Storing ingredients properly is also important. Keep them in a cool, dry place, away from sunlight. Use airtight containers to prevent contamination. This keeps your ingredients fresh and effective in your skincare products.

Some essential tools for DIY skincare include:

  • Mixing bowls and measuring cups for accurate measurements
  • Blenders and mixers for creating smooth textures
  • Airtight containers for ingredient storage
  • Labels and markers for organizing your ingredients and products

Investing in the right DIY skincare tools and following storage tips helps you make quality products. Tailor them to your skin type and needs. Always follow safety guidelines when making your own skincare. Enjoy the benefits of natural and effective skincare.

Tool Purpose
Mixing bowls Measuring and mixing ingredients
Measuring cups Accurate measurements
Blenders Creating smooth textures
Airtight containers Ingredient storage

Creating Your DIY Skincare Routine

Starting your DIY skincare journey is exciting. It’s key to make a routine that fits your skin type and needs. A good DIY skincare routine can make your skin healthy and glowy. First, figure out your skin type, like normal, dry, oily, or combination. Then, think about what you want to fix, like acne, aging, or dark spots.

To start your DIY skincare routine, follow these steps for beginners:

  • Choose a gentle cleanser that matches your skin type
  • Exfoliate often to get rid of dead skin and clear pores
  • Use a toner to balance your skin’s pH and close pores
  • Apply a moisturizer or serum that targets your skin issues

Creating a DIY skincare routine is about finding the right products for you. This way, you can make a routine that makes your skin healthy and radiant.

Steps to Follow for Beginners

Beginners should start simple and add more as they go. Always test new products on a small area first. This way, you can slowly build a routine that works for you.

Tailoring Products to Your Skin Type

Knowing your skin type is important for a good DIY skincare routine. For dry skin, use hydrating products. If you have oily skin, look for products that control oil and shrink pores. Tailoring your products to your skin type helps fix specific issues and balances your skin.

Natural Ingredients to Consider

Using natural skincare ingredients is key when making your own products. Essential oils like tea tree and lavender offer many benefits. They soothe, calm, reduce inflammation, and even out your skin tone.

Natural exfoliants also play a big role. They help remove dead skin cells and improve texture. Sugar, salt, and coffee grounds are great examples. You can use them to make scrubs, masks, and cleansers.

Benefits of Essential Oils

Essential oils tackle various skin issues. They can help with acne, aging, hyperpigmentation, and dryness. You can mix them with other natural ingredients to make products tailored to your needs.

Natural Exfoliants and Their Benefits

Natural exfoliants remove dead skin cells and improve texture. They also reduce fine lines and wrinkles. You can find them in scrubs, masks, and cleansers. Here are some popular ones:

  • Sugar: A gentle exfoliant that removes dead skin cells and improves texture.
  • Salt: A natural exfoliant that reduces inflammation and improves texture.
  • Coffee grounds: A natural exfoliant that improves texture and reduces cellulite appearance.

DIY Facial Cleansers

Making your own facial cleansers can be a fun way to control your skincare. You can use simple ingredients to make recipes that fit your skin type. Choosing between oils or creams is a key decision for DIY cleansers.

Oils are good for dry or sensitive skin because they keep moisture in and calm irritation. Creams work better for oily skin by balancing pH and reducing oil. You can use coconut oil, olive oil, or jojoba oil for oils. Creams can be made with shea butter, cocoa butter, and almond milk.

Here are some easy DIY facial cleanser recipes:

  • Oil-based cleanser: Mix 1/2 cup of coconut oil with 1/4 cup of olive oil and 1 tablespoon of honey.
  • Cream-based cleanser: Mix 1/2 cup of shea butter with 1/4 cup of almond milk and 1 tablespoon of lemon juice.

Always test new skincare products, including DIY cleansers, on a small area first. This ensures you don’t have any bad reactions. With some trial and error, you can find the best DIY cleanser for your skin.

Skin Type Recommended Ingredients
Dry or sensitive skin Oils like coconut oil, olive oil, and jojoba oil
Oily skin Creams made with shea butter, cocoa butter, and almond milk

Homemade Moisturizers for Glowing Skin

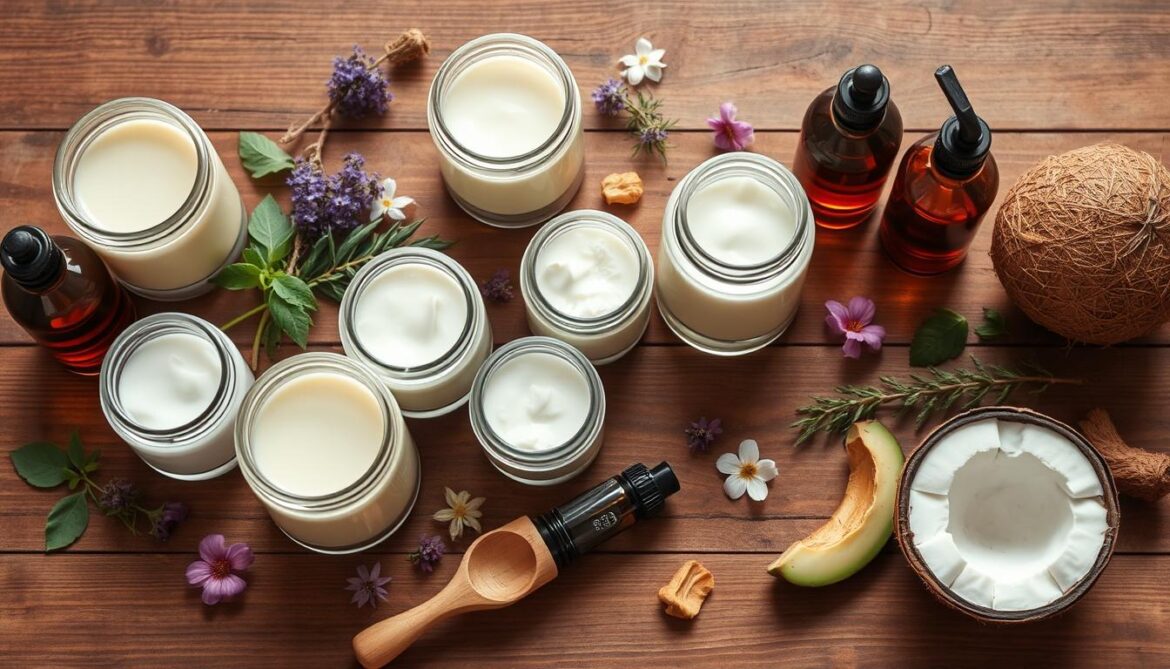
Making your own moisturizers can save money and give you glowing skin. You just need a few simple ingredients. These ingredients, like coconut oil, olive oil, and jojoba oil, are key for skin health.

Homemade moisturizers let you tailor them to your skin. For dry skin, add shea butter or honey. For oily skin, use grapeseed or sweet almond oil. Here’s how to pick the best base oils:

  • Coconut oil: rich in antioxidants and fatty acids, perfect for dry or sensitive skin
  • Olive oil: hydrating and nourishing, suitable for normal or combination skin
  • Jojoba oil: lightweight and non-greasy, ideal for oily skin

Using natural ingredients and customizing your moisturizers can lead to healthy, glowing skin. Always test your recipes first and tweak them for the best results. With a bit of effort, you can make your own moisturizers and enjoy natural skincare benefits.

Crafting Your Own Face Masks

Making your own DIY face masks is fun and rewarding. It lets you tailor your skincare to your needs. With simple ingredients, you can make masks for different skin types and concerns. For deep cleansing, use clay, charcoal, or tea tree oil to purify and detoxify.

For soothing masks, try honey, aloe vera, or green tea. These ingredients calm and hydrate your skin. Remember to choose ingredients based on your skin type and any allergies. This way, you can get benefits like deep cleansing and soothing.

Ingredients for Deep Cleansing

  • Clay: helps to purify and detoxify the skin
  • Charcoal: absorbs impurities and excess oil
  • Tea tree oil: has antibacterial and anti-inflammatory properties

Soothing Masks for Sensitive Skin

For sensitive skin, use gentle and nourishing ingredients. Honey, aloe vera, or green tea are good choices. They calm and hydrate your skin. Adding soothing essential oils like lavender or chamomile can also help.

By following these tips and using the right ingredients, you can make your own DIY face masks. Whether you want deep cleansing, soothing, or nourishing benefits, making your own masks is fun and effective. With a little creativity, you can find the perfect recipe for your skin.

Face Mask Type Ingredients Benefits
Deep Cleansing Clay, charcoal, tea tree oil Purifies and detoxifies the skin
Soothing Honey, aloe vera, green tea Calm and hydrate the skin

DIY Scrubs for Smooth Skin

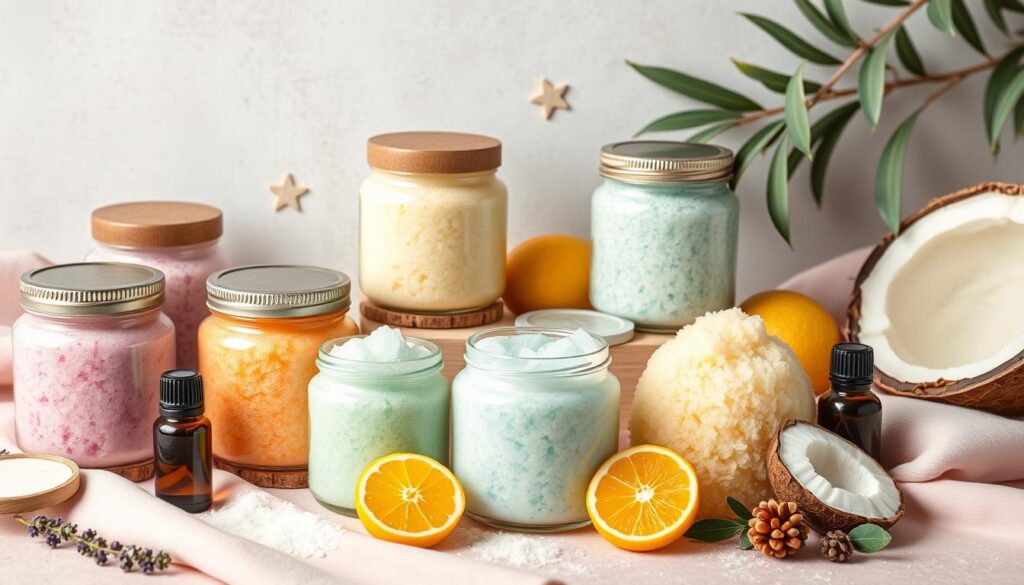
Exfoliating is key in any skincare routine. DIY scrubs are a great way to get smooth skin. You can pick from sugar or salt scrubs, each with its own benefits. Sugar scrubs are gentle for sensitive skin, while salt scrubs are better for rough skin.

When making your own scrubs, you can tailor them to your skin. Add lavender or tea tree oil to sugar scrubs for their calming effects. Salt scrubs can be made with coarse salt and olive oil for a deeper exfoliation.

Customizing Your Scrubs

To make the most of your DIY scrubs, customize them for your skin. Here are some tips:

  • For dry skin, use a sugar scrub with coconut oil and shea butter to moisturize and nourish your skin.
  • For oily skin, use a salt scrub with lemon juice and eucalyptus oil to balance and purify your skin.
  • For sensitive skin, use a gentle sugar scrub with aloe vera and chamomile oil to soothe and calm your skin.

Always test your DIY scrubs on a small area before using them on your face or body. This ensures you don’t have any bad reactions. With a bit of creativity and trial, you can make scrubs that make your skin smooth, soft, and radiant.

DIY sugar scrubs

Benefits of DIY Scrubs

DIY scrubs offer many benefits, including:

  • Cost-effective: Making your own scrubs can save you money compared to buying them.
  • Customizable: You can pick ingredients that fit your skin type and needs.
  • Natural: DIY scrubs use natural ingredients, avoiding harsh chemicals and artificial fragrances.
Scrubs Benefits Ingredients
Sugar Scrubs Gentle exfoliation, moisturizing Sugar, coconut oil, shea butter
Salt Scrubs Intense exfoliation, purifying Salt, olive oil, lemon juice

Using Herbs in Skincare

Herbal skincare is getting more popular because it’s natural and works well. Adding herbal ingredients to your skincare routine can bring many benefits. You can make your own herbal skincare products, like infused oils, at home. This way, you can tailor them to your skin type and needs.

Herbs like calendula, chamomile, and lavender are great for skincare. They soothe and calm the skin, perfect for sensitive skin. You can make herbal teas, creams, and salves with these herbs. For instance, you can make a soothing oil by infusing oils with calendula and chamomile. This oil is great as a facial moisturizer or body oil.

Popular Herbal Ingredients

  • Calendula: known for its anti-inflammatory and antimicrobial properties
  • Chamomile: soothes and calms the skin, reducing redness and irritation
  • Lavender: promotes relaxation and reduces stress, which can help to improve skin health

Infusing Oils with Herbs

To infuse oils with herbs, just add the herbs to a carrier oil like coconut or olive oil. Let it sit for a few weeks. This lets the herbs steep and release their goodness into the oil. Then, strain the oil and use it in your skincare products, like moisturizers and creams.

Using herbal skincare products, like infused oils, can greatly benefit your skin. They offer a natural way to keep your skin healthy. Herbal skincare is a wonderful alternative to traditional products.

Understanding pH Balance in Skincare

Skincare needs the right pH balance for health. The pH of your skin affects how well skincare products work. Using products with wrong pH can cause irritation.

To keep your skin healthy, knowing about pH balance is key. You should also learn how to test the pH of your DIY skincare products.

When making your own skincare, aim for a pH close to your skin’s natural 5.5. Use ingredients like aloe vera and green tea. They have a pH similar to your skin’s, making them good for your DIY products.

Importance of pH for Skin Health

Right pH balance is essential for skin health. It prevents irritation and other problems. If your skin’s pH is off, you might face dryness, itchiness, and redness.

Using products with a pH close to your skin’s natural pH helps keep your skin healthy and strong.

How to Test the pH of Your Products

Testing your DIY skincare’s pH is easy with pH strips or a pH meter. pH strips are simple and cheap, found at beauty stores. A pH meter is more accurate but pricier.

Here’s how to test your product’s pH:

  • Apply a small amount of your product to a pH strip or meter
  • Wait for the results to see your product’s pH level
  • Adjust your product’s pH as needed to get the right level

By following these steps and choosing the right ingredients, you can make DIY skincare products. These products will have a pH close to your skin’s natural pH. This helps keep your skin healthy and strong.

Product pH Level
Aloe vera 5.5
Green tea 5.5
Coconut oil 7.0

Preserving Your Self-Made Products

When you make your own skincare, using natural preservatives is key to keeping them fresh longer. This is important for keeping your products safe and of good quality. Self-made products can easily get contaminated or spoiled, but the right product preservation methods can help prevent this.

You can use natural preservatives like vitamin E oil, grapefruit seed extract, or rosemary essential oil. These not only make your products last longer but also offer extra benefits for your skin. For example, vitamin E oil fights off harmful free radicals, and grapefruit seed extract keeps bacteria away.

Natural Preservatives and Their Uses

  • Vitamin E oil: antioxidant properties
  • Grapefruit seed extract: antimicrobial effects
  • Rosemary essential oil: antioxidant and antimicrobial properties

Tips to Extend Shelf Life

To make your products last even longer, store them in a cool, dry spot away from sunlight. Always use clean tools when making or handling your products to avoid contamination. And don’t forget to label and date your products so you know how long they’ve been stored.

Eco-Friendly Packaging Ideas

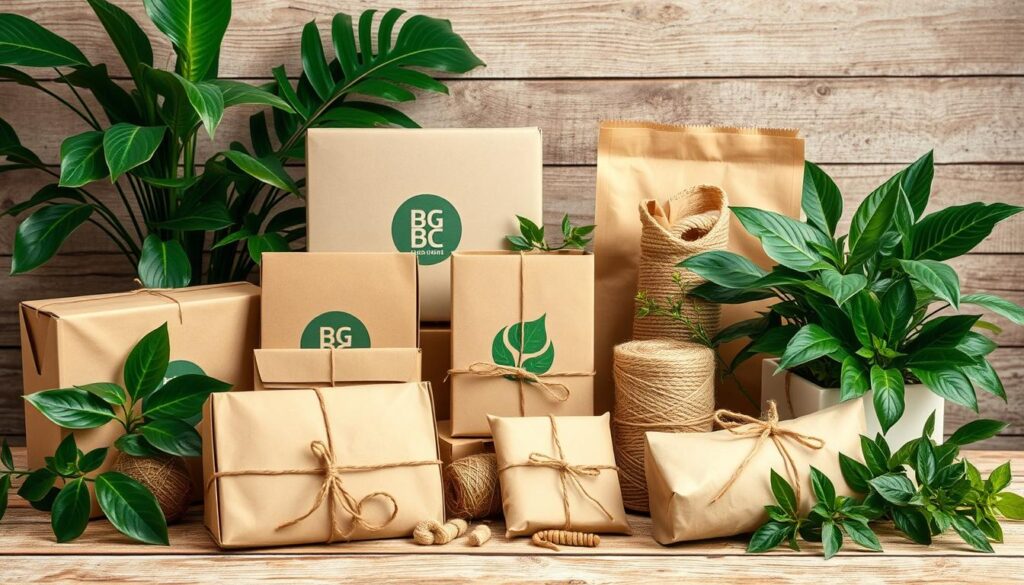
When making your own skincare products, think about the packaging. It should match your values of being green and eco-friendly. Use items you already have, like glass jars or paper bags, to cut down on waste. This not only helps the environment but also makes your products special.

Look for sustainable packaging that’s good for the planet. You can find biodegradable containers or refillable bottles. Buying in bulk is also a smart move to save money and reduce waste. Some great options include:

  • Glass jars with recyclable lids
  • Paper bags or cardboard boxes
  • Biodegradable containers made from plant-based materials
  • Refillable bottles or containers

Choosing eco-friendly packaging helps the planet and makes your skincare routine better. Always try to reuse and recycle your packaging. This helps keep our planet healthy.

eco-friendly packaging

When picking packaging, think about what your skincare products need. Pick materials that fit your values and goals. With a bit of creativity, you can make a packaging system that’s both beautiful and sustainable.

Packaging Material Eco-Friendliness Cost-Effectiveness
Glass Jars High Medium
Paper Bags High Low
Biodegradable Containers High High

Common Mistakes in DIY Skincare

Creating your own skincare products can be fun, but it’s key to know the common mistakes. These mistakes can make your products not work well or even harm your skin. To avoid these issues, always follow safety rules and choose the best ingredients. Troubleshooting is also important to fix any problems in your DIY skincare.

Some ingredients to steer clear of include harsh chemicals, artificial scents, and colors. These can irritate your skin, cause allergic reactions, and more. To fix any issues, first check your ingredients and how-to guides. Ensure you’re using the right amounts and following the steps correctly.

  • Contamination: Use clean tools and containers to keep your products safe from contamination.
  • Spoilage: Check when your ingredients expire and store your products right to avoid spoilage.
  • Allergic reactions: Always test a small area of skin before using your products on your face or body.

Knowing these common mistakes and how to avoid them helps you make safe and effective DIY skincare. This way, you can take care of your skin in a natural and nourishing way.

Testing DIY Products Safely

When making your own skincare products, it’s key to test them safely. DIY product testing helps make sure your products are gentle and work well. A good way to do this is by doing a patch test on a small skin area before using it on your face or body.

This simple test can show if you’re allergic to any ingredients in your DIY skincare. To do a patch test, put a small amount of the product on a hidden skin spot, like behind your ear or on your wrist. Wait 24-48 hours to see if any irritation or reaction happens.

If you see redness, itching, or swelling, it means you’re allergic to something in the product. You should stop using it and figure out which ingredient is causing the problem. Then, you can change your recipe to avoid that ingredient in the future.

Customizing Your DIY Skincare Products

To avoid allergic reactions, customize your DIY skincare to fit your skin type and needs. This might mean using different ingredients or changing how much of certain ingredients you use. By testing and customizing your DIY skincare, you can enjoy natural, effective skincare safely.

The Future of Self-Made Skincare Products

As you keep making your own skincare, it’s key to know the latest DIY skincare trends. The natural beauty world is always changing. New ingredients and methods are found all the time. By using natural beauty practices, you can make skincare that fits your skin’s needs.

Today’s DIY skincare trends include using natural things like essential oils, herbs, and plant extracts. These can be used to make many skincare items, like cleansers, moisturizers, face masks, and scrubs. Making self-made skincare with these natural items means your products are good for your skin and work well.

  • Follow natural beauty bloggers and influencers on social media
  • Attend workshops and classes on DIY skincare
  • Experiment with new ingredients and techniques

By embracing natural beauty and keeping up with DIY skincare trends, you can make self-made skincare that’s just right for you. Always think about your skin’s health and safety. Don’t be scared to try new things and mix up different ingredients and methods.

Skincare Product Natural Ingredients Benefits
Facial Cleanser Essential oils, herbs Gentle, effective, and customizable
Moisturizer Plant extracts, natural oils Hydrating, nourishing, and protective
Face Mask Clay, charcoal, and herbs Detoxifying, exfoliating, and rejuvenating

Conclusion: Embrace Your Homemade Skincare Journey

Discovering homemade skincare opens up a world of possibilities. You can nourish your skin with natural, customizable products. Your DIY skincare journey is just starting, so get ready to experiment and find the right mix for your skin.

The Joy of Customization

Creating your own skincare lets you tailor it to your liking. You can mix and match essential oils, plant extracts, and active ingredients. This way, you can make skincare that’s both personalized and effective for you.

Continuous Learning and Growth

Your skincare journey is a continuous learning experience. As you try new things, you’ll get to know your skin better. Don’t be afraid to try new recipes – the more you learn, the better your skincare routine will get.

Remember, success in homemade skincare comes from being open-minded and willing to try new things. Enjoy the journey, celebrate your successes, and don’t worry about setbacks. Your skin will appreciate the care and love you put into it.

FAQ

Q: What are self-made skincare products?

A: Self-made skincare products are homemade cosmetics. You make them with natural, high-quality ingredients.

Q: What are the benefits of using DIY skincare products?

A: DIY skincare products save money. They let you tailor products to your skin. And they avoid harsh chemicals found in many commercial products.

Q: What are some common ingredients used in DIY skincare?

A: Common DIY skincare ingredients include coconut oil and shea butter. Also, essential oils, honey, clay, and natural exfoliants like sugar and salt.

Q: What essential tools are needed for DIY skincare?

A: You’ll need mixing bowls, measuring cups, and storage containers. You might also need blenders, mixers, and melters for specific projects.

Q: How do I create a DIY skincare routine?

A: First, understand your skin type. Then, choose the right ingredients. Tailor products to your specific needs.

Q: What natural ingredients should I consider for my DIY skincare?

A: Consider essential oils, natural exfoliants, and herbs like calendula and chamomile. They’re great for DIY skincare.

Q: How do I make simple DIY facial cleansers?

A: Use recipes for different skin types. Choose oil-based or cream-based cleansers. Customize them to fit your needs.

Q: What are some top recipes for homemade moisturizers?

A: Top moisturizer recipes use coconut oil and shea butter. They provide hydration and nourishment for your skin.

Q: How do I craft my own face masks at home?

A: Use ingredients like clay, honey, and essential oils. Create masks for deep cleansing or soothing, tailored to your skin type and concerns.

Q: What’s the difference between sugar and salt scrubs?

A: Sugar scrubs are gentler. Salt scrubs offer a more invigorating exfoliation.

Q: How can I use herbs in my DIY skincare products?

A: Use herbs directly in products or infuse oils with them. This creates herbal-based skincare items.

Q: Why is pH balance important in skincare?

A: pH balance affects skin health and product effectiveness. Testing and adjusting pH is key.

Q: How can I preserve my self-made skincare products?

A: Use natural preservatives like vitamin E oil and grapefruit seed extract. Follow proper storage and handling techniques.

Q: What are some eco-friendly packaging ideas for my DIY skincare?

A: Use glass jars and explore sustainable packaging sources. This includes compostable containers.

Q: What are some common mistakes to avoid in DIY skincare?

A: Avoid using the wrong ingredients and improper storage. Also, don’t skip safety tests for allergic reactions.

Q: How do I safely test DIY skincare products?

A: Always start with a patch test for allergic reactions. Follow proper protocols if you experience any adverse effects.

Q: What are the latest trends in DIY skincare?

A: Trends include natural ingredients, customization, and holistic skincare. There’s a growing focus on organic practices.

0 comment
0 FacebookTwitterPinterestEmail