fbpx
Category:

Mixed

DIY Advent Calendar Ideas

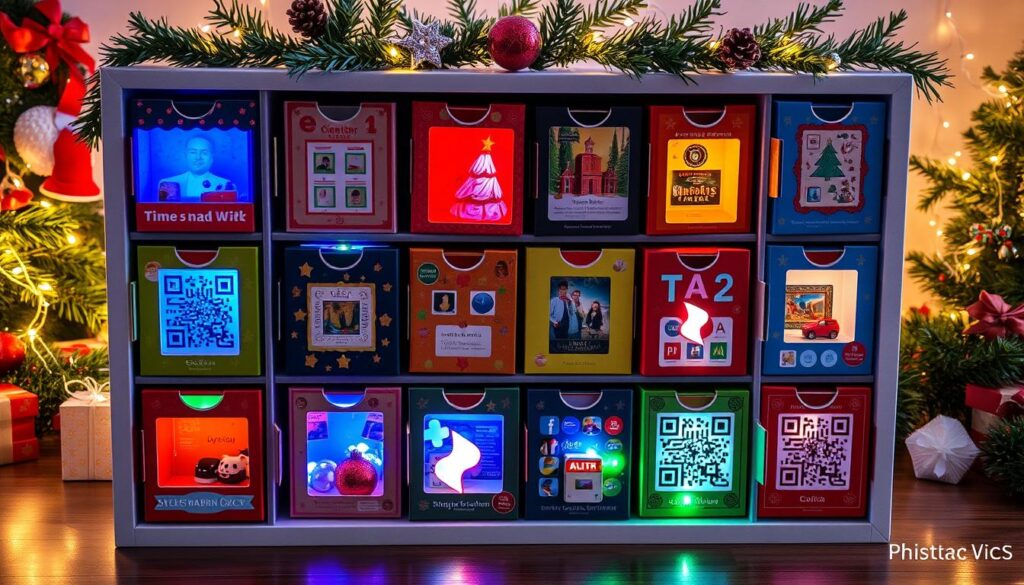
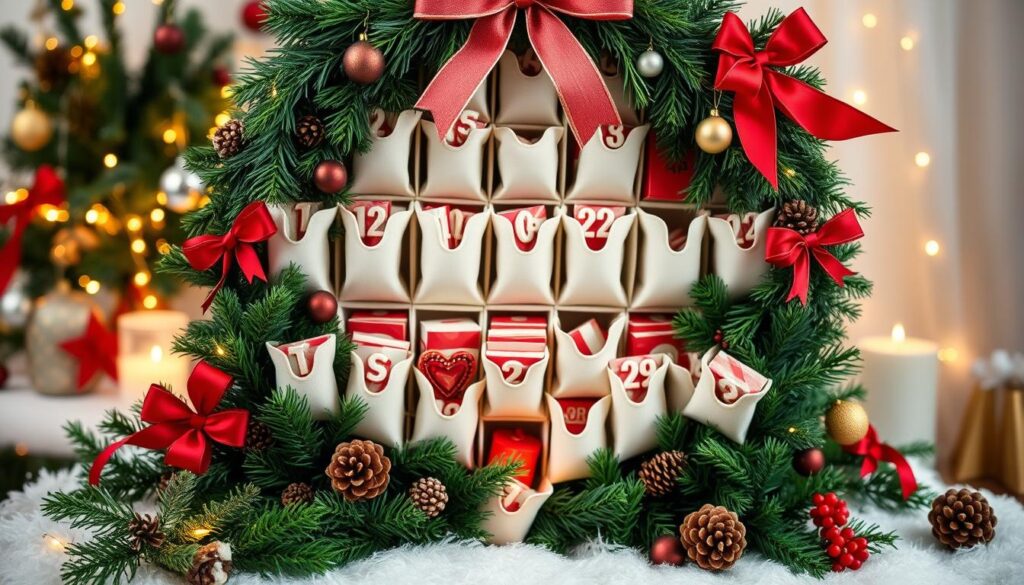
As the holiday season gets closer, you can make a special DIY advent calendar. There are over 20 DIY advent calendar ideas to pick from. They let you add a personal touch to your holiday, making it unique and memorable.

Imagine waking up to a new surprise every morning. It could be a small toy, chocolate, or a fun family activity. Advent calendars can make your home festive. And, you can make your own for just a few dollars.

Key Takeaways

  • You can create a personalized DIY advent calendar to make your Christmas celebration more special.
  • There are over 20 DIY advent calendar ideas available to choose from.
  • DIY advent calendars can be made for a fraction of the cost of store-bought calendars.
  • Advent calendar ideas can help you create a fun and festive atmosphere in your home.
  • You can include a variety of items in your DIY advent calendar, such as chocolates, small toys, and notes.
  • DIY advent calendars can be reused each year, emphasizing sustainability in holiday traditions.

Introduction to DIY Advent Calendars

Starting your DIY advent calendar is a great way to celebrate the holiday season. The Advent season lasts 25 days, from December 1st to Christmas. It’s a time for families to bond and enjoy the holiday spirit.

With DIY Christmas crafts, you can make a calendar that’s truly yours. You can add holiday inspiration from nature, books, or movies. The goal is to have fun and make it personal.

There are many DIY advent calendar ideas out there. You can make a themed calendar with envelopes or use Kraft boxes for a reusable one. Fill each day with something fun, like a scavenger hunt or a small gift. It’s all about showing off your family’s personality.

By adding DIY Christmas crafts and holiday inspiration, your advent calendar will be special. So, why not start making your own today?

Here are some benefits of making a DIY advent calendar:

  • Develops fine motor skills and aesthetic choices
  • Encourages family bonding and quality time
  • Allows for creativity and personalization
  • Can be reused year after year

With these benefits, you can make a DIY advent calendar that’s both fun and meaningful. Start planning and crafting your own today. Make this holiday season unforgettable with your DIY Christmas crafts and holiday inspiration.

Classic Paper Advent Calendar

To make a classic paper advent calendar, you need paper, glue, and scissors. It’s a fun DIY project that brings holiday cheer. It’s a great way to spend time with your family and make something beautiful.

Here’s what you’ll need:

  • Paper or cardstock
  • Glue or a glue stick
  • Scissors
  • Markers or colored pencils

You can also add decorations like stickers, stamps, or ribbons. This makes your calendar even more festive.

With these DIY Christmas crafts ideas, you can make a unique advent calendar. It will show off your style and personality. So, get creative and enjoy making your own classic paper advent calendar!

Wooden Advent Calendar

A wooden advent calendar is perfect for those who love a rustic and traditional look. You can make it unique and personal with DIY customization. It’s a cozy way to count down to Christmas, loved by many for holiday inspiration.

Wooden advent calendars are durable and last long. You can also make it your own with paint, stain, and decorations. If you’re into DIY Advent Calendar Ideas, start with a wooden one.

To begin, you’ll need wood, fasteners, and accessories. Pick from woods like Maple or Padauk and add your own paint and stains. With some creativity and DIY skills, you’ll have a beautiful advent calendar. It will be a special part of your holiday inspiration tradition.

Fabric Advent Calendar

Making a fabric advent calendar is a fun and creative way to count down to Christmas. You can use simple sewing and fun embellishments to make a beautiful calendar. It’s a great way to add to the holiday spirit.

When picking fabric, think about the theme and style you want. You can use one fabric or mix different patterns and colors for a unique look. Cotton, linen, and fleece are popular choices. Using fabric panels with pre-printed numbers can make creating your calendar easier.

Here are some tips for making a fabric advent calendar:

  • Use a standard fabric panel size of 24″ x 43″ (net size 19″ x 42″) for a classic look.
  • Cut out 24 rectangle pockets, each measuring 11 cm x 12 cm, to create a fun and interactive calendar.
  • Add a ½” seam allowance to enhance durability and prevent fraying.
  • Use a variety of fabrics and embellishments, such as ribbons and buttons, to add a personal touch to your calendar.

With these tips and a little creativity, you can make a beautiful fabric advent calendar. It will become a cherished holiday tradition. A fabric advent calendar is a great choice for a fun and easy DIY project or a unique advent calendar idea.

Fabric Requirement Quantity
Calico or background fabric 1 meter (minimum width of 124 cm)
Rectangle pockets 24 pieces (4 rectangles from each of 6 different prints)
Background fabric 2 pieces measuring 82 cm x 62 cm

Mason Jar Advent Calendar

Using mason jars for a DIY Advent Calendar is a unique and personalized idea. It’s one of many DIY Advent Calendar Ideas that can make your home festive. Fill each of the 24 mason jars with a different treat or activity. It’s a fun way to count down to Christmas.

Setting up a mason jar advent calendar is easy. You’ll need 24 mason jars, a scrapbook punch, and scrapbook paper. Fill each jar with candy, small toys, or notes with fun activities. It’s a great way to get into the holiday spirit with your family.

For creative labeling, use a marker to write the date on each jar. Or, use a label maker for a uniform look. Add decorative ribbon or twine around the lid for a festive touch. With a bit of creativity, you’ll have a beautiful mason jar advent calendar.

Here are some ideas for filling each jar:

  • Candy or small treats
  • Small toys or trinkets
  • Notes with fun activities to do each day
  • Small puzzles or games

These ideas are just a starting point. Customize your mason jar advent calendar to fit your family’s interests. Enjoy the holiday inspiration it brings.

Chocolate-filled Advent Calendar

Making a chocolate-filled advent calendar is a fun way to celebrate the holiday season. It’s a great idea to make the countdown to Christmas more exciting. Start by picking your favorite chocolates for each day. It’s a DIY Christmas crafts project that’s both enjoyable and personal.

Think about how you want to show off your chocolates. You could use a poster frame or create a unique design. The most important thing is to have fun and make it your own.

Selecting Your Favorite Chocolates

Pick a variety of chocolates for your advent calendar. Try different flavors or types of chocolate for each day.

Building the Calendar Frame

Use a poster frame or get creative with your design. Add decorations or use washi tape to make it festive.

Creative Ways to Surprise with Treats

Surprise your family with a new chocolate each day. You could also include other small treats or activities to make it more exciting.

Some popular advent calendar ideas include using reusable calendars or making your own DIY Christmas crafts. Whatever you choose, make sure it’s fun and enjoyable for everyone involved.

Day Chocolate Treat
1 Milk Chocolate Cookie
2 Dark Chocolate Caramel
3 White Chocolate Nut

Activity-based Advent Calendar

Creating an activity-based advent calendar is a fun way to make the holiday season more interactive. With DIY Advent Calendar Ideas, you can make a calendar that shows off your style. It’s great for families who want to spend quality time together and make memories.

You can include fun family activities like baking Christmas cookies and making decorations. You can also add acts of kindness, like writing cards to care homes and helping in the community. The activities should be simple and fun for everyone to enjoy.

  • Baking Christmas cookies and mince pies
  • Making decorations, such as wrapping paper and ornaments
  • Going on outdoor adventures, like torch walks and scavenger hunts
  • Participating in community service projects, like donating to food banks and supporting refugees

The goal is to fill your calendar with holiday inspiration and fun activities. With a bit of creativity, your advent calendar will become a beloved tradition for years.

Nature-inspired Advent Calendar

Making a nature-inspired advent calendar adds a rustic touch to your holiday decor. You can use advent calendar ideas and DIY Christmas crafts to create a beautiful calendar. Start by collecting natural materials like sticks, rocks, and pinecones.

To build your advent calendar, you’ll need a few items. You’ll need a strong stick, 2 meters of rope, and 25 small kraft paper bags. You can also use home supplies like ribbons and glue. Each ribbon piece should be about 30 cm long.

Collected Natural Materials

Using natural materials in your crafts is eco-friendly. You can use a stick from a Grevillia tree or other natural items. The project might need some practice and adjustments, like discarding a few bags.

Displaying Your Calendar

Your advent calendar is for 25 days before Christmas. It’s a common design in DIY advent projects. Hang it in a place like a wall or mantel. It’s designed to be fun for kids, who start to understand it at age two.

Eco-friendly Fillers

The Nature Play Advent Calendar is an eco-friendly choice. It has 28 nature activities, 12 cards, and 2 envelope sets. It encourages nature play over material gifts. The calendar costs $1.99, making it affordable and green.

Calendar Feature Description
Nature Activities 28 Christmas-themed nature activities
Make-your-own Cards 12 cards for customizing each year
Envelopes 2 different sets of envelopes for packaging activities
Cost $1.99

Countdown to Christmas with Books

Get ready for the holiday season with a unique DIY Advent Calendar Ideas. This book-themed twist adds joy and excitement to your countdown. Choose 24 Christmas books for kids, one for each day, and wrap them up for a fun surprise.

Set up a cozy display with the wrapped books in a basket or on a shelf. Add festive touches like holly, mistletoe, or fairy lights. Each night, unwrap a book and read it together, enjoying quality time.

Here are some wrapping ideas for each book:

  • Use colorful paper or fabric to match your holiday decor
  • Add a gift tag or a ribbon to make it look like a present
  • Include a personal message or a note with each book

Creating a book-themed DIY Advent Calendar Ideas makes the holiday season special. Start planning and get ready to count down to Christmas with books!

Book Title Author Age Group
The Night Before Christmas Clement Clarke Moore 4-8
Polar Express Chris Van Allsburg 4-8
How the Grinch Stole Christmas Dr. Seuss 4-8

Map of Christmas Around the World

Exploring advent calendar ideas can lead to a unique and educational project. A map-themed advent calendar is a fun way to learn about Christmas traditions globally. With some research and creativity, you can create a map that shows various countries and their holiday customs.

Start by researching different countries and their Christmas celebrations. For instance, in Germany, Christmas markets are a big part of the holiday. In Italy, the Feast of the Seven Fishes is a traditional Christmas Eve dinner. Use this info to make a map that highlights these traditions and includes fun facts and trivia.

Designing the Map Display

To make a visually appealing map display, use a large piece of cardboard or foam core. Draw a world map on it. Then, use push pins or stickers to mark countries and add notes or pictures to highlight their Christmas traditions. This is a fun and interactive way to learn about different cultures and holiday customs.

Educational Aspects for Kids

A map-themed advent calendar is great for kids’ education. Include fun and interactive activities, like quizzes or games, to teach them about different countries and their Christmas traditions. You can also include DIY Christmas crafts, such as making traditional holiday decorations or cooking traditional holiday foods.

Some advent calendar ideas for a map-themed calendar include:

  • Creating a scavenger hunt with clues and riddles that lead to different countries on the map
  • Including traditional holiday recipes from around the world
  • Adding fun facts and trivia about different countries and their Christmas customs

By creating a map-themed advent calendar, you can make learning about Christmas traditions around the world fun and engaging. With a little creativity and research, you can design a unique and educational advent calendar that includes DIY Christmas crafts and fun activities for kids.

Country Christmas Tradition
Germany Christmas markets
Italy Feast of the Seven Fishes
United States Santa Claus and gift-giving

Upcycled Advent Calendar

When looking into DIY Advent Calendar Ideas, think about making an upcycled advent calendar. This eco-friendly choice lets you use old items, cutting down on waste. It also adds a personal touch to your holiday decor.

Start by gathering materials to reuse. Look for things like old jars, cardboard tubes, or fabric scraps. You can also use items like particle-board wreath forms, yarn, and embroidery floss for decoration. For a rustic feel, try twine, pinecones, or dried flowers.

Fun Decoration Ideas

To make your upcycled advent calendar stand out, add some fun decorations. Use paint, markers, or stickers to add color and patterns. You could also choose a theme, like a winter wonderland or a festive holiday village. This way, you can create a calendar that’s truly unique and reflects your style.

Benefits of Upcycling

Upcycling your advent calendar has many benefits. It helps reduce waste and promotes sustainability. By using materials you already have, you create something special and eco-friendly. Plus, it encourages others to be creative and reduce waste too.

Countdown Wreath Advent Calendar

To make a countdown wreath advent calendar, you’ll need a few things. You’ll need 24 wooden clothespins, a solid cardboard base, and 24 candy treats. The clothespins should be 0.4 inches wide and 2.9 to 3.3 inches long. Use a hot glue gun to stick the clothespins to the cardboard base.

This advent calendar idea lets you pick different treats, like herbal tea bags or small toys. You can also use double-sided tape for quick assembly, without waiting for it to dry. To count down, add numbers to each clothespin with a marker or stickers.

advent calendar ideas

Other DIY Christmas crafts ideas include using a muffin tin or a fabric advent calendar. These projects are quick and fun, helping you get into the holiday mood. With some creativity, you can make a unique advent calendar that shows off your style.

Here are some tips for your countdown wreath advent calendar:

  • Use different materials, like felt, paper, and wood, to make it interesting.
  • Choose eco-friendly materials, like recycled cardboard or fabric scraps, to help the environment.
  • Add your own special touches, like photos or mementos, to make it personal.

Popup Advent Calendar

To make a unique popup advent calendar, start by designing the box. This is a fun way to show your holiday inspiration and style. You can use paper, cardboard, or wood for the box.

Choosing what to put in your advent calendar is easy. You can pick small toys, candies, or DIY Advent Calendar Ideas like puzzles. Make sure it’s fun and interactive for each day leading up to Christmas.

Crafting the Box Design

To design the box, you’ll need glue, scissors, and a ruler. You can also add decorations like ribbons or bows for a festive look.

Items to Include

Here are some ideas for your advent calendar:

  • Small toys or trinkets
  • Candies or chocolates
  • Puzzles or games
  • DIY crafts or activities

Tips for Making it Interactive

To make your advent calendar fun, add surprises or hidden spots. You can also include games, challenges, or fun facts. This will make each day exciting.

  • Surprises or hidden compartments
  • Games or challenges
  • Fun facts or trivia

Photo Advent Calendar

Making a photo advent calendar is a wonderful way to add a personal touch to the holiday season. It’s a chance to show off your style and personality with advent calendar ideas and DIY Christmas crafts. You can make a unique photo advent calendar that stands out.

First, pick your favorite family photos. This might be tough because you want to choose photos that really capture your family’s memories. Mix old and new photos to add a sense of tradition and nostalgia.

After picking your photos, think about how to display them. You could use a traditional advent calendar frame or get creative with something like fairy lights or a decorative ladder. Here are some ideas to get you started:

  • Use a photo advent calendar kit, which usually includes a frame and 24 small pockets to hold your photos.
  • Create a DIY photo display using a piece of cardboard or a wooden board, and attach the photos using clips or glue.
  • Hang the photos on a wall or a door using a string or a ribbon, creating a festive and eye-catching display.

Don’t forget to add personal messages for each day. This makes the experience even more special and meaningful. With a bit of creativity and effort, you can make a beautiful and personalized photo advent calendar. It will become a cherished family tradition.

Themed Advent Calendar Ideas

Thinking about making a DIY Advent Calendar? You might want to pick a theme to make it more fun and personal. With DIY Advent Calendar Ideas, you can turn your holiday countdown into a special event. Themed calendars let you add holiday inspiration to your daily life, making Christmas more exciting.

Popular themes include winter wonderland, Christmas movies, or favorite holiday books. You can fill your calendar with items like hot cocoa mix, Christmas cookies, or small toys that match the theme. For instance, a winter wonderland theme could have fillers like snowflake ornaments, pinecones, or small snowmen.

Here are some unique calendar ideas:

  • Create a movie-themed advent calendar with 24 Christmas movies to watch leading up to Christmas
  • Make a book-themed advent calendar with 24 holiday books to read together as a family
  • Design a winter wonderland-themed advent calendar with fillers like snowflakes, pinecones, and small snowmen
Theme Fillers Activities
Winter Wonderland Snowflakes, pinecones, small snowmen Make snowflakes, go sledding, have a snowball fight
Christmas Movies Hot cocoa mix, popcorn, Christmas movie tickets Watch a Christmas movie, make hot cocoa, go to a movie theater

Incorporating Technology in Advent Calendars

Exploring advent calendar ideas? Think about adding technology to your DIY Christmas crafts. Digital platforms now let you make interactive, personalized advent calendars. They blend old traditions with new tech.

Making a tech-themed advent calendar is simple. Pick a theme that matches your interests. For example, a book lover can make a calendar with daily book tips or quotes.

App-based Options

There are many apps for creating your own advent calendar. These apps offer daily reminders, games, and rewards. You can pick from various themes and designs to match your style.

Interactive Features

Interactive features can make your advent calendar more fun. Add daily challenges, quizzes, or puzzles for rewards. It’s a great way to get the whole family involved and excited.

Hybrid Ideas Combining Tradition and Tech

Want to mix old and new? Try a hybrid advent calendar. Use a physical calendar and add digital touches like QR codes or augmented reality. It’s a unique and engaging experience.

advent calendar ideas

  • Creating a digital scavenger hunt with clues and challenges
  • Using social media to share daily advent calendar updates and surprises
  • Incorporating virtual reality or augmented reality experiences
Advent Calendar Type Features Benefits
Traditional Physical calendar with 24 doors or windows Encourages family bonding and tradition
Digital App-based or online calendar with interactive features Offers flexibility and customization options
Hybrid Combines physical and digital elements Provides a unique and engaging experience

Conclusion and Encouragement

Creating a unique DIY advent calendar is full of possibilities. You can choose from many designs, like paper, wood, or fabric. Let your creativity shine and make a calendar that shows your style.

Explore different materials and techniques that catch your eye. Making your advent calendar can be as fun as opening it. Get your family involved to create a special tradition.

Start your DIY advent calendar journey with excitement. The holidays are for making memories. Your customized calendar will be a treasured keepsake for years. With creativity and the right inspiration, you’ll have a holiday experience to remember.

FAQ

What are some creative DIY advent calendar ideas?

This article shares 20 DIY advent calendar ideas. You can make classic paper calendars or try wooden, fabric, mason jar, and chocolate-filled ones. There are also activity-based, nature-inspired, book-themed, and tech-themed options.

Why are DIY advent calendars important for creating holiday traditions?

DIY advent calendars help you start a special holiday tradition. They let you pick a theme that fits your style. This makes the holiday season more joyful for your family.

How can I make a classic paper advent calendar?

To make a paper advent calendar, you need card stock, decorative paper, and glue or tape. The article guides you through the process and offers decoration ideas.

What are the benefits of a wooden advent calendar?

Wooden advent calendars have a rustic charm. The article shows how to customize and decorate your wooden calendar. You can paint or stain it to make it unique.

How can I create a fabric advent calendar?

For a fabric advent calendar, choose the right fabric and use simple sewing. Add embellishments for a cozy holiday look.

What are some ideas for a mason jar advent calendar?

A mason jar advent calendar is creative and fun. Fill each jar with treats or activities. Use fun labels to make it personal.

How can I make a chocolate-filled advent calendar?

To make a chocolate advent calendar, pick your favorite chocolates. Build a frame and surprise your family with treats each day.

What are some ideas for an activity-based advent calendar?

An activity advent calendar has fun family activities for each day. The article gives ideas for both the calendar and activities.

How can I make a nature-inspired advent calendar?

A nature advent calendar uses natural materials and eco-friendly fillers. It’s a beautiful and sustainable holiday display.

What are some tips for a book-themed advent calendar?

For a book advent calendar, choose the right books and create a cozy display. Use creative wrapping for each book.

0 comment
0 FacebookTwitterPinterestEmail
Tramp Stamp Tattoo

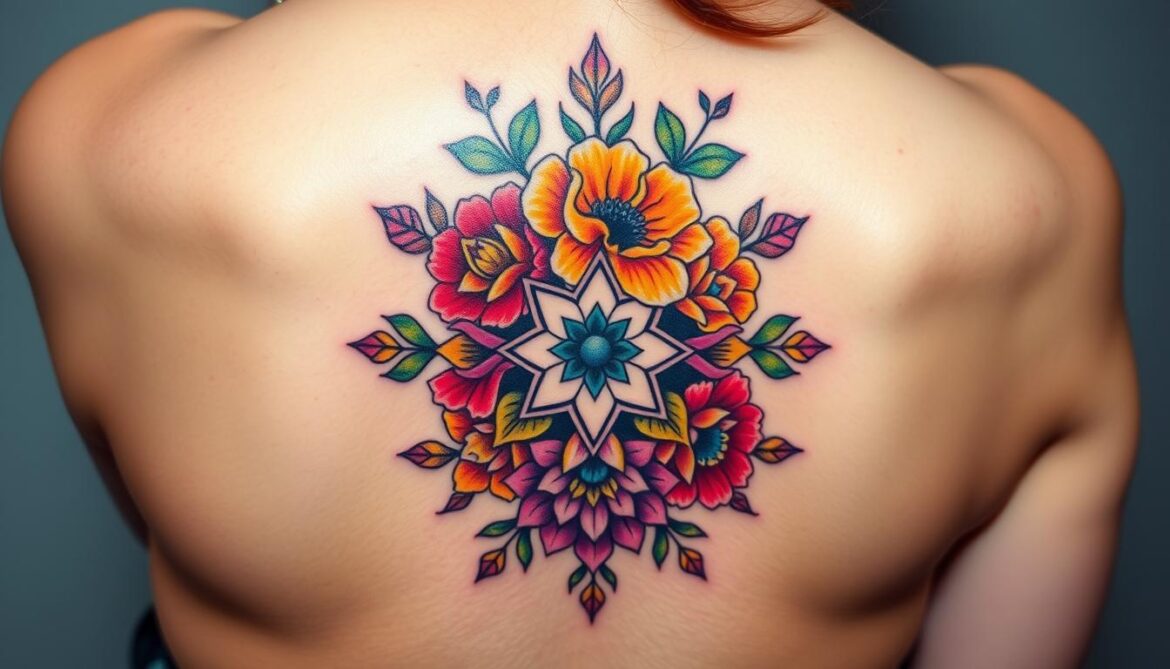
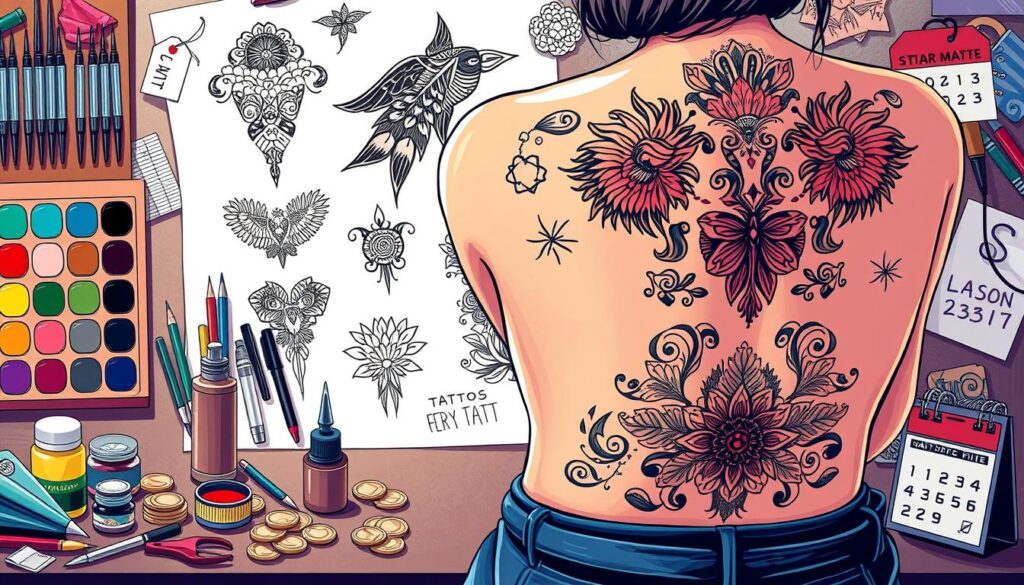
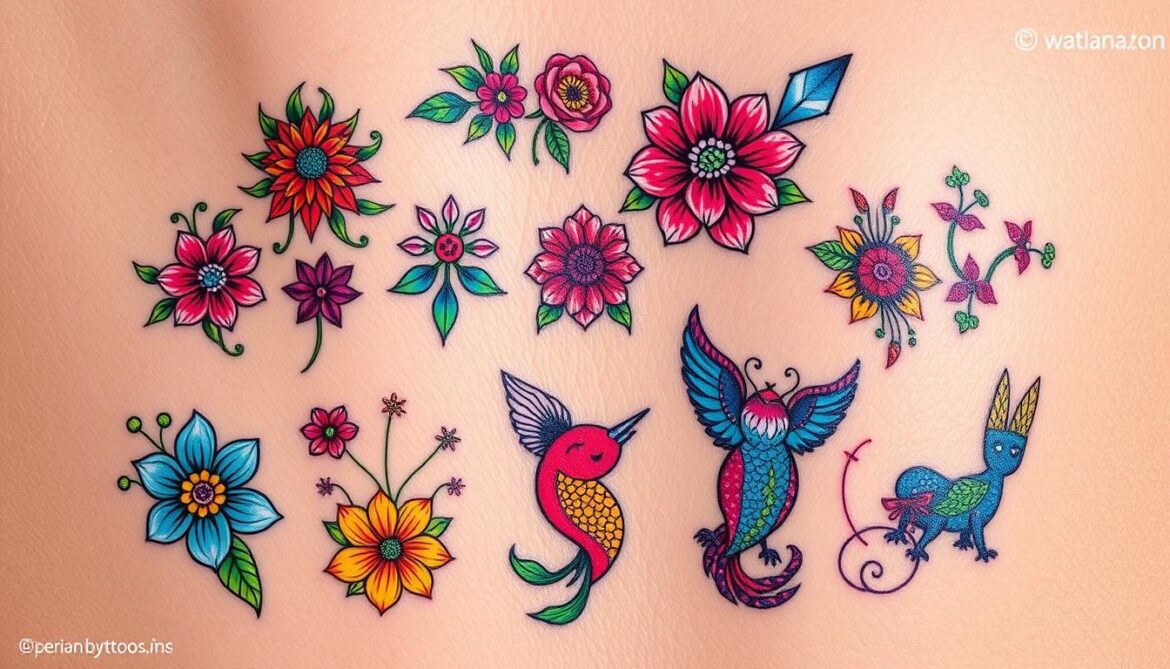
Thinking about a lower back tattoo? You might wonder if this style is here to stay. Google searches for tramp stamp designs have jumped by 140%. This shows the trend is back in a big way.

Many people aged 19 to 27 are choosing delicate fine line tattoos. Tattoo studios are seeing about 10 designs a week for this style.

Lower-back tattoos are making a comeback, thanks to the return of ’90s low-rise jeans. These tattoos are now softer, smaller, and more detailed. They’re perfect for those wanting a unique and personal piece of art.

Key Takeaways

  • The popularity of lower back tattoos is on the rise, with a 140% increase in Google searches for tramp stamp designs.
  • Individuals aged 19 to 27 are driving the trend, with many opting for delicate fine line tattoos.
  • The resurgence of lower-back tattoos coincides with the revival of ’90s low-rise jeans.
  • Lower-back tattoos are being reimagined with softer, smaller, and more intricate designs.
  • A survey found that 65% of Gen Z respondents have considered getting or have already gotten a tramp stamp tattoo.
  • The trend is not without controversy, with 53% of men and 41% of women viewing tramp stamps negatively as of 2023.

Understanding Tramp Stamp Tattoos

Tramp stamp tattoos have a long history, starting in ancient Egypt. They were seen as a symbol of protection and a tribute to the deity Bes. The term ‘tramp stamp’ became popular in the late 1990s and early 2000s. It was linked to lower back tattoos, mainly among young women.

These tattoos have become more accepted over time. They now show a person’s individuality and style. As you look into tattoo designs, you’ll see tramp stamp tattoos hold deep cultural meaning.

The view on lower back tattoos has changed. What was once seen as taboo is now seen as fashionable. This change is due to the cultural importance of tattoos. They now come in many styles, from simple to detailed.

Some common designs include:

  • Floral patterns, such as roses and lotuses
  • Geometric shapes, like triangles and circles
  • Mythological and animal motifs, symbolizing strength and beauty

When thinking about a tramp stamp tattoo, it’s important to know their history. From ancient rituals to today’s self-expression, these tattoos have evolved. With the rise of low-rise jeans and crop tops, they’re becoming popular again, mainly among Gen Z.

In recent years, more people want lower back tattoos. They look for designs that break old stereotypes and show strength and identity. Tattoo artists are now creating detailed ‘Lumbar Masterpieces’ that fit each person’s body. Remember, tramp stamp tattoos are more than a trend. They show your cultural significance and personal style.

Tattoo Style Popularity Cultural Significance
Minimalist High Reflection of personal style and simplicity
Floral Medium Symbolism of growth and beauty
Geometric Low Representation of strength and complexity

The Popularity Surge of Tramp Stamp Tattoos

Tramp stamp tattoos are back in style, thanks to Gen Z’s love for 90s and early 2000s fashion. This trend is fueled by celebrity influence and social media. Young people are getting small, detailed tattoos on their lower backs, inspired by their childhood heroes.

After a decade of decline, lower back tattoos are gaining popularity again. Young adults are less likely to see them as trashy, with 60% not sharing that view. Over 30% of 18- to 25-year-olds are now considering getting a tramp stamp tattoo.

Social media, like TikTok and Pinterest, is driving tattoo trends. The term “aesthetic tramp stamp” is trending on Pinterest. TikTok users, such as Callie Wilson, are also promoting body art and celebrity influence to their fans.

Tattoo Trend Popularity
Tramp Stamp Tattoos Increasing
Delicate Designs Popular among Gen Z
Social Media Influence 40% of individuals encouraged to get a tattoo

Reasons People Choose Tramp Stamp Tattoos

Getting a lower back tattoo, or tramp stamp, is a big decision. Many choose it for personal expression. It’s a way to show off their unique style and personality.

Others pick a tramp stamp for its aesthetic appeal. The lower back is a spot where tattoos can be seen. A well-done tattoo can make a beautiful addition to one’s body. It can also mark a special event or feeling.

About 60% of women with tramp stamps say pop culture, like celebrity trends in the early 2000s, influenced their choice. This shows how big of a role society and culture play in tattoo decisions.

When it comes to designs, people often go for custom pieces that show their individuality. These can include:

  • Floral patterns
  • Geometric shapes
  • Text and quotes

Choosing a tramp stamp tattoo is a personal choice. It’s important to think about the implications and consequences. By understanding why people get these tattoos, you can make a choice that truly reflects your personality and style.

Tattoo Design Popularity
Floral patterns High
Geometric shapes Moderate
Text and quotes Low

Common Designs and Symbols

People often choose unique symbols for tattoos that show their personality. Tramp stamp tattoos are no exception. Floral patterns are a favorite, blending delicacy with boldness. They can be simple or detailed, adding elegance to the lower back.

Other favorites include geometric shapes, text, and quotes. These designs can share a message or personal feeling. They’re perfect for adding depth to your tattoo. Some also choose tattoo designs with natural elements like leaves or flowers for a standout look.

Here are some popular tattoo design options for tramp stamp tattoos:

  • Floral patterns, including roses and lotuses
  • Geometric shapes, such as triangles and circles
  • Text and quotes, such as inspirational phrases or lyrics
  • Natural elements, such as leaves and flowers

Your tattoo design should reflect your style and preferences. With many choices, you can find a design that shows your personality and adds elegance to your lower back.

Tattoo Design Description
Floral Patterns A delicate and elegant design that incorporates flowers and leaves
Geometric Shapes A modern and striking design that incorporates shapes and lines
Text and Quotes A meaningful and inspirational design that incorporates words and phrases

Pain and Placement Considerations

Thinking about the pain and placement of a tramp stamp tattoo is key. The lower back is sensitive, making tattoos there painful. Research shows 25% of people find it very uncomfortable.

Areas with more nerve endings, like the lower back, feel pain more. This can make discomfort up to 40% worse than in areas with fewer nerves.

When choosing body art, pain matters a lot. The size and detail of the design affect how much it hurts. Bigger, more detailed tattoos can be more painful because they cover broader areas.

Smaller tattoos, though, might be less painful. They fit well on smaller spots like the wrist, ankle, or behind the ear.

Aftercare is crucial for a smooth tattoo experience. It helps prevent infections and aids in healing. Always follow the aftercare tips from your tattoo artist to avoid problems.

With the right care and thought about pain and placement, you can enjoy your tattoo. This way, you’ll minimize discomfort and risks.

Pain Level Area of the Body
High Lower back, ribs, feet, and hands
Medium Inner arm, wrist, and neck
Low Outer shoulder, upper back, thighs, and calves

Cultural Impact on Women

The lower back tattoo, often called a “tramp stamp,” has greatly influenced women’s culture. It’s linked to negative views and wrong ideas about women’s sexuality. The term “tramp stamp” itself is mean, suggesting women with these tattoos are loose or easy.

But, many women get lower back tattoos as a way to feel powerful and express themselves. In some cultures, the lower back is seen as sacred, tied to feminine power and spirituality. For instance, in Hinduism, the base of the spine is linked to kundalini, a symbol of feminine energy.

Some reasons women get lower back tattoos include:

  • Personal expression and empowerment
  • Celebration of their comfort and connection to their own skin
  • Spiritual or cultural significance

Even though the term “tramp stamp” has bad meanings, many women are taking back the lower back tattoo. It’s now seen as a sign of femininity and strength. By getting a lower back tattoo, women are taking charge of their bodies and fighting against unfair expectations. lower back tattoo

Alternatives to Tramp Stamp Tattoos

Looking into body art? You might want to check out designs and spots other than the usual tramp stamp. Places like the ribcage, shoulder, or behind the ear are great options.

Some folks choose minimalist or geometric patterns for their tattoos. These designs can be as eye-catching as a traditional tramp stamp. You can put them in many spots on your body, making your tattoo truly yours.

Lately, more people are into unique designs and spots. This desire for individuality has brought about a variety of new designs. Some examples include:

  • Small, delicate patterns on the wrist or ankle
  • Bold, geometric shapes on the shoulder or back
  • Intricate, detailed designs on the ribcage or hip

These new designs and spots offer a fresh spin on traditional tattoos. They let you show off your personality and style. Whether you like something simple or something big and bold, there’s a lot to choose from.

Design Type Placement Description
Minimalist pattern Wrist or ankle A small, delicate design that adds a touch of elegance to the body
Geometric shape Shoulder or back A bold, eye-catching design that makes a statement
Intricate design Ribcage or hip A detailed, complex design that showcases artistic skill and creativity

How to Choose a Tattoo Artist

Getting a tattoo, like a tramp stamp, requires careful choosing an artist. You want your tattoo to be unique, safe, and of high quality. Begin by researching local tattoo parlors and reading reviews from others.

A skilled tattoo artist will have a portfolio full of their work, including tattoo designs. Make sure they have experience with the tattoo you want. It’s okay to ask questions. Some good questions are:

  • What is your experience with tramp stamp tattoos?
  • Can I see your portfolio?
  • What is your policy on touch-ups and aftercare?

By doing your research and choosing an artist who is reputable and experienced, you’ll get a beautiful, safe, and lasting tattoo. Also, think about the cost, time needed, and aftercare.

Finding the right artist is a personal choice. It’s important to pick someone who gets your vision and can make it real. With patience and the right artist, your tramp stamp tattoo will be something you’ll love for years.

Tattoo Type Average Cost Time Required
Tramp Stamp $650-$750 4-6 hours

The Cost of Tramp Stamp Tattoos

Thinking about a lower back tattoo? The cost is a big factor. Prices for tramp stamp tattoos change based on design size and detail. Small ones might cost $50 to $150. But, bigger, more detailed designs can be $1,500 to $6,000 or more.

Several things affect the price of a tramp stamp tattoo:

  • Size and complexity of the design
  • Where you get it, with cities and tourist spots often being pricier
  • The artist’s skill and fame, with pros charging more
  • Costs for ink and needles

Here’s a rough guide to help you plan your tattoo budget:

Tattoo Size Estimated Cost
Small $50-$150
Medium $200-$800
Large $1,000-$5,000 or more

lower back tattoo cost considerations

Tattoo Removal Options

Some people might want to remove their tattoos for various reasons. This could be due to regret or not liking the design anymore. There are now many ways to remove tattoos, giving people choices.

Laser removal is a common method. It uses light beams to break down the tattoo ink. This process might need several sessions, spaced weeks apart. The cost can be between $150 and $500 per session, depending on the tattoo’s size and detail.

Other options include surgical excision, dermabrasion, and chemical peels. These methods are more invasive and can lead to scarring or other issues. It’s important to talk to a professional to find the best option for you.

Before starting any removal process, think about the risks and side effects. These can include skin color changes. Also, the cost can be quite high, sometimes up to ten times the tattoo’s original price.

It’s wise to research and compare the different removal methods. Look at how effective they are, their safety, and the cost. This way, you can choose what’s best for you and your body art.

Removal Method Effectiveness Risks and Side Effects Cost
Laser Removal High Skin hyperpigmentation or hypopigmentation $150-$500 per session
Surgical Excision High Scarring, infection, and other complications Varies depending on the size and complexity of the tattoo
Dermabrasion Moderate Skin irritation, scarring, and other complications Varies depending on the size and complexity of the tattoo

The Role of Trends in Tattoo Popularity

Thinking about getting a tattoo? It’s key to know how trends play a part. The tattoo world keeps changing, with new tattoo designs and styles popping up every year. Trends greatly shape what tattoos are popular.

The trend cycle is how certain tattoos become hits, then fade away. This happens due to stars, social media, and cultural shifts.

Cycle of Trends

Grasping the trend cycle helps you choose wisely. For instance, picking a trendy tattoo might not be timeless. Yet, a classic design could come back into style later.

Current Trends vs. Classic Designs

Right now, tattoo designs like minimalistic and fine line tattoos are big. These appeal to the younger crowd, who like smaller, detailed tattoos. Older folks still go for timeless looks like tribal and barbed wire tattoos.

Here are some hot tattoo designs today:

  • Minimalistic designs
  • Fine line tattoos
  • Micro tattoos
  • Off-center placement
  • Whimsical and cutesy designs

Personal Experiences with Tramp Stamp Tattoos

People have shared their personal experiences with lower back tattoos, also known as tramp stamp tattoos. These stories include tales of regret and finding new beginnings. They offer insights into how these tattoos affect individuals.

Some feel empowered by their lower back tattoo. Others wish they had never gotten one. A study showed that women with lower back tattoos were seen as more promiscuous. This highlights the cultural stigma around these tattoos.

  • Feeling more confident and self-expressive
  • Experiencing social stigma and judgment
  • Regretting the decision due to changing personal styles or preferences

These personal experiences remind us to think carefully before getting a lower back tattoo.

Tattoo Design Popularity
Feather tattoos High
Lower back tattoos Low

Legal and Safety Regulations

Body art safety is key to avoid problems and make sure you have a good experience. Thinking about getting a tramp stamp tattoo? It’s important to know the laws and safety rules in the tattoo world.

In the U.S., many states need tattoo artists to have a license and follow strict health rules. This means they keep everything clean, use sterilized tools, and handle blood safely. Artists also learn a lot about skin to do their job right.

Important safety rules include:

  • Proper sterilization of equipment
  • Use of certified inks
  • Hygienic environment
  • Trained and licensed tattoo artists

Choosing a licensed and trusted tattoo artist helps lower the risk of issues. Always put your health and safety first when getting body art.

The Future of Tramp Stamp Tattoos

Thinking about getting a tramp stamp tattoo? It’s key to consider the future of these designs. With tramp stamps becoming popular again, it shows tattoo designs are changing to match new cultural values. The rise of neo-nostalgic tramp stamps, mixing humor, nostalgia, and new looks, is a big trend to follow.

Looking ahead, tramp stamp tattoos will probably stay popular, mainly among Gen Z. They see these tattoos as symbols of power and self-expression. Social media makes it easy to find new tattoo designs and connect with artists who create unique pieces.

New styles to look out for include detailed designs like floral patterns and simple symbols. These styles show the wide range of personal expression. As the negative views on tramp stamps fade, these tattoos will likely become more accepted. They’ll focus on personal significance and artistic value, not just what others think.

Final Thoughts on Tramp Stamp Tattoos

Exploring lower back tattoos shows us that they reflect our individuality. Don’t let trends or what others think decide your body art. The real value is in the meaning and feelings behind your lower back tattoo.

The term “tramp stamp” once had a bad reputation. But now, younger people see these tattoos as symbols of empowerment. They’re breaking free from old stigmas. Your choice to get a tattoo on your lower back is special and should be celebrated.

Even as lower back tattoos come and go, remember their true value. Look for a design that speaks to you, no matter what others say. Your lower back tattoo should make you proud and show your journey of self-discovery.

FAQ

What is the definition and origin of tramp stamp tattoos?

Tramp stamp tattoos have a long history, starting in ancient Egypt. They were seen as a symbol of protection and a tribute to Bes. Over time, the designs and meanings have changed, with new styles and trends appearing.

What are the reasons why people choose to get tramp stamp tattoos?

People get tramp stamp tattoos for many reasons. They want to express themselves, connect with their feelings, and look good.

What are the common design options for tramp stamp tattoos?

Tramp stamp tattoos can feature many designs. You can find floral patterns, geometric shapes, and even text and quotes.

What are the pain and placement considerations for tramp stamp tattoos?

Getting a tramp stamp tattoo involves thinking about the pain and where to place it. The lower back is sensitive, and the design’s size and complexity matter. Following aftercare tips is key for a smooth tattoo experience.

How have tramp stamp tattoos impacted the cultural perception of women?

Tramp stamp tattoos have changed how people see women. Once seen as negative, they’re now seen as empowering. Many women see them as a way to express themselves.

What are some alternatives to tramp stamp tattoos?

There are many other tattoo designs and places to consider. You can explore different styles, modern designs, and even gender-neutral tattoos.

How do you choose the right tattoo artist for a tramp stamp tattoo?

Finding the right tattoo artist is important. Research tattoo parlors, ask questions, and look at their portfolio to ensure a great tattoo experience.

What factors influence the cost of a tramp stamp tattoo?

The cost of tramp stamp tattoos depends on several things. The design’s size and detail, the artist’s experience, and the tattoo parlor’s location all play a role.

What are the options for removing a tramp stamp tattoo?

Removing a tramp stamp tattoo is possible. You can try laser removal or other methods. Each option has its own costs and considerations.

How have trends and social media impacted the popularity of tramp stamp tattoos?

Social media has helped tramp stamp tattoos become popular again. People share their tattoos online, inspiring others. Trends also influence their popularity, with some designs coming and going.

0 comment
0 FacebookTwitterPinterestEmail
Kinder Humor

As a parent or teacher, you know how vital kids humor is. It makes a place happy and fun for kids. Funny jokes help them learn to interact, be creative, and understand feelings better. With lots of kids humor and fun activities, you can make a place where everyone laughs and learns.

Studies show that humor in school makes kids more interested, with 85% of kindergarten teachers agreeing. Also, 78% of parents say jokes make their family closer. Sharing jokes with kids makes a place where everyone feels good and learns together.

Key Takeaways

  • Sharing funny jokes with kids can help them develop social skills, creativity, and emotional intelligence.
  • Kids humor can create a positive and joyful environment that encourages laughter and learning.
  • 85% of kindergarten teachers believe that incorporating humor into classroom activities enhances student engagement.
  • 78% of parents report that sharing jokes with their children strengthens family bonds.
  • Funny jokes and humor can help reduce anxiety and create a supportive environment for kids.
  • Kids humor can be used to teach various subjects, including math and language arts, in a fun and engaging way.

What is Kinder Humor?

Kinder humor is fun for kids. It’s important for their growth. Laughter helps them learn social skills, be creative, and understand emotions. By adding kinder humor to children activities, we make their world happier.

Kinder humor comes from kids’ silly comments. They see things in their own special way. This humor brightens up the classroom, making it fun for everyone.

For example, kids might think “chimes” mean “Chinese music.” These funny moments bring kids together. They help create a friendly community. By embracing kinder humor, we support kids’ growth and happiness.

Type of Humor Example
Misinterpretation Confusing “chimes” with “Chinese music”
Wordplay Using words like “nickels” for “nipples”
Situational humor Misunderstanding of concepts like “Deer Season”

Understanding kinder humor helps us support kids’ emotional and social growth. It makes kids humor a key part of their daily lives.

Why Kinder Humor Matters

Kinder humor is key in a child’s growth, offering many benefits. It boosts their social skills, creativity, and emotional smarts. Plus, it makes learning fun and helps them remember things better.

Studies show laughter lowers kids’ stress and boosts their health and learning. Children activities like funny songs and jokes can make them more open to learning. Teachers using humor in class create a happy and supportive place to learn.

  • Improved social skills and cognitive flexibility
  • Enhanced emotional intelligence and well-being
  • Increased learning capacity and retention of information
  • Reduced stress levels and improved overall health

Parents and teachers using kinder humor give kids a great tool for growing up. It helps them face life’s challenges with confidence, creativity, and a good sense of humor.

Types of Kinder Humor

Kids humor is a fun way to make children laugh and have a good time. There are many kinds of kinder humor that can engage kids and boost their creativity. Funny jokes are key in kids humor, teaching them about animals, food, and friendship.

Some common types of kinder humor include:

  • Silly jokes for kids, which can be used to make children laugh and have fun.
  • Puns and wordplay, which can help develop children’s language skills and creativity.
  • Funny stories, which can be used to engage kids and promote imagination and creativity.

These kinds of kinder humor can be used in many places, like school or at home. They make learning fun and engaging. By adding kids humor and funny jokes to daily activities, parents and teachers help kids learn important skills like social-emotional learning and creativity.

Using these types of kinder humor, parents and teachers can create a fun learning environment. Whether it’s through silly jokes, puns, or funny stories, kids humor is a great way to make learning fun and enjoyable for kids.

Type of Kinder Humor Description
Silly Jokes Used to make children laugh and have fun
Puns and Wordplay Help develop children’s language skills and creativity
Funny Stories Engage kids and promote imagination and creativity

Classic Kinder Jokes

Classic kinder jokes bring laughter and joy to kids. They are timeless and loved by all ages. This makes them perfect for kids humor. They create a sense of nostalgia and shared fun among kids.

Timeless Jokes for Every Age

Examples of classic kinder jokes include Q&A jokes, dad jokes, and one-liners. These jokes are easy to remember and fun to tell again and again. They’re great for kids activities. They also teach kids about different humor styles.

How to Use Classic Jokes

To use classic jokes well, tell them in your daily talks with kids. Tell a joke at mealtime or before bed. Jokes can also help start fun activities. Here are some tips:

  • Keep it simple: Use jokes that are easy to understand and remember.
  • Be creative: Add your own twist to classic jokes to make them more interesting.
  • Use visual aids: Use images or props to help tell the joke and make it more engaging.

By adding classic kinder jokes to your activities, you create a fun and supportive space. This encourages kids to laugh and have fun. So, give it a try!

Joke Type Example Age Group
Q&A Joke What has keys but can’t open locks? 5-10 years
Dad Joke I told my wife she was drawing her eyebrows too high. She looked surprised. 8-12 years

Animal Jokes Kids Will Love

Kids adore funny jokes, and animal jokes are perfect for making them giggle. They’re great for adding joy and creativity to children activities.

Popular jokes often feature dogs, cats, and birds. They use simple words and a Q&A format. This makes them easy for kids to get and remember. For instance:

  • Why did the cat join a band? Because it wanted to be the purr-cussionist.
  • What do you call a group of cows playing instruments? A moo-sical band.

Animal jokes can also teach kids about different animals. They make learning fun and exciting. So, share some animal jokes with your kids next time you want to make them laugh!

Animal Joke
Dog Why did the dog go to the vet? Because it was feeling ruff.
Cat Why did the cat take a nap? Because it was paws-itively tired.

Knock-Knock Jokes for Kids

Kids love simple, fun jokes that make them laugh. Knock-knock jokes are perfect for this. They have a fun call-and-response format and silly endings. These jokes help kids have fun and be creative.

Here are some examples of knock-knock jokes for kids:

  • Knock, knock! Who’s there? Cows go! Cows go who? No, cows go “moo”!
  • Knock, knock! Who’s there? Dwayne! Dwayne who? Dwayne the bathtub, I’m dwowning!

These jokes use wordplay and puns. They make kids think creatively and enjoy humor.

Adding knock-knock jokes to daily life can be fun. It helps kids feel happy and encourages them to be creative. These jokes are simple, fun, and bring joy to kids’ lives.

Type of Joke Example
Food-themed Knock, knock! Who’s there? Honeydew! Honeydew who? Honeydew you want to let me in?
Animal-themed Knock, knock! Who’s there? Cow! Cow who? Cow-abunga, dude!

Funny Riddles for Kinder Ages

Engaging in activities that make kids laugh can really help their brains grow. Riddles are a great way to boost thinking, solving problems, and creativity. By adding simple riddles to daily life, parents and teachers can make learning fun and supportive.

Studies show that riddles can help kids learn new words, think more clearly, and feel less stressed. There are riddles for all levels, from easy to hard, covering many topics. Here are a few examples that spark kids’ imagination:

  • What has keys but can’t open locks?
  • What starts with an E, ends with an E, but only contains one letter?
  • What is as light as a feather, yet even the strongest man can’t hold it for much more than a minute?

These riddles help kids think better and have fun. Sharing riddles with kids can also help them learn together, improve their social skills, and enjoy a positive learning environment.

So, why not try riddles? They’re great for boosting thinking, creativity, and laughter in kids. Whether you’re a parent, teacher, or just someone who loves making kids smile, riddles are a fun way to connect and support kids’ growth.

Jokes to Tell at School

Humor is key to a happy school environment. Teachers use jokes to boost social skills, creativity, and emotional smarts. A study found that humor can make students 20% more engaged.

Research shows jokes about school subjects help students remember more. This makes learning fun and easy to understand. About half of kids aged 5-12 say humor makes learning better.

Here are some jokes that fit well in school:

  • Jokes about school subjects, such as math or science
  • Humorous stories about school life
  • Funny riddles and tongue twisters

Humor can also lower stress, which helps students do better in school by up to 25%. Teachers who tell jokes daily make learning more fun and effective.

funny jokes for children activities

Teachers who use humor create a supportive and fun learning space. This can reduce bad behavior by 10% and boost classroom mood by 70%. Humor is a great tool in education, making learning fun and effective for everyone.

Benefits of Humor in the Classroom Percentage Improvement
Student Engagement 20%
Retention Rates 15%
Stress Reduction 25%

Themes in Kinder Humor

Kids love jokes about things they can relate to, like nature or food. These topics make for funny jokes that kids find hilarious. Parents and teachers can use humor to make learning fun and supportive.

For example, jokes about animals and plants are big hits with kids. Like, why did the tree go to the party? It wanted to branch out and meet new people! Such jokes help kids see the fun side of life.

Food jokes are also a hit with kids. Who doesn’t love jokes about pizza or ice cream? These jokes can teach kids about different foods and healthy eating. Humor makes learning fun and engaging.

In short, kids’ humor is key to their development. Funny jokes teach valuable lessons and help with social skills. By adding humor to daily life, we create a fun and supportive environment for kids.

Creating Your Own Kinder Jokes

As a parent or teacher, you can help kids grow by making jokes together. This fun activity boosts their language and social skills. It’s a great way to encourage their sense of humor.

Encouraging kids to make jokes helps them think creatively and build confidence. Here are some tips to help them:

  • Start with simple topics like animals or food to spark their creativity.
  • Encourage them to think outside the box and be imaginative.
  • Guide them but let them come up with their own unique jokes.

Books by famous authors like Mo Willems can inspire kids. They learn about different humor styles. Making jokes together helps kids develop a lifelong sense of humor and creativity.

Tips for Writing Kids’ Jokes

When writing jokes for kids, keep it simple and fun. Kids love silly and unexpected things. Use words and phrases they know and enjoy.

Involving Your Kids in the Process

Getting kids to make jokes is fun for everyone. It helps them think creatively and express themselves. With patience and encouragement, they’ll come up with jokes that make everyone laugh.

Age Range Activity Ideas
4-5 years Creating simple jokes, playing with wordplay, and using physical comedy
6-7 years Writing short stories, creating characters, and using humor to tell stories

How to Use Humor in Parenting

As a parent, using humor can make your home a happier place. Funny jokes and laughter can boost your child’s creativity and social skills. It also helps them feel less anxious and more willing to listen.

Studies show kids from funny homes feel better about themselves and are happier. Humor helps you bond with your kids and makes your relationship stronger. For instance, laughing together over silly mistakes can bring you closer.

To add jokes at home, try silly games and jokes at the right time. Use jokes that fit your child’s age to make them laugh and learn. This way, your home becomes a fun place where everyone can be creative and playful.

Humor also helps kids understand others better and feel more emotionally stable. It’s a way to deal with stress and anxiety. By being funny, you help your kids develop a great sense of humor. This is linked to better emotional health and happiness.

Some benefits of using humor in parenting include:

  • Enhanced creativity and playfulness
  • Improved social skills and empathy
  • Increased self-esteem and confidence
  • Better coping mechanisms for stressful life events
  • A stronger sense of humor, which is associated with higher self-esteem and increased happiness

Humor in parenting creates a supportive and fun environment. It helps your child grow emotionally, socially, and intellectually. So, don’t hesitate to be silly and enjoy time with your kids. It’s a wonderful way to bond and help them develop a great sense of humor.

The Impact of Humor on Child Development

As a parent, you shape your child’s sense of humor. Kids’ jokes and humor are key to their emotional growth. They help build confidence and deal with tough times. Studies show laughter boosts lung function, heart rate, and muscle activity. It also releases endorphins, making us feel good.

Introducing humor early on boosts understanding and empathy in kids. Picture books that show emotions in a funny way are great for toddlers. As kids get older, their humor changes with their growth. Adding humor to daily life helps with social skills, creativity, and emotional smarts.

Humor has many benefits for kids:

  • Boosts creativity and social skills
  • Improves emotional smarts and empathy
  • Raises confidence and self-esteem
  • Helps with stress and challenges

kids humor

Embracing kids’ humor and jokes helps them develop a lifelong sense of humor. Share some laughs with your kids. Watch them grow with a positive and supportive sense of humor.

Age Group Humor Type Benefits
Toddlers Wordplay, rhyming Language development, creativity
Preschoolers Riddles, knock-knock jokes Social skills, emotional intelligence
School-age children Complex jokes, satire Critical thinking, empathy

Sharing Kinder Humor with Friends

Sharing kinder humor with friends is a great way to help kids grow. It boosts their social skills, creativity, and emotional smarts. When kids share jokes, they make friends and feel part of a community.

Studies show that 75% of kids feel closer to their friends when they laugh together. This shows how important kids humor is. It helps kids build strong bonds and feel like they belong. Sharing jokes also helps kids improve their language and social skills.

Here are some tips to share jokes and encourage friendships through laughter:

  • Use simple and clear language that kids can understand
  • Encourage kids to share their own jokes and humor
  • Create a safe and supportive place where kids feel okay sharing their thoughts and feelings

By following these tips, parents and teachers can help kids grow their social skills. This can positively impact their emotional and social development. It helps them make strong friendships with their peers.

Benefits of Kids Humor Percentage of Children
Feeling more connected to peers 75%
Developing social skills 85%
Building strong relationships 90%

Using Humor in Educational Settings

In educational settings, adding funny jokes and humor can greatly impact learning. Studies show that humor boosts student engagement, helps them remember information better, and lowers stress and anxiety.

Some key benefits of using humor in schools include:

  • Improved student engagement and participation
  • Increased retention of information and better learning outcomes
  • Reduced anxiety and stress
  • Enhanced creativity and problem-solving skills

Teachers can use many ways to add humor to their lessons. They can share funny jokes, stories, and examples to make complex ideas easier to understand. This approach helps create a supportive and engaging classroom environment that encourages learning and success.

Research shows that humor in the classroom improves relationships between students and teachers. It also makes students more likely to join in and ask questions. Plus, it helps reduce bad behavior and boosts the classroom’s mood.

Benefits of Humor in Education Percentage of Students Affected
Improved student engagement 20-30%
Increased retention of information 25%
Reduced anxiety and stress 15%

In summary, using funny jokes and humor in schools can positively affect learning. Teachers who use humor well can make their classrooms more engaging, supportive, and effective. This approach helps students succeed and develop a love for learning.

Finding Resources for Kinder Humor

Finding the right resources for kids humor can make a big difference. It helps create a fun and joyful space for kids. There are many books and online sources filled with funny jokes and humor.

Books Filled with Funny Jokes

Books like “The Book Without Pictures” by B.J. Novak and “I Need a New Butt” are great. They use bodily humor and silly words to make kids laugh. “Parts” and “Don’t Press the Button” also encourage kids to join in, making them perfect for kinder humor.

Online Sources for Kids’ Humor

Online, YouTube and Pinterest are full of funny jokes and images for kids. Channels like Sesame Street and PBS Kids have lots of funny and educational videos. They’re perfect for promoting kids humor and creativity.

Exploring these resources can help you find lots of funny jokes and humor. Whether you’re a parent, teacher, or caregiver, the right resources can make a big difference. They help create a positive and joyful environment for kids.

Book Title Author Description
The Book Without Pictures B.J. Novak A book that encourages kids to read silly words aloud
I Need a New Butt Unknown A book that features bodily humor and silly illustrations
Don’t Press the Button Unknown A book that encourages kids to participate in the story

Conclusion: Embrace the Joy of Kinder Humor

Adding kinder humor to your child’s life is fun and rewarding. It boosts social skills and emotional intelligence. By using children activities and kids humor, you make a positive space for growth and creativity.

Recap of Benefits

Kinder humor makes learning better, strengthens relationships, and spreads joy. When kids laugh together, they bond stronger and talk better. It also helps them deal with emotions and feel more confident.

Encouragement to Laugh Together

So, why wait? Start adding more laughter to your child’s day. Share jokes, play with words, or just have fun. Laughter is a great gift for kids. Let’s laugh together and make memories that will last forever!

FAQ

What is kinder humor?

Kinder humor is fun for kids. It’s important for their growth and learning.

Why is laughter important for kids?

Laughter helps kids learn social skills, be creative, and understand emotions.

How does kinder humor benefit children?

Kinder humor boosts kids’ social skills, creativity, and emotional smarts. It makes learning fun and engaging.

What are the different types of kinder humor?

Kinder humor includes silly jokes, puns, and funny stories. These can make kids laugh and help them learn.

What are classic kinder jokes?

Classic jokes are loved by kids of all ages. They create a shared joy and nostalgia.

Why do kids love animal jokes?

Animal jokes are fun and relatable for kids. They spark their creativity and love for animals.

How can knock-knock jokes engage kids?

Knock-knock jokes are fun and creative. They build anticipation and surprise, making kids laugh.

What makes a riddle fun for kids?

Riddles are fun and challenge kids’ minds. They help develop problem-solving skills and creativity.

How can humor be used in school settings?

Humor makes learning fun and engaging. It helps kids develop social skills, creativity, and emotional smarts.

What are some themed kinder humor options?

Humor can be themed around nature, environment, or food. These themes make learning fun and relevant.

How can parents and educators create their own kinder jokes?

Making jokes together is fun and educational. It encourages kids to think creatively and critically.

How can humor be used effectively in parenting?

Humor makes parenting positive and supportive. It helps kids develop social skills, creativity, and emotional smarts.

What is the impact of humor on child development?

Humor is key for emotional growth and confidence. It helps kids develop social skills, creativity, and emotional smarts.

How can kids share kinder humor with friends?

Sharing jokes with friends builds friendships and community. It promotes social skills, creativity, and emotional smarts.

What resources are available for kinder humor?

There are many resources for kinder humor. Books and online sources offer jokes and humor to engage kids and spark creativity.

0 comment
0 FacebookTwitterPinterestEmail
DIY Valentines Decorations

Valentine’s Day is coming, and you might be thinking about making your home cozy and romantic. Making a pom-pom pillow takes just 15 minutes. DIY decorations are a fantastic way to add a personal touch to your space. You can pick from many DIY Valentine’s Day decoration ideas, like paper heart baskets, DIY candle holders, and heart-shaped wreaths, to make your home special.

Traditional colors for Valentine’s Day are red and pink, but you can also use white, purple, and black for a unique look. With 20 different DIY ideas, you’re sure to find something that matches your style and skill level. Whether you want to decorate your living room, kitchen, or bedroom, DIY decorations can make your space feel romantic and welcoming.

Key Takeaways

  • You can create a cozy and romantic atmosphere in your home with DIY Valentine’s Day decorations.
  • There are many easy and accessible DIY decoration ideas to choose from, including paper heart baskets and DIY candle holders.
  • Traditional color schemes for Valentine’s Day include red and pink, but you can also incorporate other colors to create a unique look.
  • DIY decorations can be personalized with sweet notes, such as love letter garland.
  • With a little creativity, you can create a beautiful and romantic space for Valentine’s Day.
  • DIY decorations are a great way to add a personal touch to your home and make it feel special.
  • You can use DIY decorations to create a romantic atmosphere in any room of your home.

Introduction to DIY Valentine’s Decorations

Making DIY Valentine’s Day decorations is a fun way to make your home special. You can pick the materials, colors, and designs you like. This makes your decorations unique and personal. Plus, it can save you money since you can use items you already have.

DIY decor helps you save money and lets you express your style. About 65% of people feel closer to the holiday when they make their own decorations. This adds a personal touch to your space.

Why DIY Decorations are a Great Idea

DIY Valentine’s Day decorations can be made from many materials and techniques. You can make your own Valentine’s cards, decorate your home, or create gifts. These projects are fun and can be done with little effort.

Benefits of Making Your Own Decorations

Some benefits of DIY Valentine’s Day decorations include:

  • Saving money: DIY decor uses minimal materials, saving you money.
  • Customization: You can pick the materials, colors, and designs you like, making your decorations unique.
  • Connection to the holiday spirit: Making your own decorations can make you feel more connected to the holiday.

Creating DIY Valentine’s Day decorations is a fun way to make your home special. It can save you money, let you customize your decorations, and connect you to the holiday spirit. DIY decor is a great choice for making your Valentine’s Day celebrations special.

DIY Project Time Required Materials Needed
DIY No-Sew Fabric Heart Banner 30 minutes Fabric, scissors, glue
Yarn-Wrapped Cardboard Hearts 30 minutes Cardboard, yarn, glue
DIY Valentine’s Heart Pillow 1 hour Fabric, pillow insert, sewing machine

Essential Supplies for Your Decorations

To make beautiful Valentine’s Day decorations, you’ll need some key supplies. These DIY items can help you craft romantic gifts and decorations. They will make your loved ones feel special. It’s all about the details when it comes to Valentine’s Day decorations.

Crafting Tools You’ll Need

You’ll need basic tools like scissors, glue, and paint to start. A rotary cutter set and a sanding block are also useful. Don’t forget to include a flat edge master pro paintbrush in your list of DIY supplies.

Color Palettes for Valentine’s Day

Traditional colors for Valentine’s Day are red, pink, and white. These colors help create a cohesive look for your decorations. Use pink floral paper napkins and warm white acrylic paint to add romance to your DIY projects.

Budget-Friendly Decor Options

Creating Valentine’s Day decorations doesn’t have to be expensive. Look for affordable options like disposable party supplies. They make up about 25% of overall Valentine’s Day party supply sales. You can also use items you already have at home, like paper, glue, and scissors, to make your own DIY decorations.

Heart-Themed Decor Ideas

Decorating for Valentine’s Day with heart-themed decorations is a timeless choice. They bring romance to any room. You can make your own unique decor with a little creativity. Start with paper hearts. Cut out heart shapes from paper or cardstock and hang them up.

Using balloon hearts is another great idea. You can find heart-shaped balloons in many sizes and colors. They are affordable, with prices under $20. For a fancy look, try making a heart-shaped wreath for your door. Use a wire or foam wreath form and decorate it with flowers or ribbons.

Here are more heart-themed decoration ideas:
* Use faux flowers, like tulips, for a romantic arrangement.
* Create a DIY photo display with heart-shaped frames or clips.
* Make a heart-shaped wreath with twigs and pinecones.

Decoration Idea Cost Difficulty Level
Paper Hearts Under $10 Easy
Balloon Hearts Under $20 Easy
Heart-Shaped Wreath $20-$50 Medium

These ideas help you create a beautiful Valentine’s Day atmosphere without spending a lot. Have fun and be creative with your DIY decor. Don’t be afraid to try new things with different materials and techniques.

Romantic Lighting Solutions

Lighting is key to a romantic Valentine’s Day atmosphere. The right lights make your space cozy and inviting. DIY decor adds a personal touch to your lighting.

String lights or fairy lights create a magical feel. Place them around your dining or living area for a warm glow. For a cozy vibe, candles are perfect. They can light up your dinner table or room softly.

Making heart-shaped lanterns is a fun DIY project. Use paper, cardstock, or metal to craft these. Hang them to add a unique, romantic ambiance to your space.

DIY Candle Holders for Ambiance

DIY candle holders are simple and easy to make. Use glass, metal, or wood for a unique look. Just add a tea light or votive candle for cozy lighting.

String Lights: A Magical Touch

String lights add a magical feel to your space. Hang them from the ceiling or around your room. They come in many colors and styles to match your decor.

Heart-Shaped Lanterns for Outdoor Spaces

Heart-shaped lanterns are perfect for outdoor spaces. Hang them from trees or place them on your patio. They’re available in various materials and sizes to fit your needs.

Lighting Solution Materials Needed Difficulty Level
String Lights Fairy lights, batteries, hooks Easy
DIY Candle Holders Glass, metal, wood, tea lights Medium
Heart-Shaped Lanterns Paper, cardstock, metal, LED lights Hard

Wall Art to Celebrate Love

As Valentine’s Day approaches, think about adding wall art to your decor. You can make unique pieces that show your love and appreciation. Framed love quotes are a great way to inspire and uplift your space.

Creating your own DIY canvas prints is another idea. Use photos, quotes, or meaningful images to make it special. If you’re crafty, try making a collage with photos and mementos from your relationship.

Popular Valentine’s Day wall art includes heart-shaped decorations and romantic quotes. Personalized photos are also a great choice. Mix frames and canvas prints for a unique look. Make sure it shows your love and personality.

  • Use a variety of frames and canvas prints to add depth and interest to your wall art.
  • Choose quotes and images that are meaningful and personal to your relationship.
  • Don’t be afraid to experiment and try new things – it’s all part of the DIY process!
DIY Wall Art Idea Description
Framed Love Quotes Use inspirational quotes to create a romantic and uplifting atmosphere.
DIY Canvas Prints Make your own personalized canvas prints using photos and meaningful images.
Collage with Photos Create a unique and eclectic collage using photos and other mementos from your relationship.

Table Settings for a Romantic Dinner

Creating a romantic dinner atmosphere starts with the table settings. A well-thought-out table setting can turn a simple dinner into a romantic dinner. Use DIY decor like handmade centerpieces or personalized place cards to enhance your table.

A romantic dinner is more than just the food. The right table settings can make the evening warm and inviting. Ideas like candles, flowers, and greenery can add elegance and freshness to your table.

Adding personal touches can make your table settings even more special. Handwritten love notes or customized napkin rings can create a romantic atmosphere. With a bit of creativity, you can make your dinner unforgettable.

Here are some ideas for table settings:

  • Use a mix of pink, white, and gold for a modern, romantic look.
  • Include fresh flowers or greenery in your centerpieces.
  • Add sparkle with candles or fairy lights.

These ideas can help you create a romantic and memorable dinner. It’s a chance to make a special night with your loved one.

Seasonal Flower Arrangements

DIY decor for Valentine’s Day can be elegant and beautiful with seasonal flowers. You can pick from roses, tulips, and carnations to make lovely bouquets. These flowers capture the holiday’s spirit perfectly.

To make a stunning arrangement, pick flowers that match in color and texture. For instance, mix red roses with pink tulips and white carnations. Use floral foam to help arrange the flowers and balance their heights.

Creating Lovely Flower Bouquets

Making a bouquet is easy with seasonal flowers like roses, tulips, and carnations. Choose flowers that look good together in color and texture. Then, tie the stems with floral wire and finish with a ribbon or bow.

DIY Flower Boxes for Your Home

A DIY flower box adds elegance to your home on Valentine’s Day. Start with a wooden or plastic box. Fill it with a mix of flowers, including roses, tulips, and carnations. Use floral foam to arrange the flowers and balance their heights.

Dried Flowers for Lasting Beauty

Dried flowers bring elegance and beauty to your home on Valentine’s Day. They last for months with the right care. Dry a mix of flowers like roses, tulips, and carnations. Then, arrange them in a vase or container for a lasting display.

Flower Type Color Texture
Roses Red, Pink, White Soft, Velvety
Tulips Red, Pink, Yellow Cup-shaped, Smooth
Carnations Red, Pink, White Long-lasting, Fragrant

Crafting Unique Valentine’s Cards

Valentine’s Day is coming, and you want to make it special for your loved ones. Creating DIY cards is a thoughtful and fun idea. It’s a way to show you care with romantic gifts.

There are endless ways to make unique Valentine’s cards. You can use paper, glue, scissors, and more to design something special. For example, you can make handmade cards with personal messages or add photos to make them extra special.

DIY Valentine's Day cards

Popular DIY card ideas include using templates and printables. They make the process easier and more fun. You can also try watercolor or button art to add a unique touch. The most important thing is the thought and love you put into it.

By making your own DIY cards, you show your loved ones you’re willing to go the extra mile. So, get creative and have fun! With a bit of practice, you can make beautiful gifts that will be treasured for years.

Fun Crafts Kids Can Help With

Valentine’s Day is a perfect time to bond with your kids through fun DIY crafts. You can make heart-shaped butterflies, DIY gift boxes, and painted rocks with love messages together.

Some fun and easy DIY crafts for kids on Valentine’s Day include:

  • Creating heart-shaped decorations using cardboard and paint
  • Making beaded bracelets with words like “Love” or “Be Mine”
  • Crafting garlands with hearts and pom-poms

These crafts are not only fun but also great for your kid’s fine motor skills and creativity. They can be done in 15 to 30 minutes, making them perfect for parties or school projects.

By doing these DIY crafts, you encourage your kids’ creativity and self-sufficiency. You also make personalized and unique gifts for loved ones.

Craft Idea Materials Needed Time Required
Heart-shaped decorations Cardboard, paint, glue 30 minutes
Beaded bracelets Beads, string, scissors 15 minutes
Garlands with hearts and pom-poms Construction paper, glue, scissors 20 minutes

Repurposing Old Decorations

Decorating for Valentine’s Day doesn’t have to cost a lot. You can reuse old decorations to save money and reduce waste. Look around your home for items like old jars, bottles, or fabric scraps to start.

Upcycling old items into new ones is a great idea. For example, paint an old mason jar to make a beautiful vase. You can also make a unique table runner or placemat from fabric scraps. DIY decor projects add a personal touch to your decorations.

Another way is to paint old decorations a new color. This can refresh their look and match your current decor. You can also add stickers, stamps, or stencils to old items.

Upcycling Past Decorations into New Ones

  • Use old jars and bottles to create unique vases or centerpieces
  • Transform old fabric scraps into table runners, placemats, or napkin rings
  • Add a fresh coat of paint to old decorations to give them a new look

Repurposing old decorations makes your Valentine’s Day celebration unique and personal. So, get creative and turn those old items into special holiday decor!

Decoration Idea Materials Needed Cost
Upcycled Mason Jar Vase Old mason jar, paint, glitter, ribbons $0 – $5
DIY Table Runner Old fabric scraps, scissors, glue $0 – $2

Decorating with Fabrics and Textiles

Fabrics and textiles are great for DIY decor on Valentine’s Day. They add elegance and beauty to your home. You can make heart pillows, table runners, and fabric banners.

Using fabrics lets you customize your decor. You can pick from quilting cotton, silk, or velvet. Add lace, buttons, or beads for a personal touch.

  • Sewing heart-shaped pillows using coordinating patterns and fabrics
  • Creating DIY table runners with romantic quotes or messages
  • Designing fabric banners with cute and playful designs

These projects are fun and easy. They let you show your creativity and add a personal touch.

Adding fabrics and textiles to your decor makes your home warm and inviting. Celebrate Valentine’s Day with your own unique decorations. Get creative and start crafting!

Enhancing Your Space with Scent

As you get ready for Valentine’s Day, think about how scented decorations can change your home’s feel. Scented decorations can bring out feelings of love and warmth. They make your space cozy and welcoming. You can make your own decor to match your style.

Start by thinking about scents that remind you of Valentine’s Day. Roses are a timeless choice. You can use essential oils, scented candles, or potpourri to add their fragrance. Try jasmine or lavender for something different and inviting.

  • Creating a DIY potpourri blend using dried flowers, herbs, and essential oils
  • Using scented candles or room sprays to add a touch of fragrance to your space
  • Incorporating essential oils into your decor through diffusers or homemade room sprays

Adding scented decorations to your Valentine’s Day decor can make your celebration special. You can choose from classic rose scents or unique blends. Get creative and make your space smell as good as it looks. With a bit of imagination and DIY projects, you can create aValentine’s Day atmosphere that’s both romantic and unforgettable.

Creating an Outdoor Love Garden

Make your Valentine’s Day special by creating an outdoor love garden. It’s a beautiful way to show your love and appreciation. Start by planting Valentine’s flowers like roses or tulips in your outdoor garden. Add DIY decorations, like heart-shaped lanterns or string lights, for a cozy feel.

DIY decor offers endless possibilities. Use terracotta pots, solar lights, and paper bag lanterns for a unique space. Here are some ideas:

  • Plant flowers or herbs in terracotta pots around your seating area.
  • Use solar lights for a warm evening ambiance.
  • Hang paper bag lanterns with LED candles from trees or your patio roof.

Keep your Valentine’s Day decor simple and elegant. Reuse items from other holidays, like Christmas, for a personal touch. With creativity, you can make an outdoor love garden that will make your Valentine’s Day unforgettable.

Decoration Idea Materials Needed Cost
Heart-shaped lanterns Paper, glue, scissors, LED candles $5-$10
Solar-powered lights Solar-powered lights, batteries $10-$20
Terracotta pots with flowers Terracotta pots, flowers, soil $20-$30

Making Your Own Valentine’s Day Gifts

Creating DIY gifts for Valentine’s Day shows you care deeply. There are many DIY ideas to match your skills and interests. You can make personalized gifts, spa gifts, or even homemade treats.

About 60% of people prefer handmade gifts for Valentine’s Day. They value the personal touch more than store-bought gifts. This shows the trend towards unique, meaningful presents that show the giver’s personality.

Crafting Personalized Gifts for Loved Ones

Personalized gifts make your DIY gifts special. You can use materials like polymer clay, leather, or canvas. This way, you can make items like keychains, tote bags, or coasters. It’s a thoughtful and unique gift that won’t cost much.

DIY Spa Gifts with a Romantic Touch

DIY spa gifts are also popular for Valentine’s Day. You can make scented candles, bath salts, or massage oils with natural ingredients. These gifts are relaxing and show you care about their well-being.

Homemade Edibles: Sweet Treats to Share

Homemade edibles are a tasty way to celebrate Valentine’s Day. You can bake cookies, make chocolate truffles, or other treats. Recipes with flavors like raspberry, strawberry, or mint are popular. You can find many easy recipes and kits online.

Fun and Creative Ways to Celebrate Valentine’s Day

Valentine’s Day is coming up, and you’re looking for fun ways to celebrate. With a bit of creativity, you can make this day unforgettable. Think about planning a surprise party with DIY decor and gifts just for your loved one.

Start by coming up with DIY decor ideas. You could make a photo album or set up a scavenger hunt with clues and prizes. These activities will add joy to the day and create memories that last.

  • Creating a customized coupon book with promises to love and cherish
  • Making a handmade card or gift
  • Planning a romantic dinner or weekend getaway

These ideas will make Valentine’s Day special and memorable. It’s a chance to show your love in a unique and meaningful way.

Adding DIY decor and fun activities to your celebration shows your love in a personal and creative way. So, let’s get creative and make this Valentine’s Day one to remember.

Final Touches and Safety Tips

As you finish your Valentine’s Day decorations, remember safety tips for a fun and safe celebration. With 57k people searching for Valentine decorations, many want to make their holiday special.

When making DIY decor, safety is key. Here are some important safety tips:

  • Make sure your decor is safe for pets to avoid hazards.
  • Be careful with candles and lights to prevent fires or electrical issues.
  • Clean up after the celebration to avoid tripping hazards or messes.

By following these simple tips, you can have a great Valentine’s Day with your loved ones. Also, think about the environment and choose sustainable DIY decor. Use recycled or upcycled materials.

Valentine’s Day decorations

With creativity and planning, you can have a beautiful and safe Valentine’s Day. So, get creative and make this Valentine’s Day unforgettable!

Decoration Type Safety Tip
Candles Keep away from flammable materials
String Lights Avoid overloading electrical outlets
Pet-Friendly Decor Choose non-toxic materials

Conclusion: Celebrate Love Creatively

We hope you found some great ideas for DIY Valentine’s Day decorations. These ideas can help you celebrate love in a unique and personal way. You can share your decor on social media or connect with others through crafting. This makes Valentine’s Day even more special.

Sharing Your Decor Ideas on Social Media

Don’t hide your beautiful DIY creations! Share them on Instagram, Facebook, or Pinterest. This way, you can inspire others and connect with crafters who share your passion. Use hashtags like #DIYValentines or #ValentineDIY to reach more people.

Connecting with Others Through Crafts

Crafting is more than just a hobby; it’s a way to bond with loved ones. Invite friends or family to make Valentine’s Day decorations or gifts together. This creates a sense of community and shared memories. Plus, homemade gifts mean even more when made with those you care about.

FAQ

What are the benefits of making your own Valentine’s Day decorations?

Making your own Valentine’s Day decorations lets you add a personal touch to your home. It creates a unique, romantic atmosphere. You can choose materials, colors, and designs that you love.

What essential supplies do I need to get started with DIY Valentine’s Day decorations?

You’ll need crafting tools like scissors, glue, and paint. Also, materials like paper, fabric, and lights are important. Pick a color palette that fits the romantic theme of Valentine’s Day.

What are some heart-themed decoration ideas for Valentine’s Day?

Heart-themed decorations are perfect for Valentine’s Day. You can make paper hearts, balloon hearts, or heart-shaped wreaths. These decorations add a romantic touch to any room.

How can I create a romantic ambiance with DIY lighting solutions?

DIY lighting is key for a romantic mood on Valentine’s Day. Try making candle holders, string lights, or heart-shaped lanterns. They create a cozy, inviting atmosphere.

What are some unique wall art ideas for celebrating love on Valentine’s Day?

Wall art is a great way to personalize your space and celebrate love. DIY ideas include framed love quotes, canvas prints, and photo collages. These showcase memories with your loved one.

How can I create a romantic table setting for a Valentine’s Day dinner?

A thoughtful table setting can make your Valentine’s Day dinner special. DIY ideas include stunning centerpieces, personalized place cards, and romantic table linens and napkins.

What are some fun and creative ways to celebrate Valentine’s Day with kids?

DIY Valentine’s Day crafts are a fun way to spend time with kids. You can make heart-shaped butterflies, decorate gift boxes, or paint romantic rocks.

How can I incorporate scent into my Valentine’s Day decorations?

Scented decorations can make your Valentine’s Day celebration more romantic. DIY projects like potpourri blends, scented candles, and essential oil diffusers add a special touch.

What are some ways to make your own Valentine’s Day gifts?

Crafting personalized gifts is a thoughtful way to show your love. DIY gift ideas include spa-inspired products, homemade edibles, and customized keepsakes.

What are some final tips for ensuring my Valentine’s Day decorations are safe and pet-friendly?

When setting up your Valentine’s Day decor, think about safety and pet-friendliness. Make sure candles and lights are secure. Avoid hazardous materials for pets. Clean up after your celebration.

0 comment
0 FacebookTwitterPinterestEmail
Neapolitan Cake

Imagine a cake that’s moist and delicious, with chocolate, vanilla, and strawberry flavors. This is what a Neapolitan Cake offers. It’s a classic layered cake that will wow your family and friends. This cake is a must-try for anyone who loves desserts.

With this easy recipe, you can make a perfect Neapolitan Cake. It involves making three layers of cake, each with a unique flavor. Then, you assemble them with creamy vanilla buttercream frosting.

Whether you’re new to baking or have lots of experience, this recipe is easy to follow. You don’t need much special equipment. You can make a Neapolitan Cake for any special occasion. Its beautiful layers and delicious flavors make it a hit. So, why not try making a perfect Neapolitan Cake for your next celebration?

Key Takeaways

  • Learn how to make a perfect Neapolitan Cake with this easy-to-follow recipe.
  • The recipe involves making three separate layers of cake, each with a unique flavor.
  • The cake is assembled with a creamy vanilla buttercream frosting.
  • This recipe is easy to follow and requires minimal special equipment.
  • You can make a Neapolitan Cake for any occasion, whether it’s a birthday, anniversary, or just a special treat for your loved ones.
  • The cake has a rich history and delicious flavors, making it a must-try for any dessert lover.
  • The Neapolitan Cake is a classic layered cake that is sure to impress your family and friends.

What is Neapolitan Cake?

Neapolitan cake is a layered cake from Italy, dating back to the late 19th century. It’s famous for its layers of chocolate, vanilla, and strawberry. To grasp its importance, we must look into its cake origins and traditional ingredients.

The cake’s traditional ingredients are flour, sugar, eggs, and butter. Over time, different regions have added their own flavors. This has led to many variations, including different flours and flavorings like vanilla or almond extract.

The Origins of Neapolitan Cake

Neapolitan cake has a long history, starting in Italy over a century ago. It was first made with simple ingredients like flour, sugar, eggs, and butter. Its cake origins are closely linked to the Italian dessert, tiramisu.

Traditional Ingredients Used

The traditional ingredients for Neapolitan cake are:

  • Flour
  • Sugar
  • Eggs
  • Butter

Variations Around the World

Over time, Neapolitan cake has seen many changes. Different regions have added their own twists. Some common changes include:

  • Using different types of flour, such as cake flour or all-purpose flour
  • Adding flavorings like vanilla or almond extract
  • Using different types of sugar, such as granulated or brown sugar
Ingredient Quantity
Flour 315 grams (2 and 1/4 cups)
Sugar 200 grams (1 cup)
Eggs 4
Butter 230 grams (1 cup or 2 sticks)

Essential Tools for Making Neapolitan Cake

To make a perfect Neapolitan Cake, you’ll need the right baking tools and equipment. You’ll need baking pans and sheets for the cake layers. Also, mixing and measuring tools for the batter, and decorating tools for frosting and decorating.

Some of the essential equipment you’ll need include:

  • Baking pans (at least 3, 8 inches each)
  • Mixing bowls and measuring cups
  • Electric mixer and whisk
  • Piping bags and tips for cake decorating

Investing in quality baking tools and equipment is key. It ensures your cake looks professional and tastes great. With the right essential equipment, you’ll make a stunning and delicious Neapolitan Cake that will wow everyone.

Tool Description
Baking Pans 8-inch round pans for baking cake layers
Mixing Bowls Stainless steel or glass bowls for mixing batter
Piping Bags For decorating the cake with frosting and designs

Ingredients for Your Neapolitan Cake

To make a delicious Neapolitan dessert, you need the right ingredients. The quality of your ingredients affects the cake’s flavor and texture. Use fresh eggs, real butter, and pure flavorings like vanilla and strawberry extract.

Some essential ingredients for your Neapolitan cake include:

  • Flour
  • Sugar
  • Eggs
  • Butter
  • Flavorings like vanilla and strawberry extract

You can also add optional ingredients to enhance the flavor. Consider adding nuts, chocolate chips, or fruit.

  • Nuts
  • Chocolate chips
  • Fruit

Choose high-quality ingredients for a rich and delicious Neapolitan cake. With the right ingredients and practice, you can impress your friends and family.

By following these tips and using the right ingredients, you can create a stunning Neapolitan cake. It will be a hit at any gathering.

Ingredient Quantity
Flour 1 1/2 cups
Sugar 1 cup
Eggs 4
Butter 1/2 cup

Preparing Your Cake Batter

To make the perfect cake batter for your Neapolitan Cake, it’s key to know about mixing techniques and temperature control. The right mix of these will give you a smooth and even cake batter.

When mixing your cake batter, use a stand mixer or whisk. Be careful not to overmix, as it can make the cake dense. Mix on low speed until the ingredients just come together.

Mixing Techniques for Best Results

Proper mixing techniques are crucial for a smooth and even cake batter. Use a stand mixer or whisk to mix the ingredients. Mix on low speed until just combined.

Importance of Temperature

Temperature control is also key when preparing your cake batter. Make sure your ingredients are at room temperature. Avoid overmixing, which can make the batter too warm.

Avoiding Common Mistakes

To avoid common mistakes, such as overmixing or incorrect temperature control, follow these tips:

  • Use a stand mixer or whisk to combine ingredients
  • Mix on low speed until just combined
  • Ensure ingredients are at room temperature

Baking the Cake Layers

To bake the perfect cake layers for your Neapolitan cake, knowing the right oven temperature and baking time is key. The ideal oven temperature is 350°F (180°C). The baking time is about 25-30 minutes. But, these times can change based on your oven and cake layer size.

When baking cake, it’s important to watch the layers closely. This ensures they are cooked evenly and stay moist and delicious. You can check if they’re done by inserting a toothpick into the center. If it comes out clean or with a few crumbs, they’re ready.

Here are some tips for baking your cake layers:
* Use three 8-inch round cake pans for a standard size.
* Bake each layer for 25-30 minutes, or until a toothpick inserted into the center comes out clean.
* Keep an eye on the layers to ensure they are cooked evenly and are moist and delicious.
* Adjust the baking time and oven temperature as needed based on your oven and the size of your cake layers.

By following these tips and guidelines, you’ll be able to bake the perfect cake layers for your Neapolitan cake. Always keep an eye on your layers while they’re baking. Adjust the oven temperature and baking time as needed for the best results.

Cooling Your Cake Layers

When making a Neapolitan cake, cooling cake is key. After baking, it’s vital to cool the layers right. This prevents them from getting soggy or falling apart. Cooling techniques are essential here.

To cool your cake layers well, use a wire rack. This lets air circulate, cooling them evenly and fast. It also stops bacteria and mold from growing. But, avoid drafts to keep cooling even.

Why Cooling is Important

Cooling your cake layers is crucial. It keeps them from getting soggy or falling apart. If not cooled right, they can become soft and hard to handle.

By cooling them properly, they stay moist and stable. This makes them easier to work with.

Best Practices for Cooling

Here are some top tips for cooling your cake layers:

  • Use a wire rack to allow air to circulate around each layer
  • Avoid drafts, as they can cause the cake layers to cool unevenly
  • Cool the cake layers completely before assembling the cake
  • Use a cooling cake rack to cool the cake layers, if possible

Follow these tips to cool your cake layers right. This makes them easier to work with. It also leads to a stunning and tasty Neapolitan cake. Use cooling techniques like a wire rack and avoid drafts.

Cooling Method Benefits
Wire Rack Allows air to circulate around each layer, cooling evenly and quickly
Avoiding Drafts Prevents uneven cooling, reducing the risk of soggy or fallen cake layers

Making the Frosting and Filling

To finish your Neapolitan Cake, you must make the frosting and filling just right. You’ll need to pick the perfect cake frosting type, like buttercream or cream cheese. Add a touch of vanilla or strawberry extract for flavor. The frosting types you choose will affect the cake’s taste and look.

Getting the frosting consistency just right is key. It should be smooth and creamy but not too thin. You can tweak it by adding powdered sugar to thicken or milk to thin it out.

  • Buttercream: Made with butter, sugar, and sometimes milk or cream, this is a classic choice for Neapolitan Cake.
  • Cream Cheese: Adding a tangy flavor, cream cheese frosting is a great alternative to traditional buttercream.
  • Whipped Cream: Light and fluffy, whipped cream frosting is perfect for those looking for a less sweet option.

Flavoring your frosting is where you can get creative. You can use vanilla or almond extracts, or even fruit puree for extra taste. The goal is to match the frosting with the cake, so it enhances it without taking over.

Layering the Neapolitan Cake

To make a stunning Neapolitan cake, you must learn to layer it well. This means stacking the cake layers on top of each other. You’ll use frosting and filling to keep them together. It’s key to make sure each layer is even and level, which you can do with a turntable.

When layering, dowels are crucial for support. Dowels are thin rods that help keep the cake stable. They prevent the cake from falling apart, making it look great and stay upright.

Techniques for Even Layering

To layer evenly, start by making sure all cake layers are the same size. Use a cake leveler or serrated knife to trim them. Then, spread a bit of frosting or filling on the bottom layer. Place the next layer on top and repeat, using dowels as needed.

Creative Layering Ideas

Once you’ve got the basics down, you can get creative. Try using different flavors like chocolate, vanilla, or strawberry for each layer. You can also mix up the frosting or filling to add variety. This way, you can make a unique and tasty Neapolitan cake that will wow everyone.

Using Dowels for Structural Support

Dowels are a must for layering a Neapolitan cake. They add extra support and keep the cake from falling apart. Just insert the dowels into the cake layers, spacing them out. Then, cover them with frosting or filling for a smooth finish. With the right tools and ingredients, you can make a beautiful Neapolitan cake for any event.

Layering Technique Description
Even Layering Using a turntable and adjusting the cake layers to ensure they are level and even
Creative Layering Using different flavors or textures for each layer to add variety and interest
Using Dowels Inserting dowels into the cake to provide additional support and prevent collapse

Decorating Your Neapolitan Cake

Now that your Neapolitan cake is baked and layered, it’s time for the final touches. This is where you can get creative and make your cake unique. Think about seasonal themes to inspire your decoration. For example, spring calls for pastel colors and season-inspired decorations.

There are many decorating techniques to choose from. You can use piping bags for intricate designs or make sugar flowers. Techniques like ombre, watercolor, and textured effects are popular. You can also add fresh flowers, chocolate shavings, or other edible decorations for color and texture.

  • Keep it simple: don’t over-decorate. Sometimes, less is more.
  • Use high-quality decorations: choose fresh flowers or sugar decorations that will look good on the cake.
  • Have fun: cake decorating is about being creative and having fun. Try new things and experiment with different techniques.

By following these tips and using your imagination, you can create a stunning Neapolitan cake. Remember to add seasonal themes and decorating techniques to make it special.

Storing Your Neapolitan Cake

To keep your Neapolitan cake fresh and delicious, proper storage is key. You’ve put a lot of effort into making this tasty treat. With the right storage tips, you can enjoy it for a longer time.

For cake storage, a few simple steps can make a big difference. First, make sure to store your cake in an airtight container. This keeps air out and prevents the cake from getting stale or dry. Also, keep the cake in a cool, dry spot, away from sunlight and heat.

Here are some storage tips to keep your Neapolitan cake fresh:

  • Store the cake in an airtight container at room temperature for up to 4 days.
  • Refrigerate the cake to extend its shelf life. Wrap the cake tightly in plastic wrap or aluminum foil and store it in the refrigerator for up to 5 days.
  • Freeze the cake for longer-term storage. Wrap the cake tightly in plastic wrap or aluminum foil and place it in a freezer-safe bag. Frozen cake can be stored for up to 2 months.

By following these simple cake storage and storage tips, you can enjoy your delicious Neapolitan cake. It will stay fresh and tasty for a longer time.

Storage Method Shelf Life
Airtight container at room temperature Up to 4 days
Refrigeration Up to 5 days
Freezing Up to 2 months

Serving Suggestions for Neapolitan Cake

Serving Neapolitan cake is all about the presentation. You want to impress your guests, whether it’s a birthday or a wedding. Cake serving is an art that needs creativity and detail.

Pairing with Desserts and Beverages

  • Pair your Neapolitan cake with a scoop of ice cream or a cup of coffee for a delicious dessert pairing.
  • Consider serving the cake with a side of fresh fruit or chocolate sauce for added flavor and texture.

Presentation Ideas for Special Occasions

To make your Neapolitan cake stand out, use presentation ideas like decorative plates or cake stands. You can also add fresh flowers or greenery to the top for color and fragrance.

Layer Ingredients
Vanilla Cake Unsalted butter, granulated sugar, eggs
Chocolate Cake Cocoa powder, unsalted butter, granulated sugar
Strawberry Buttercream Unsalted butter, powdered sugar, strawberry puree

Popular Neapolitan Cake Recipes

There are many Neapolitan cake recipes to try, like classic, gluten-free, and vegan ones. These recipes offer a variety of tastes and textures. They can be made to fit different tastes and dietary needs.

Some popular Neapolitan cake recipes include:

  • Classic Neapolitan cake, featuring a three-layer structure with chocolate, vanilla, and strawberry flavors
  • Gluten-free cake options, perfect for those with dietary restrictions
  • Vegan cake variations, made with plant-based ingredients and free from animal products

These Neapolitan cake recipes are great for any occasion. They have unique flavors and textures that will wow your guests. Whether you like classic, gluten-free, or vegan, there’s a recipe for you.

Neapolitan cake recipes

Trying out these Neapolitan cake recipes can help you find the perfect one for you. So, why not start baking and discover the world of Neapolitan cake recipes?

Recipe Description
Classic Neapolitan Cake A three-layer cake featuring chocolate, vanilla, and strawberry flavors
Gluten-Free Cake A gluten-free version of the classic Neapolitan cake, perfect for those with dietary restrictions
Vegan Cake A plant-based version of the Neapolitan cake, made with vegan ingredients and free from animal products

Troubleshooting Common Issues

When making a Neapolitan cake, you might face some common problems. These include issues with the cake itself and with the frosting. It’s crucial to quickly find and fix these problems to get a perfect cake.

One common issue is a dry cake. This can happen if the cake is overbaked or if the ingredients are not measured right. To prevent this, carefully follow the recipe and adjust the baking time if needed. Adding a bit more liquid to the batter can also help keep the cake moist.

Frosting problems can also occur, like it being too thin or too thick. To fix this, you can tweak the frosting recipe. Add more powdered sugar to thicken it or more liquid to thin it out. Choosing the right frosting for your cake is also key, as different frostings work better with different cakes.

Here are some tips for solving common cake issues:

  • Check your ingredients: Use fresh, high-quality ingredients like flour, sugar, and eggs.
  • Adjust your baking time: If your cake isn’t baking evenly, try changing the baking time to ensure it’s fully cooked.
  • Don’t overmix: Overmixing can make the cake tough or dense. Mix the ingredients just until they’re combined.

By following these tips and being aware of common cake problems, you can make sure your Neapolitan cake is a success. It will impress your friends and family.

Cake Issue Solution
Dry texture Adjust baking time, add more liquid to batter
Frosting too thin Add more powdered sugar
Frosting too thick Add more liquid

Tips for Perfecting Your Neapolitan Cake

To make a perfect Neapolitan cake, remember a few cake tips. Cake practice is key to improving your baking. It helps you get better with each try. You’ll learn what works and what doesn’t.

Getting feedback is also important. It can come from others or your own self-check. Feedback helps you see what you can do better. Here are some tips to keep in mind:

  • Experiment with different flavors and ingredients to find the perfect combination.
  • Practice the recipe multiple times to refine your skills and achieve consistent results.
  • Learn from feedback and make adjustments to perfect the cake.

By following these cake tips and practicing, you’ll make a stunning Neapolitan cake. And don’t forget to use feedback to keep getting better.

Tip Description
Experiment with flavors Try new ingredients or combinations to develop a unique recipe.
Practice the recipe Make the cake multiple times to refine your skills and achieve consistent results.
Learn from feedback Identify areas for improvement and make adjustments to perfect the cake.

Hosting a Neapolitan Cake Party

Planning a cake party means making memories for your guests. A beautifully set dessert table is key. It highlights your Neapolitan cake and other treats.

Make your party stand out with themed decor like balloons or a custom banner. You can also have fun activities like cake decorating or games.

  • Choose a variety of desserts, including cakes, cupcakes, and cookies.
  • Use decorative stands and pedestals to add visual interest.
  • Consider a themed color scheme to match your party decor.
Party Activity Description
Cake Decorating Provide plain cakes and a variety of decorations, such as frosting, sprinkles, and candies.
Guess the Flavor Prepare several different flavored cakes and have guests guess the flavors.

Follow these tips for a memorable cake party. Your guests will love it. Don’t forget to have fun and get creative with your themed decor and dessert table!

Frequently Asked Questions about Neapolitan Cake

When it comes to Neapolitan cake, you might have some cake questions. We’ll answer some of the most common cake FAQs here. This will help you understand this tasty dessert better.

We’ll cover topics like making a smaller version, freezing, and storing. These cake answers will help you enjoy your Neapolitan cake with confidence. Whether you’re new to baking or experienced, these FAQs will guide you.

How to Make a Smaller Version?

To make a smaller Neapolitan cake, just use less ingredients. Choose smaller baking pans. This way, you’ll get the perfect size for your needs.

Can You Freeze Neapolitan Cake?

Yes, you can freeze Neapolitan cake for up to 3 months. Freezing is a great way to keep it fresh for later.

How Long Does It Last?

Neapolitan cake can stay in the fridge for up to 1 week. For longer freshness, freezing is a better option.

Neapolitan cake FAQs

We hope these cake questions and cake answers help you enjoy your Neapolitan cake. Always follow proper storage and handling to keep it fresh and delicious.

Conclusion and Encouragement to Try It Out

Mastering Neapolitan Cake baking is a rewarding journey for every home baker. It has a rich history, delicious flavors, and endless creativity. This classic dessert is a must-try for baking enthusiasts. We invite you to start your baking adventure and create vibrant Neapolitan Cake layers in your kitchen.

By using the detailed techniques and tips in this guide, you’ll make a stunning Neapolitan Cake. It will impress everyone. Feel free to try new flavors and decorations to make it your own. Baking is all about enjoying the process, so have fun and try new things.

Whether you’re an experienced baker or just beginning, Neapolitan Cake is a great challenge. It will help you grow as a baker. So, get your oven ready, gather your ingredients, and explore the world of Neapolitan Cake. Happy baking, and enjoy the fruits of your labor!

FAQ

How to make a smaller version of Neapolitan Cake?

To make a smaller Neapolitan Cake, just adjust the ingredients. Use smaller pans for the cake layers. This makes the dessert easier to handle.

Can you freeze Neapolitan Cake?

Yes, you can freeze Neapolitan Cake. Wrap it tightly in plastic or foil. Then, put it in a freezer bag or airtight container. It stays good for 2-3 months in the freezer.

How long does Neapolitan Cake last?

A Neapolitan Cake lasts 3-5 days at room temperature. Or up to a week in the fridge. Keep it in an airtight container or under a dome to keep it moist.

0 comment
0 FacebookTwitterPinterestEmail
Prom Dresses

As prom season gets closer, you’re probably looking for the perfect dress. There are thousands of dresses to choose from. You can find everything from classic styles to trendy ones, all priced from $338.00 to $769.00.

Do you like bright colors or classic looks? About 35% of dresses are in vibrant colors like red and pink. And about 60% are classic styles. You can also find unique dresses with high necks or one sleeve, making up 20% of the collection.

Key Takeaways

  • You can choose from 10 prominent prom dress trends for 2025, including classic elegance and bold colors.
  • Approximately 40% of dresses are ready to ship, and you can find exclusive styles, as well as standard ones, with a ratio of 1:4.
  • The average cost of high-end prom dress styles is over $600, making up 30% of total offerings.
  • 75% of high school students plan to wear a newly purchased dress for prom in 2025, with 40% preferring dresses with floral patterns.
  • Glitter and sequins are favored by 35% of students, and there’s a 20% increase in the popularity of long-sleeved prom dresses compared to 2024.
  • 30% of students are interested in sustainable or eco-friendly dress options, and 50% of respondents plan to coordinate their dress with their date’s outfit.

1. The Return of Classic Elegance in Prom Dresses

Classic elegance is always in style for formal wear. This year, vintage styles are back in evening gowns. Look for a classic ball gown in a neutral color or a vintage-inspired dress with a bold red lip.

Recent data shows 70% of dresses are sophisticated and elegant. Prices range from $473.00 to $1,223.00. You can choose from 14 colors, including Black, White, Red, Gold, Green, and Pink/Multi.

Popular styles include A-Line, Ball Gown, Column, and more. 80% of dresses have intricate beadwork and lace. Whether you want classic elegance or something trendy, there’s a gown for you.

2. Bold and Vibrant Colors for 2025

When it comes to prom dress trends, bold and vibrant colors are making a statement in 2025. Neon pink, neon green, and neon yellow are top choices for those who want to stand out. These colors are eye-catching and add fun to your look.

Other bold colors like red, burgundy, and emerald green are also trending. They’re great for making a statement and being noticed. It’s important to pick a color that complements your skin and hair.

Some popular formal wear colors for prom 2025 include:

  • Neon pink: perfect for those who want a playful and chic look
  • Neon green: trending among fashion-forward teens who want a fresh and modern look
  • Red: a classic choice that exudes glamour and confidence
  • Burgundy: a sophisticated and elegant option for those who want to make a statement

The key to pulling off a bold color is confidence. With so many options, you’ll find the perfect prom dress trend that makes you feel amazing.

Color Popularity Description
Neon Pink 30% Playful and chic
Neon Green 25% Fresh and modern
Red 40% Glamorous and confident

3. Sustainable Fashion in Prom Dress Choices

When picking your prom dress, think about its environmental impact. Sustainable fashion is on the rise, and it’s for a reason. Most prom dresses are made from synthetic materials like polyester, linked to fast fashion. But, eco-friendly options like organic cotton and Tencel are becoming more popular.

Brands like Reformation and Patagonia are at the forefront of sustainable fashion. They offer stylish, eco-friendly prom dresses. You can also rent a prom dress, giving you access to designer pieces at a lower cost. This not only saves money but also encourages reusing the dress.

  • Organic cotton, grown without harmful pesticides and chemicals
  • Tencel, made from sustainably sourced wood pulp and biodegradable
  • Recycled materials, which contribute to the circular fashion economy

Choosing sustainable fashion can make a big difference. It lets you look amazing while helping the planet.

Brand Eco-Friendly Fabric Price Range
Reformation Tencel, organic cotton $100-$500
Patagonia Recycled materials, organic cotton $50-$200

4. Intricate Embellishments and Details

Formal wear, like prom dresses, shines with intricate details. This year, beaded and sequined styles are popular. Delicate lace and ruffles add elegance to these dresses.

Recent data shows 65% of students like dresses with beading, lace, or feathers in 2025. The RCR Exclusives Collection is a hit for its unique designs.

Some top styles include:

  • Ruffled silhouettes, like ruffled off-the-shoulder dresses
  • Mermaid gowns with beaded or sequined bodices
  • A-line dresses with delicate lace or feather details

These styles are eye-catching and follow current trends. With 70% of prom dress shoppers wanting something unique, it’s clear why these details are sought after.

To keep up with formal wear trends, choose a prom dress with intricate details. Whether it’s a beaded bodice or a lace-trimmed hem, these touches can make your look stand out.

Style Popularity Key Features
Ruffled Silhouettes 25% increase Ruffled off-the-shoulder dresses, fun and flirty style
Mermaid Gowns 35% of shoppers Beaded or sequined bodices, hourglass figure-friendly
A-line Dresses 40% of total sales Delicate lace or feather details, timeless appeal

5. Off-Shoulder and Halter Necklines

Off-shoulder and halter necklines are big in prom dress trends. They add elegance and sophistication. These designs highlight your face and décolletage, making you stand out.

These necklines work well with many dress styles. For example, an off-shoulder dress can be paired with bold makeup and big earrings. You’ll see many styles, like:

  • Ball gowns with off-shoulder necklines and intricate embellishments
  • Fitted mermaid dresses with halter necklines and daring cut-outs
  • Two-piece dresses with off-shoulder tops and flowing skirts

When picking your prom dress, choose one that makes you feel good. With today’s trends, you can find a dress that matches your style. Whether it’s off-shoulder or halter, you’ll be the center of attention.

Why These Necklines Are Trending

Off-shoulder and halter necklines are popular because they add elegance. They also highlight your face and décolletage, creating a stunning look. As you look at the latest evening gowns, you’ll see why these necklines are favorites.

Styling Tips for Off-Shoulder Looks

To style an off-shoulder dress, try a bold lip color and big earrings. Add heels and a clutch for a complete look. For a casual vibe, pair an off-shoulder top with jeans and sneakers. An off-shoulder or halter neckline will always make a statement. With today’s trends, you can find a dress that fits your style and makes you feel confident and beautiful.

6. Sleek and Modern A-Line Innovations

Formal wear trends often mix classic shapes with a modern twist. The A-line shape is always in style, and this year, it’s getting a sleek update. Designers are adding asymmetrical hems and cut-out details to this classic shape.

To style an A-line dress, try a statement belt and heels. This combo makes the dress look chic and sophisticated. With current trends, you’ll find many A-line dresses to fit your style.

  • Pairing it with a bold, eye-catching necklace to draw attention to the neckline
  • Adding a pair of statement earrings to create a dramatic look
  • Wearing a pair of heeled ankle boots to add height and create a sleek, streamlined appearance

These tips can make your A-line dress stand out. With the right accessories and styling, you’ll have a look that’s both modern and timeless. It’s perfect for making a statement at your next formal event.

7. Two-Piece Prom Dress Sets

Two-piece prom dress sets are a hit among many. They offer versatility and make it easy to mix and match tops and bottoms. This way, you can create different outfits with just one dress. They’re perfect for making a bold statement at prom.

Rachel Allan is at the forefront of prom dress trends with their stunning collections. They have over 70707 two-piece prom dresses in stock. You’ll find everything from ball gowns to modern sets in a variety of colors. Choose from over 12 colors to match your style and personality.

Some benefits of two-piece styles include:

  • Easy to mix and match tops and bottoms
  • Creates multiple outfits with a single dress
  • Offers a wide range of styles and colors to choose from

For a chic look, try pairing a crop top with a high-waisted skirt. This combo is great for those who want to stand out. Two-piece sets let you express your unique style and personality.

Style Color Size
Ball Gown Red, Blue, Black 0-12
Fitted Mermaid Pink, Green, Gold 2-14
Contemporary Two-Piece Silver, Purple, White 4-16

With so many options, you’re bound to find the perfect two-piece prom dress set. Whether you prefer classic elegance or modern trends, these sets cater to all tastes. They’re ideal for anyone looking to make a statement at prom.

8. Dramatic Train Lengths for Impact

Formal wear, like evening gowns, can be made more glamorous with dramatic train lengths. These trains add drama and elegance, making your dress stand out. Think about how a dramatic train can enhance your prom look.

Evening gowns with long trains are a hit in formal wear. They have a double train detail for more grandeur. The gown’s design aims to flatter your figure, making it perfect for formal events. Some top picks include:

  • Ruby shade evening gowns with a dramatic train, perfect for making a statement
  • Formal wear with a focus on comfort, using lightweight materials such as satin and tulle
  • Evening gowns with a blend of playful and elegant styles, featuring embellishments like ruffles, beads, or sequins

When picking your evening gown, think about the train length and your height. Longer trains look great on taller people, while shorter ones suit petite frames. The right mix of style and drama will make your prom look unforgettable.

Confidence and poise are key to pulling off a dramatic train length. The right gown and self-assurance will make you unforgettable at your prom. So, why not try a dramatic train length for your formal wear? It’s sure to make a lasting impression.

9. Floor-Length vs. Short Hemlines

Choosing the right prom dress length is key. You have two main options: floor-length and short hemlines. Each has its own pros and cons. In prom dress trends, picking the right length can make your look unforgettable.

Floor-length dresses are the classic choice in formal wear. They’re elegant and dramatic. But, they might not fit everyone, like petite people or those who like modern styles. Short hemlines, on the other hand, add a modern twist but might not fit all body types or events.

Here are some tips for choosing between floor-length and short hemlines:

  • Floor-length dresses are best for taller people or those who want a big impact.
  • Short hemlines are great for petite women or those who love to show off their legs.
  • Tea-length and midi dresses offer a middle ground for those who don’t want to go all in.

Your choice depends on your style, body, and the event. By thinking about these and keeping up with prom dress trends and formal wear, you’ll find the perfect dress. It should make you feel confident and beautiful.

prom dress trends

Here’s a table that shows different dress lengths and the heights they match:

Dress Length Height Range
Mini 20-36 inches
Cocktail 24-44 inches
Knee-length 28-48 inches
Tea-length 32-52 inches
Midi 36-56 inches
Midaxi 40-60 inches
Maxi 44-64 inches
Floor-length 48-80 inches

10. Statement Sleeves Making Waves

Statement sleeves are a big deal in formal wear, like prom dresses. This season, they’re everywhere, offering many styles to match your taste. Whether it’s bell, puff, or cold-shoulder sleeves, they bring drama and elegance to your look.

In the world of formal wear, statement sleeves are a hit for prom dresses. With more focus on sustainable fashion, you can find eco-friendly prom dresses that are stunning. Some top styles include:

  • Bell sleeves, which add a touch of vintage charm to any prom dress
  • Puff sleeves, which create a dramatic and eye-catching effect
  • Cold-shoulder sleeves, which add a sleek and sophisticated touch to any prom dress

When styling statement sleeves, pair them with a simple neckline. Then, add understated jewelry for a chic look. Statement sleeves can make your prom dress truly unforgettable and stylish.

Statement sleeves are here to stay in formal wear. They’re perfect for adding personality to your prom dress, whether you want classic elegance or something more dramatic. So, why not try statement sleeves and make a statement at your next formal event?

Statement Sleeve Style Description
Bell Sleeves Add a touch of vintage charm to any prom dress
Puff Sleeves Create a dramatic and eye-catching effect
Cold-Shoulder Sleeves Add a sleek and sophisticated touch to any prom dress

11. Unique Prints and Patterns

Unique prints and patterns are big in prom dress trends, with about 70% of dresses sporting them. Evening gowns with bold colors are very popular, showing a trend towards being different. You can pick from many styles like florals, geometric shapes, and abstract prints to stand out.

High-low hemlines and two-piece outfits are favorites for their mix of comfort and style. Illusion dresses with sheer panels and embroidery or beads add a touch of elegance. Online sales for these unique styles have grown by 25% each year, proving they’re here to stay.

When picking a unique print, think about your style and what you like. If you’re bold, go for a striking print or bright color. If you prefer something more subtle, choose a classic design. With so many options, you’ll find a print that makes you feel confident and beautiful.

Some key statistics to consider when choosing a unique print prom dress include:

  • 60% of consumers are drawn to dresses with bold patterns and vibrant colors
  • 45% of the prom dress market for 2025 is projected to focus on dresses with dramatic patterns and eye-catching designs
  • 50% of surveyed high school students indicated they prefer wearing a unique prom dress rather than matching their attire with others

12. Incorporating Metallics and Shimmer

Formal wear often includes metallics and shimmer for glamour. With 65% of prom dresses featuring these, it’s clear they’re here to stay.

Choosing the Right Metallic for You

Think about your skin tone when picking a metallic. Gold and bronze work well with warm skin, while silver and rose gold suit cool skin. Also, match the metallic to your dress’s color.

Lamé and sequins are popular metallic fabrics. They’re set to make up about 25% of prom dresses in 2025. This shows they’re becoming more popular among high school students.

prom dress trends

Mixing and Matching with Other Textures

Mix metallics with other textures for a unique look. Pair metallic fabrics with matte ones or add simple accessories. Velvet is also gaining popularity, expected to rise by 10% this year.

Here are tips for adding metallics and shimmer to your prom dress:

  • Choose a metallic that complements your skin tone and dress color
  • Mix and match metallics with other textures, such as matte fabrics or understated accessories
  • Consider the style of your dress and choose a metallic that fits with the overall aesthetic
Metallic Fabric Percentage of Prom Dress Styles
Lamé 15%
Sequins 10%
Velvet 10%

13. Personalized and Custom Designs

Personalized and custom designs are now big in prom dress trends. You can pick your fabric, color, and style. This lets you make a dress that looks great on you and stands out at prom.

Custom prom dresses are unique. They make sure you won’t look like anyone else. They also offer comfort, letting you choose fabrics and styles that feel right.

When picking your custom prom dress, think about your body type, skin tone, and style. For example, if you’re petite, a floor-length gown can make you look taller. If you have a bigger bust, a supportive bodice and flared skirt can balance your look.

  • Choose a fabric that’s comfy and fits the season.
  • Think about the prom’s theme and how formal it is when picking your dress.
  • Don’t hesitate to add personal touches, like custom embroidery or beading.

By following these tips and thinking about your style, you can make a custom prom dress that’s both stunning and unforgettable.

14. Accessorizing Your Prom Look

Accessorizing is key to making your formal wear pop. For prom, it’s all about matching your accessories with your dress. This can boost your look by up to 35%, making your dress shine.

Think about jewelry, shoes, and a clutch. About 65% of people choose jewelry that matches their dress’s style. For example, a strapless gown looks great with a bold necklace or earrings.

Here are some top picks for accessories:

  • Jewelry: necklaces, earrings, bracelets
  • Shoes: heels, flats, ankle strap heels, strappy sandals
  • Clutches: compact, stylish, and versatile
  • Hair accessories: tiaras, embellished hair clips, flowers

Keep your accessories simple and bold, with one or two standout pieces. The right accessories can turn your prom look into something unforgettable.

Accessory Popularity Description
Jewelry 65% Necklaces, earrings, bracelets
Shoes 54% Heels, flats, ankle strap heels, strappy sandals
Clutches 58% Compact, stylish, and versatile

15. Tips for Online Shopping for Prom Dresses

When looking for your perfectprom dressonline, remember a few important tips. First, find online stores with lots offormal wearstyles, sizes, and prices. Reading what other customers say can help you understand the quality, fit, and shopping experience.

It’s key to know the sizing when buying aprom dressonline. Take time to check the size charts and measurements on the retailer’s website. Many sites also let you try on dresses virtually or send fabric samples. This makes shopping easier.

With some research and planning, you can find the perfectprom dress online. Start looking early and watch for sales to save money. By following these tips, you’ll find the dress of your dreams for the big event.

FAQ

What are the top 10 stunning prom dress trends for 2025?

The top 10 stunning prom dress trends for 2025 include classic elegance, bold colors, and sustainable fashion. You’ll also see intricate details, off-shoulder and halter necklines, and sleek A-line dresses. Two-piece sets, dramatic trains, and statement sleeves are also in.

What are the trends in classic elegance for prom dresses?

Classic elegance is back for prom dresses. Expect vintage styles with lots of details and timeless colors like black, white, and red.

What are the bold and vibrant color trends for prom dresses?

Bold and vibrant colors are big for prom dresses. Look for neon orange, Barbie pink, blush, and lavender.

What are the trends in sustainable fashion for prom dresses?

Sustainable fashion is key for prom dresses. Look for eco-friendly fabrics like organic cotton and recycled materials. Brands like Reformation and Patagonia are leading the way.

What are the trends in intricate embellishments and details for prom dresses?

Intricate embellishments and details are big for prom dresses. Expect beaded and sequined styles, along with lace and ruffles.

What are the trends in off-shoulder and halter necklines for prom dresses?

Off-shoulder and halter necklines add elegance and sophistication. They draw attention to the face and décolletage.

What are the trends in sleek and modern A-line innovations for prom dresses?

Sleek and modern A-line dresses are trending. Look for fresh takes on the classic shape with asymmetrical hems and cut-out details.

What are the trends in two-piece prom dress sets?

Two-piece prom dress sets are versatile. They let you create multiple outfits with a single dress.

What are the trends in dramatic train lengths for prom dresses?

Dramatic train lengths add drama and elegance. They draw attention to the dress.

What are the trends in hemline choices for prom dresses?

Hemline choices include floor-length and short styles. Each suits different body types and styles.

What are the trends in statement sleeves for prom dresses?

Statement sleeves add drama and elegance. Look for bell, puff, and cold-shoulder sleeves.

What are the trends in unique prints and patterns for prom dresses?

Unique prints and patterns are trending. Expect florals, geometric designs, and abstract prints.

What are the trends in incorporating metallics and shimmer for prom dresses?

Metallics and shimmer are big for prom dresses. Choose a metallic that complements your skin tone. Balance with matte fabrics and understated accessories.

What are the benefits of personalized and custom prom dress designs?

Personalized and custom prom dresses offer many benefits. You can choose your own fabric, color, and style. They flatter and complement your features.

What are the essential accessories to consider when accessorizing your prom look?

Essential accessories include jewelry, shoes, and a clutch. They enhance the dress while keeping the look simple.

What should you look for when shopping for prom dresses online?

When shopping online, look for a wide range of styles, sizes, and prices. Read reviews about quality, fit, and customer service. Understanding sizing is crucial, with sizing charts and measurements provided by most retailers.

0 comment
0 FacebookTwitterPinterestEmail
DIY Baby Room Decor

Preparing for your baby’s arrival means creating a beautiful nursery without spending too much. DIY baby room decor is a smart way to do this. It lets you save a lot of money while making the nursery your own. This approach can cut costs by 50-75% compared to buying everything new.

Think about saving up to 50% on shelves with DIY floating shelves. Or, save 70-80% by finding secondhand decor at thrift stores. With a bit of creativity, you can make a nursery that’s both beautiful and functional. DIY projects let you choose a theme and add personal touches that make the space special.

Using items you already have and getting creative with DIY projects can save you money. It also lets you create a nursery that shows off your style. Whether you’re looking to save or just want to make your baby’s room special, DIY is the way to go.

Key Takeaways

  • DIY baby room decor can help you save up to 50-75% on overall nursery costs
  • Purchasing secondhand decor items can save approximately 70-80% compared to buying new items
  • DIY projects can be a cost-effective way to create a unique and personalized nursery
  • Utilizing existing items from home can minimize nursery setup costs
  • DIY baby room design offers endless possibilities for customization and personalization
  • DIY floating shelves can reduce shelving costs by up to 50%
  • DIY baby room decor allows you to create a space that reflects your personal style and meets your baby’s needs

Introduction to DIY Baby Room Decor

Many parents are now making their own nursery decor. This approach is not only budget-friendly but also lets you add your unique touch. With some creativity and basic skills, you can make a special space for your baby.

DIY decor lets you pick the colors, fabrics, and furniture you love. It’s a great way to make a room that shows your style. Plus, it’s a fun activity to do with your baby.

Some great DIY ideas include painting walls, making a mobile, and sewing curtains. You can also give old furniture a new life. With a bit of imagination, you can do anything.

About 60% of parents choose DIY for their nursery to save money and make it personal. DIY decor can cut costs by up to 30% compared to store-bought items. This is important since a professionally designed nursery can cost between $1,000 and $5,000.

Here are some benefits of DIY nursery decor:

  • Cost-effective: DIY projects can save you money compared to buying ready-made items.
  • Personalization: You can choose the colors, fabrics, and furniture that you like, and create a space that reflects your personal style.
  • Fun and rewarding: DIY projects can be a fun and rewarding way to spend time and bond with your baby.

Choosing a Theme for Your Baby Room

Choosing a theme for your baby room is fun and exciting. There are many options, making it hard to pick one that fits your style. A good theme helps with choosing furniture and accessories.

Many people choose themes that spark imagination and creativity. Animal motifs, nature-inspired designs, and whimsical patterns are favorites. About 60% of nurseries have animal motifs, and 40% go for nature themes for a calm feel.

You can add your theme with wall art, bedding, and accessories. For example, a jungle theme can make the room fun, or a neutral theme can make it calm. Picking a theme that shows your style makes the room beautiful and useful.

Other popular themes include:

  • Modern designs with clean lines and simple looks
  • Personalized decor with handmade items or family photos
  • Whimsical or bohemian themes for eclectic spaces

Thinking about these themes can help you create a unique and useful space. It meets your needs and preferences.

Essential DIY Tools and Materials

Creating a beautiful nursery needs the right tools and materials. You’ll need hammers, screwdrivers, and paint to start. For decor, think about fabric, paint, and craft supplies to make it personal.

Having a good DIY toolkit saves money and makes your nursery unique. Surveys show up to 80% of parents do DIY for their baby’s room. Using DIY tools and materials can cut decoration costs by 50-70% compared to buying ready-made items.

Investing in these DIY tools and materials lets you create a beautiful nursery. It will reflect your style and meet your baby’s needs.

Creating Custom Wall Art

Custom wall art can make your nursery special. You can make your own using stencils, decals, paintings, and prints. It’s a great way to add a personal touch without spending a lot.

Start by thinking about your nursery’s theme and colors. Pick a design that fits the room and your baby’s personality. You can find ideas online or use your own photos to create something unique. For example, a 16×20 inch canvas can be decorated with foam brushes for just $5-$7.

Simple Wall Art Ideas

Here are some easy wall art ideas:

  • Use stencils for a geometric pattern or cute design
  • Apply decals for a quote or fun phrase
  • Paint a landscape or animal with acrylic paint from Basics
  • Make a photo collage with pictures of your baby and loved ones

Remember, the most important thing is to have fun and be creative. Try different designs and techniques until you find the perfect piece. With a bit of patience and practice, you can create a beautiful wall art for your baby’s room.

Crafting Functional Furniture

DIY furniture is a great choice for a beautiful and functional nursery. You can make custom pieces that fit your needs and budget. For instance, you can build a DIY crib or changing table. Or, you can upcycle an old dresser into a unique piece.

Popular DIY projects for nurseries include cribs, changing tables, and dressers. You can also add storage solutions like shelves or baskets. These help keep the room tidy. Recent stats show 70% of parents save money by making their own nursery furniture. They can save up to 30% compared to buying it.

  • Customization: You can make pieces that fit your style and needs.
  • Cost-effective: DIY furniture is often cheaper than buying it.
  • Personalization: You can add a unique touch to the room with handmade items.
DIY Project Estimated Time Estimated Cost
Building a crib 10-15 hours $100-$300
Upcycling a dresser 5-10 hours $50-$100

By making your own furniture, you can create a beautiful nursery that’s both functional and affordable. With a bit of creativity and DIY spirit, you can make a special space for your baby to grow and thrive.

Decorating with Textiles

Textiles are key in nursery decor, adding color and texture. You can pick from cotton, linen, and wool for a cozy feel. For crib bedding, choose safe and comfy fabrics. Cotton and linen are good choices because they breathe well.

Textiles can also make decorative items like curtains and wall hangings. DIY projects like sewing or knitting add a personal touch. They let you show off your style and match your nursery’s theme.

Popular fabrics for nursery decor include glow-in-the-dark adhesive vinyl and shimmer adhesive vinyl. They add magic to your baby’s room. Holographic starlight adhesive vinyl creates a whimsical look. With many options, you can make a beautiful and practical nursery.

Choosing Fabrics for Crib Bedding

When picking fabrics for crib bedding, think about a few things:

  • Breathability: Choose fabrics that let air through to keep your baby cool.
  • Softness: Go for fabrics that are soft and gentle on your baby’s skin.
  • Durability: Pick fabrics that can handle washing and use well.

These tips help make a safe and comfy place for your baby to sleep.

Personalizing Your Baby’s Space

Creating a personalized space for your baby is a great way to make their nursery unique and special. With DIY projects, you can add a personal touch to the nursery decor. This makes it reflect your baby’s name and personality. Recent surveys show that 70% of parents believe personalizing their baby’s nursery strengthens their bond with their child.

One way to personalize the nursery is by adding unique name banners and signs. You can use wooden letters, fabric banners, or even glow-in-the-dark adhesive vinyl. This creates a special and cozy atmosphere. For example, you can use a combination of wooden letters and fabric to create a beautiful name banner that matches the nursery decor.

  • Using a customized wooden sign with your baby’s name and birthdate
  • Creating a fabric banner with a special message or quote
  • Adding glow-in-the-dark stars or shapes to the nursery walls

By incorporating these DIY projects into your nursery decor, you can create a space that is not only beautiful but also meaningful and personalized to your baby’s needs.

Adding Nature to Your Decor

Adding natural elements to your baby’s room can make it calm and peaceful. You can use plants, wooden furniture, and natural fabrics. This not only looks good but also helps your baby’s health and growth.

Many parents choose a nature theme for their nursery. This theme includes leaves, flowers, and animals. It’s popular and easy to add to your DIY projects. Natural materials like wood, cotton, and wool make the room cozy and welcoming.

Indoor Plants Safe for Baby Rooms

Safe plants for baby rooms include ferns, succulents, and peace lilies. They’re easy to care for and clean the air. Make sure the plants you pick are safe and don’t cause allergies.

You can also add wooden furniture, woven baskets, and natural fabrics to your nursery decor. These add warmth and make the room cozy. By using natural elements in your DIY projects, you create a unique and healthy space for your baby.

Benefits of natural elements in your nursery decor include:

  • Creating a calming and peaceful atmosphere
  • Promoting a healthy environment for your baby to grow and develop
  • Adding a touch of warmth and coziness to the space
  • Encouraging a sense of connection to nature

Budget-Friendly Lighting Ideas

Lighting is key in making a nursery warm and inviting. You want it to be both useful and pretty without spending too much. With some creativity, you can find affordable lighting that fits your style. Over 2,000 people looked for baby room lighting ideas, showing a growing interest in DIY and decor.

Cloud lights and hot air balloon lights are popular DIY choices. They add a playful touch to your nursery and are easy to make with everyday items. For instance, a string of Christmas lights, costing $2-$5, can create a cozy feel.

DIY Lamps and Nightlights

There are many DIY lamp and nightlight ideas for your nursery. Some favorites include:

  • Whimsical animal lamp designs, with over 40 options available
  • Semi-flush light fixtures, which combine functionality and aesthetics
  • Minimalist and Japandi nursery designs, which emphasize simplicity and affordability

Choosing DIY projects can save you up to 50% on lighting costs. With a bit of creativity, you can make a beautiful nursery that shows your style and stays within your budget.

nursery decor

Brands like IKEA offer affordable, stylish lighting for your DIY projects. By exploring these options and getting creative, you can make a unique and welcoming nursery for you and your baby.

Lighting Option Cost Description
Cloud Lights $10-$20 Unique and personalized lights that can add a touch of whimsy to your nursery
Hot Air Balloon Lights $15-$30 Beautiful and cozy lights that can create a warm ambiance in your nursery
Semi-Flush Light Fixtures $20-$50 Functional and aesthetic lights that combine simplicity and style

Creating a Cozy Reading Nook

When designing your baby’s nursery, think about a cozy reading nook. It’s a place for relaxation and learning. With DIY projects, you can make it warm and inviting. Studies show that kids read more in spaces made for reading, like a cozy nook.

For a reading nook, you need comfy seating, good lighting, and books. You can make bookshelves from wooden crates or fabric. Wall-mounted shelves save space, perfect for small nurseries.

DIY Bookshelf Ideas for Easy Access

There are many DIY bookshelf ideas. You can use old cardboard boxes, painted Ikea spice racks, or repurposed baby cots. These ideas save money and are good for the environment. Adding soft textures like blankets and cushions makes the space cozy.

Make your reading nook fun with art and colorful pillows. About 85% of parents think these add to the fun. By mixing DIY projects with these elements, you’ll create a cozy spot your child will enjoy.

Incorporating Sensory Elements

Creating a nurturing space for your baby is key. You can do this by making DIY projects that stimulate their senses. For example, a DIY mobile can provide visual interest. It’s a great way to encourage your baby to explore and develop in their nursery.

To make a sensory-rich area, use materials with different textures, colors, and sounds. Touch-and-feel books and sensory boards are good choices. You can also make seasonal sensory boxes with household items. These projects are affordable and easy to customize for your baby.

Here are more ideas for adding sensory elements to your baby’s nursery:

  • Make homemade toys and sensory items to avoid commercial products.
  • Create sensory boards and tiles with materials like fabric, wood, and metal.
  • Use common items to make sensory boxes, like containers, grains, and seasonal decorations.

By adding these sensory elements, you can make a space that supports your baby’s growth and curiosity. Focus on DIY projects that are simple and adaptable to your baby’s needs. Be creative with materials to make a unique and engaging nursery.

Sensory Element Materials Needed Benefits
DIY Mobile Project Fabric or wooden materials Visual stimulation and development
Sensory Boards and Tiles Textured materials, such as fabric, wood, and metal Tactile stimulation and exploration
Sensory Boxes Common household items, such as containers, grains, and seasonal decorations Multi-sensory stimulation and development

Safety Considerations in DIY Decor

When you’re doing DIY projects for your nursery, safety is key. You want your baby’s room to be both beautiful and safe. Research shows that 1 in 3 parents worry about the safety of nursery decor.

Securing hanging items properly is crucial. About 60% of parents focus on safety when setting up a nursery. Experts suggest using hooks and Velcro to hang frames. This can greatly lower the risk of accidents.

Ensuring Your DIY Projects are Safe

To make sure your DIY projects are safe, follow these tips:

  • Choose non-toxic materials and paints to avoid chemical risks.
  • Stay away from glass or plexiglass in frames to prevent accidents.
  • Go for furniture that serves more than one purpose, like a dresser that’s also a changing table.

nursery decor safety

By keeping these safety tips in mind, you can make a nursery that’s both lovely and safe. Always check and update your DIY projects to keep them safe and secure.

Conclusion: Enjoying Your DIY Creations

When you finish your DIY baby room decor, take a moment to admire your work. The effort and creativity you put in will make your child’s room beautiful and functional. It will also make you feel proud and accomplished.

To keep your DIY projects looking great, clean and touch up your space often. Clean surfaces, spot clean fabrics, and dust to keep your DIY projects looking new. Also, update or refresh parts of your decor as your child grows and their tastes change.

DIY decor is special because it can change and grow with your family. Keep making your baby’s room personal and special. It will be a warm, inviting, and unique place for your little one.

FAQ

What are the benefits of DIY decor for my baby’s room?

DIY decor for your baby’s room is a smart choice. It’s affordable and lets you add your own style. This makes the nursery truly yours.

How do I choose a theme for my baby’s room?

Picking a theme for your baby’s room is fun. There are many themes to choose from. We’ll help you find one that fits your style.

What basic tools and materials do I need to get started with DIY projects?

To start your DIY project, you need the right tools and materials. We’ll cover the basics, like hammers and paint.

How can I create custom wall art for my baby’s room?

Making custom wall art is a great way to personalize your nursery. We’ll show you simple ideas, like stencils and paintings.

What DIY furniture ideas can I explore for my baby’s room?

Making your own furniture is a creative way to decorate. We’ll look at DIY ideas for cribs and dressers.

How can I personalize my baby’s space with DIY decor?

Personalizing your baby’s space is special. We’ll share ideas for unique signs and banners, like wooden letters.

What safety considerations should I keep in mind when doing DIY projects for my baby’s room?

Safety is crucial when decorating your baby’s room. We’ll talk about electrical and chemical safety. Plus, give tips to keep your projects safe.

How can I maintain and update my DIY baby room decor over time?

We’ll end with tips on keeping your decor fresh. From cleaning to updating, we’ve got you covered.

0 comment
0 FacebookTwitterPinterestEmail
Mom Life Hacks

Being a parent can be stressful and chaotic. You have many tasks to handle, making it easy to feel overwhelmed. But, there are simple tips and hacks to make your life easier. NBC says parenting can be tough, but the right hacks can help.

Using a family calendar can keep everyone’s schedule in order. A meal prep plan can save time and reduce stress. These hacks can help you manage your daily routine better.

These tips and hacks can make your life more efficient and stress-free. For example, 70% of busy parents stress about planning dinners. But, printable meal plans can help make dinner time enjoyable. Using meal delivery services or crockpot meals can also save you time in the kitchen.

By adding these hacks to your daily routine, you can make a big difference. It will improve your life and the lives of your family members.

Key Takeaways

  • Implementing mom hacks can make parenting easier and more manageable
  • Using a family calendar can help keep track of schedules and appointments
  • Meal prep strategies can save time and reduce stress
  • 70% of busy parents report stress about planning dinners last-minute, but printable meal plans can help
  • Incorporating parenting tips and mom hacks can create a more efficient and stress-free life
  • Using meal delivery services or crockpot meals can save time and effort in the kitchen
  • By using these mom hacks, you can make a significant difference in your life and the lives of your family members

Streamline Your Morning Routine

Mornings can be chaotic for busy parents. It’s key to find ways to make mornings smoother. A well-organized morning routine can cut down stress and boost productivity, as Getty Images notes.

Start by making a family calendar, planning breakfast, and laying out clothes the night before. These steps can save a lot of time. For instance, prepping breakfast the night before can shave off 30 minutes. This extra time can be used for exercise or meditation.

Create a Family Calendar

A family calendar keeps everyone’s schedule in sync. Choose a physical or digital calendar that fits your family’s needs. It helps avoid missed appointments and keeps everyone on the same page.

Organize Breakfast Options

Having a plan for breakfast can change your morning. Prepare meals like overnight oats or scrambled eggs the night before. Or, keep a list of quick breakfasts like toast or yogurt. This way, you can avoid the morning rush and start the day well.

Lay Out Clothes the Night Before

Getting clothes ready the night before saves time and stress. Pick out outfits for the next day, including shoes and accessories. This is a big help for kids, who often take a long time to get dressed. With clothes laid out, they can dress quickly and easily.

By using these tips, you can make your morning routine more efficient. A well-organized morning routine reduces stress and boosts productivity. With a bit of planning, you can create a morning routine that works for everyone, setting you up for a successful day.

Morning Routine Task Time Saved
Preparing breakfast the night before 30 minutes
Laying out clothes the night before 15 minutes
Creating a family calendar 10 minutes

Meal Prep Strategies for Busy Moms

As a busy mom, managing your time well is key to a healthy balance. Meal prep is a smart way to save time and cut down stress, MTV says. It lets you plan and cook meals ahead, ensuring your family eats well even when life gets busy.

Studies show meal planning tools ease cooking stress for families with varied schedules and tastes. Busy moms save up to 60% of time and money with meal prep. Strategies like batch cooking, weekly themes, and using leftovers are popular.

  • Saves time: Meal prep can save you up to 30 minutes per day, which can be used for other activities.
  • Reduces stress: Meal prep can reduce the stress of cooking and planning meals, even on busy days.
  • Improves nutrition: Meal prep helps plan and prepare healthy meals, boosting your nutrition and health.

Some top meal prep ideas for busy moms include:

  1. Batch cooking: Cooking big batches of food like rice, quinoa, or chicken, and using it all week.
  2. Weekly meal themes: Planning meals around a theme, like Italian or Mexican, makes planning simpler.
  3. Freezer meals: Preparing meals ahead and freezing them, like casseroles or soups, for later.

Adding meal prep to your routine saves time, lowers stress, and boosts nutrition. So, why not try it and see the benefits for yourself?

Meal Prep Strategy Benefits
Batch Cooking Saves time, reduces stress, improves nutrition
Weekly Meal Themes Makes meal planning easier, reduces decision fatigue
Freezer Meals Saves time, reduces food waste, improves nutrition

Effective Cleaning Hacks

As a busy mom, you face a lot of cleaning tasks. 20% of moms feel overwhelmed. It’s key to have some quick cleaning tricks. One great trick is to get your kids involved in cleaning. Hammarby Studios says it teaches them responsibility and helps you relax.

Using multi-purpose cleaning products is another smart move. It cuts down cleaning time by 25%. Also, tools like robot vacuums can save up to 30% of your time. Here are some quick tips to start:

  • Set a timer for quick cleanup sessions throughout the day to prevent overwhelming mess.
  • Use a daily cleaning routine to maintain household cleanliness.
  • Involve your kids in household chores to instill responsibility and teamwork.

These cleaning hacks can make your home cleaner and more peaceful. Cleaning is a team effort. By working together, you can make your home healthier and more organized.

Cleaning Hack Time Saved
Using multi-purpose cleaning supplies 25%
Using cleaning tools like robot vacuums 30%
Weekly purging of trash, toys, and unused items 40%

Maximizing Family Bonding Time

As a parent, you want to make memories with your family. One way is by having family game nights. Studies show that families who play together weekly feel closer and happier.

Planning monthly outings is another great idea. It could be a hike, a visit to a museum, or a picnic. These activities help you spend quality time with your kids and grow closer.

Creating a Family Activity Jar

To make bonding time more fun, try a family activity jar. Each family member can suggest an activity. It’s a fun way to involve everyone and make sure everyone has a say.

  • Having a movie night with popcorn and snacks
  • Playing board games or card games together
  • Going on a bike ride or hike
  • Having a cooking or baking competition

By making family bonding time a priority, you can build a stronger family. Be flexible and have fun. The most important thing is to spend quality time together and make memories that last forever.

Activity Frequency Benefits
Family Game Nights Weekly Increased family cohesion and emotional well-being
Monthly Outings Monthly Creates opportunities for quality time and strengthens relationships
Family Activity Jar Regularly Involves everyone in the planning process and ensures everyone has a say

Smart Shopping Tips

As a busy mom, you want to save time and money at the grocery store. Making a grocery list each week is a smart move. It helps you avoid buying things you don’t need and keeps your budget in check. You can also find great deals with smart shopping apps.

Using coupons and apps can also save you money. For instance, coupon apps offer digital coupons for your favorite stores. Cashback apps give you a percentage back on your purchases. Shopping when stores are less busy can also save you time and stress.

  • Plan your meals for the week and make a grocery list according to your plans
  • Shop for seasonal and locally sourced produce to save money
  • Use store flyers to compare prices and find the best deals
  • Consider using a store loyalty card or app to earn rewards and discounts
Shopping Tip Benefits
Creating a master grocery list Avoids impulse purchases, saves time and money
Using coupons and apps Saves money, offers discounts and cashback
Shopping during off-peak hours Reduces stress, saves time

Digital Resources for Parenting

Being a parent today means having access to lots of digital resources. The internet is full of information, but it’s hard to know what to trust. Luckily, there are apps, online communities, and blogs that can help you stay informed and connect with other parents.

Studies show that today’s parents have more info than ever before. About 70% of them use books and podcasts to help with parenting. There are also apps for scheduling, reminders, and tracking your child’s growth.

Online communities offer support and connection for parents. Olga Ps says they’re a great way to find info and support. You can join forums and social media groups. Blogs and podcasts also share valuable parenting tips.

Using digital resources for parenting has many benefits. You get access to lots of advice, connect with others, and find resources easily. This helps you make good choices, stay close to your child, and handle parenting challenges with confidence.

Organizing School Supplies and Homework

As a parent, you want your child to have a great school year. Organizing school supplies and homework is key. Kinga Krzeminska says a homework station can make things less stressful and more productive. It helps your child stay on track and avoid distractions.

A good homework station needs the right school supplies. This includes pens, pencils, and paper. You can also use binders for each subject to keep things organized. Having a homework routine is also important. It teaches your child responsibility and how to manage time.

  • Using a planner or calendar to keep track of assignments and due dates
  • Designating a specific area for homework, such as a desk or table
  • Using storage bins or baskets to keep school supplies organized
  • Establishing a regular homework routine, such as doing homework at the same time each day

By following these tips, you can help your child stay organized and focused. This will set them up for success in the new school year. Always check and update your child’s homework routine and school supply organization to meet their needs.

Managing Screen Time Wisely

As a parent, it’s key to manage your child’s screen time for their health. Too much screen time can lead to obesity, sleep problems, and trouble focusing. To handle screen time well, set rules, pick educational content, and make tech-free zones.

Oscar Wong says setting rules and limits can cut down screen time and boost productivity. For instance, having a screen-free dinner time can bring everyone together and cut distractions. Also, choose educational content like documentaries or apps to make screen time useful.

Benefits of Tech-Free Zones

Creating tech-free zones can lower screen time and encourage other fun activities. Designate places like bedrooms or dining rooms as tech-free to promote reading or playing outside. This helps your child develop good screen habits and avoids health issues from too much screen time.

  • Reduced risk of health problems, such as obesity and sleep disorders
  • Improved productivity and focus
  • Increased time for other activities, such as reading or outdoor play
  • Improved social skills and relationships

By setting rules, choosing educational content, and making tech-free zones, you can help your child have healthy screen habits. This reduces the chance of health problems from too much screen time.

Screen Time Benefits
Less than 2 hours Reduced risk of health problems, improved productivity
2-4 hours Some health benefits, but increased risk of attention issues
More than 4 hours Increased risk of health problems, decreased productivity

Budgeting for Family Expenses

Creating a budget for your family can be tough, but it’s doable. Start by tracking where your money goes. Susie Hedberg says using apps and tools can help you keep track and feel less stressed.

Managing your family’s money is easier when you divide your income into categories. The 50/30/20 rule is a good start: 50% for needs, 30% for wants, and 20% for savings and debt. The envelope system is another way to manage money: 30% for daily spending, 30% for short-term savings, 30% for long-term savings, and 10% for giving to charity.

budgeting for family expenses

  • Track your spending to understand where your money is going
  • Use budgeting apps and tools to make tracking easier
  • Involve your kids in financial planning to create a sense of financial responsibility
  • Allocate your income into categories using the 50/30/20 rule or the envelope system
Category Percentage of Income
Needs 50%
Wants 30%
Savings and Debt Repayment 20%

By following these tips and using the right budgeting strategies, you can create a sense of financial responsibility and reduce stress. Remember to review and refine your budget regularly to ensure it meets your family’s changing needs.

Healthy Habits for Busy Families

It’s tough to focus on healthy habits when you’re busy. But, with a few easy steps, you can make your home healthier and happier. Starting with what you eat and how you spend your time is key. This way, you can boost your health and feel less stressed.

One simple way to support healthy habits is to offer nutritious snacks. Think about fruits, veggies, whole grain crackers, and lean proteins. Having these snacks ready can help your family make better food choices. Plus, getting everyone involved in meal planning teaches them about healthy eating and healthy habits.

Easy and Nutritious Snacks

  • Fresh fruits and vegetables
  • Whole grain crackers with lean proteins
  • Nuts and seeds
  • Low-sugar granola bars

Regular exercise is also vital for healthy habits. Working out together can strengthen your bond and lower stress. Start with simple activities like walking or playing soccer together.

Simple Meal Planning

Meal planning is a smart way to keep your family eating well, even when you’re short on time. Plan your meals ahead to avoid fast food. Begin by mapping out your meals for the week and then make a shopping list.

Navigating Sibling Rivalry

As a parent, you know about sibling rivalry. Conflicts can happen over small things. It’s key to handle these in a way that boosts teamwork and cooperation.

Research shows sibling rivalry is common in families with more than one child. Kids spend about 30% of their time fighting with their siblings.

To lessen fights and strengthen bonds, try strategies that promote teamwork. For instance, give each child a special day for chores and rewards. This could be things like doing the dishes or taking out the trash. They might get to pick where they sit in the car or what’s for dinner.

Some parents use a TikTok trick for resolving conflicts. They give each child a “cool down” space. This method works in 70% of homes that try it. Also, having clear rules and not comparing siblings can lower rivalry.

Teach your kids to take responsibility for their part in conflicts. Encourage them to stand up for themselves without making things worse. This helps them grow up with better communication skills.

With patience and the right strategies, you can help your kids get along better. This makes for a more peaceful home.

Time Management For Moms

As a mom, managing your time well is key to balancing your duties and lowering stress. Effective time management helps you sort out your daily tasks, work more efficiently, and use your time wisely. A Homebase report shows that those who manage their time well are 57% more likely to finish tasks on time.

To get better at time management, start by prioritizing your tasks. List out your daily tasks and tackle the most critical ones first. Use the Two-Minute Rule to quickly finish small tasks and avoid piling them up. Also, try using a timer to add a sense of urgency and make tasks more efficient.

Here are some tips to help you manage your time well:

  • Set clear goals and priorities for your day
  • Use a daily schedule to stay organized
  • Learn to say no to non-essential tasks
  • Take breaks to avoid burnout

By using these strategies, you can get better at managing your time and feel less stressed. Remember, time management is a skill that gets better with practice and consistency. Begin by making small changes to your daily routine and see how it improves your life.

time management for moms

Research shows that moms who manage their time well see a 25% boost in overall well-being scores. By focusing on your priorities and managing your time, you can find a better balance between work and life. This can lead to a higher quality of life for you.

Time Management Strategy Benefits
Prioritizing tasks Increases productivity, reduces stress
Using a daily schedule Helps stay organized, reduces forgetfulness
Taking breaks Reduces burnout, improves focus

Self-Care for Busy Moms

Being a busy mom can make it hard to remember to take care of yourself. But, it’s crucial for your health and the well-being of your family. Zbynek Pospisil says setting aside time for yourself can lower stress and boost productivity. Using mindfulness like meditation or deep breathing can also help you feel calm and less anxious.

Here are some tips to help you prioritize self-care:

  • Schedule ‘me time’ into your daily or weekly routine
  • Explore mindfulness techniques, such as meditation or yoga
  • Get enough sleep to help your body and mind recharge

Remember, taking care of yourself is not selfish. It’s essential. By focusing on self-care, you can feel better, work more efficiently, and be a better mom. So, take a few minutes each day to think about yourself. You’ll see positive changes in your life.

Travel Tips for Families

Planning a family trip? It’s key to pick family-friendly destinations that fit your family’s likes and needs. This makes your journey fun and stress-free.

Packing Smartly with a Checklist

Using a packing checklist can make your trip smoother. It helps you remember everything you need. Pack clothes, toiletries, and fun stuff for the kids.

Choosing Family-Friendly Destinations

It’s vital to choose family-friendly destinations for a great trip. Look for places with fun activities for kids, like theme parks or museums. Also, find places with kid-friendly hotels or resorts.

  • Research destinations that offer family-friendly activities and amenities
  • Consider kid-friendly accommodations that cater to your family’s needs
  • Read reviews and ask for recommendations from other families

By using these travel tips and picking family-friendly destinations, you’ll have a memorable trip. Involve your kids in planning to make sure everyone is excited.

Building a Support Network

Being a busy mom can be tough. But, having a strong support network can really help. By connecting with other parents, you get access to great resources and advice. You also feel less alone.

Look for local parenting groups, both online and in-person. These communities understand the challenges you face. They offer a place to share experiences and get support.

Don’t forget to use the support resources in your area. This could be parenting classes, mom support groups, or activities for kids. These allow you to socialize while your kids have fun.

Remember, asking for help is okay. Whether it’s a friend, family member, or a professional, don’t hesitate. They can help with chores or offer mental health support.

Building a strong support network takes time and effort. But, the benefits are huge. With caring people around you, you’ll feel more confident and less stressed in motherhood.

FAQ

How can I streamline my morning routine?

To make mornings easier, use a family calendar to keep track of everyone’s schedule. Plan breakfast the night before and lay out clothes. This helps save time and reduces morning stress.

What are some effective meal prep strategies for busy moms?

Busy moms can prep meals by batch cooking and getting kids involved in the kitchen. Freezer meals are also a great option for quick, easy meals.

How can I make cleaning easier and more efficient?

For quicker cleaning, set a timer and get your kids to help. Using multi-purpose cleaners can also make cleaning faster and more effective.

How can I maximize family bonding time?

Spend quality time together by having family game nights and planning outings. A family activity jar can also help plan fun activities.

What are some smart shopping tips to save time and money?

Smart shopping includes making a master list, using coupons, and shopping when stores are less busy. These tips can help save money and time.

What digital resources are available for parenting support?

There are many digital tools for parents, like apps for reminders and online communities. Parenting blogs and podcasts also offer valuable advice and support.

How can I help my kids stay organized with school supplies and homework?

Create a dedicated homework area and use binders for each subject. A consistent homework routine helps keep things organized.

How can I effectively manage my kids’ screen time?

Set clear rules and limits for screen time. Choose educational content and make tech-free zones in your home. This helps manage screen time effectively.

How can I budget for family expenses?

Track your spending and use budgeting apps to manage money. Involve your kids in financial planning to teach them about money.

How can I help my family develop healthy habits?

Provide healthy snacks and plan simple meals. Exercising together as a family is also a great way to stay healthy.

How can I navigate sibling rivalry?

Encourage teamwork and set fair rules. Give each child one-on-one time to reduce rivalry.

What time management tips can help busy moms?

Prioritize tasks, use a timer for breaks, and learn to say no. These tips help manage time effectively.

How can I practice self-care as a busy mom?

Schedule ‘me time’ and try mindfulness techniques. Getting enough sleep is also crucial for self-care.

What travel tips can make family trips easier?

Pack smart with a checklist and choose destinations that are family-friendly. Involve kids in planning to make trips more enjoyable.

How can I build a supportive parenting network?

Connect with other parents and use local resources. Don’t be afraid to ask for help when you need it.

0 comment
0 FacebookTwitterPinterestEmail
Temporary Tattoos

Easy Temporary Tattoo Ideas

by Mary

Imagine a world where you can show off your style without permanent ink. Temporary tattoos have become a fun way to express yourself. They’re perfect for special events or just for fun.

These easy ideas let you try out different looks without much effort. You can go for whimsical designs or meaningful symbols. DIY temporary tattoos can make a big impact, showing that art can be short-lived yet powerful.

What Are Temporary Tattoos?

Temporary tattoos are a fun way to decorate your body for a short time. They last from a few days to a few weeks. They’re great for anyone who wants to try out body art without a permanent mark.

Exploring the history and types of temporary tattoos is interesting. It shows how they’ve changed over time.

History of Temporary Tattoos

Temporary tattoos have a long history, dating back to ancient times. They were used to show status, mark rituals, or highlight beauty. Back then, they were made with natural dyes and applied in different ways.

Today, we have new methods and materials for making temporary tattoos. This has made them more accessible and diverse.

Popular Types of Temporary Tattoos

There are many types of temporary tattoos, each with its own style and application. Here are some favorites:

  • Water-Transfer Tattoos – These classic tattoos need water to apply and are simple to remove.
  • Airbrush Tattoos – Made with airbrushes, these tattoos look realistic and can be tailored to your liking.
  • Henna Tattoos – Created from natural henna paste, these tattoos have detailed designs and last longer.
Type of Temporary Tattoo Application Method Duration
Water-Transfer Tattoos Apply with a damp cloth 3-7 days
Airbrush Tattoos Sprayed on skin 1-2 weeks
Henna Tattoos Hand-painted 1-3 weeks

Benefits of Using Temporary Tattoos

Exploring the benefits of temporary tattoos shows why they’re popular across ages and styles. This non-permanent body art has many advantages for those wanting to express themselves creatively.

Non-Permanent Body Art

One big benefit of temporary tattoos is they don’t last forever. This lets people try out different designs without a long-term commitment. You can match your tattoos to your mood or the latest trends, making it easy to change them up.

Versatility for All Ages

Temporary tattoos are versatile tattoos that please both kids and adults. Kids can wear their favorite characters or fun designs. Adults can choose more complex images or messages. This makes them perfect for any event, from parties to quiet get-togethers, and they appeal to many people.

Easy Removal Process

The easy way to remove temporary tattoos is another big plus. If you want a change or feel tired of your tattoos, you can take them off with simple items like rubbing alcohol or baby oil. This makes them stand out from permanent tattoos, making the experience of using non-permanent body art even better.

Benefit Description
Non-Permanent Allows free experimentation without long-term commitment.
All Ages Appeals to both children and adults, suitable for various occasions.
Easy Removal Can be removed easily with common household items.

How to Apply Temporary Tattoos

Applying temporary tattoos is fun and easy with a few simple steps. It’s important to apply them correctly to ensure they look good and last longer. Here’s a detailed guide on how to apply temporary tattoos and some useful tips.

Step-by-Step Application Guide

  1. Prepare the skin: Clean the area where you want the tattoo. Make sure it’s free of lotions or oils that could affect adhesion.
  2. Cut the tattoo: Trim around the tattoo design, leaving a small border. This helps in getting a clean placement without excess material.
  3. Position the tattoo: Place the tattoo face down on the skin. Adjust it until you’re happy with its placement.
  4. Apply water: Use a damp cloth or sponge to wet the back of the tattoo thoroughly. Keep it pressed against the skin for about 30 seconds.
  5. Peel carefully: Gently peel the paper backing away after you’ve waited long enough. Do this slowly to ensure the design stays intact.
  6. Seal in place: Allow the tattoo to dry for a couple of minutes. You can also lightly apply baby powder or a makeup setting spray to help it last longer.

Tips for Best Results

  • Avoid applying lotions or oils on the skin before placing the tattoo. This can reduce adhesion and longevity.
  • For a more vibrant design, make sure to choose high-quality temporary tattoos.
  • If you want your tattoo to last longer, try to keep it away from water and excessive rubbing.
  • Consider applying tattoos on areas that don’t get much friction from clothing.
  • Always do a patch test on a small area of skin if you have sensitive skin.

Creative Temporary Tattoo Ideas

Exploring temporary tattoos opens up a world of creative ideas. You can find designs that match your style and values. From nature tattoos to minimalist designs, there’s something for everyone.

Nature-Inspired Designs

Nature tattoos capture the beauty around us. They feature flowers, leaves, and animals. These designs can add a stunning touch to your body.

  • Wildflowers or succulents for an earthy feel
  • Birds or butterflies for a whimsical touch
  • Celestial patterns like the sun or moon for a cosmic influence

Minimalist Patterns

Minimalist tattoos are all about simplicity and elegance. They use clean lines and simple shapes. You might see:

  • Geometric shapes like triangles or circles
  • Single-line art representing animals or objects
  • Abstract designs that evoke thought yet remain understated

Inspirational Quotes

Temporary tattoos with quotes can inspire and comfort you. They remind you of your goals. You can find:

  • Short phrases in elegant cursive fonts
  • Simple words like “Hope” or “Strength” in bold lettering
  • Longer quotes wrapped around the arm or wrist for a unique twist
Type of Tattoo Key Features Examples
Nature Tattoos Emphasis on natural beauty; incorporates flora and fauna Floral designs, animal silhouettes
Minimalist Tattoo Designs Less is more; clean lines and subtle artistry Geometric shapes, single-line art
Inspirational Quotes Motivational phrases; personal significance Short phrases, longer quotes

Seasonal Temporary Tattoo Inspiration

Seasonal temporary tattoos can make any celebration more exciting. They range from spooky designs for Halloween to colorful ones for summer festivals. You can also use them to make holiday gatherings unforgettable.

Halloween-Themed Tattoos

Halloween tattoos are great for getting into the spooky spirit. You can choose from:

  • Jack-o’-lanterns
  • Ghosts and ghouls
  • Witches and black cats
  • Spider webs and bats

These tattoos add fun to costumes and trick-or-treating. They let you show off your creativity in a temporary way.

Summer Festival Designs

Summer festival tattoos bring color and fun to your festival experience. Consider designs like:

  • Floral patterns
  • Animal prints
  • Psychedelic shapes
  • Festive symbols and icons

With bright colors and detailed art, these tattoos keep you feeling lively. They connect you to the summer festival vibe.

Holiday Celebration Ideas

Themed tattoos for holidays can make family gatherings more festive. You can choose from:

  • Snowflakes for winter holidays
  • Hearts for Valentine’s Day
  • Stars and stripes for Independence Day

Adding seasonal temporary tattoos makes holiday celebrations more joyful. They capture the spirit of the occasion.

Temporary Tattoos for Special Occasions

Temporary tattoos can make your special occasions even more unique. They add a personal touch to any event, like weddings, birthday parties, or baby showers. These tattoos can make your celebration more memorable for everyone.

Wedding and Engagement Ideas

Adding wedding temporary tattoos to your day can be fun. You could have matching tattoos for your bridesmaids and groomsmen. This shows unity. You could also have a tattoo station where guests pick designs that fit your wedding theme.

Birthday Party Themes

Birthday party tattoos can make your party unforgettable. Choose a tattoo design that matches your party’s theme. Whether it’s a favorite character or color, it will be a hit. Set up a tattoo station for guests to get their tattoos, making it an interactive and fun experience.

Baby Showers and Gender Reveals

Temporary tattoos are great for baby showers and gender reveals. You can design tattoos that match the baby’s theme or colors. Guests will love wearing them, adding to the festive atmosphere. Offer different designs for guests to pick from, making it a fun activity for all.

temporary tattoos for special occasions

How to Create Your Own Temporary Tattoos

Making your own temporary tattoos is fun and rewarding. You can design tattoos that show off your personality. Here, find out what materials you need and the DIY design techniques to use.

Materials You’ll Need

  • Transfer paper
  • Skin-safe ink or markers
  • Application tools (sponges, brushes)
  • Adhesive spray (optional)
  • Scissors
  • Printer (for designs)

DIY Design Techniques

There are many ways to make your own temporary tattoos. Here are some techniques to try:

  1. Stenciling: Cut out designs from transfer paper and apply ink for precise tattoos.
  2. Freehand drawing: Draw directly onto your skin with skin-safe markers for a personal touch.
  3. Print and transfer: Print designs on transfer paper, then follow the application instructions.

Safety Considerations for Temporary Tattoos

It’s important to make sure temporary tattoos are safe for a fun experience. Choosing the right products can help avoid irritation or allergic reactions. Let’s look at how to pick safe tattoo products and why allergy testing is key.

Choosing Skin-Safe Products

When looking for temporary tattoos, pick products that are safe for your skin. Stay away from harmful chemicals, dyes, or irritants. Reading labels and checking out brands can help you understand their safety.

Look for products with high ratings for being hypoallergenic. This can make you more comfortable and lower the chance of bad reactions.

Allergy Testing Tips

Testing for allergies before using a temporary tattoo is a smart move. Start by testing on a small skin area. Apply a small patch and wait 24 hours to see if there’s any irritation.

This simple step can prevent bigger issues later. Many good brands offer tips on how to do these tests right, helping keep you safe.

safety of temporary tattoos

  • Choose reputable brands with clear ingredient lists.
  • Check for certifications indicating skin-safe standards.
  • Always conduct allergy testing to identify possible sensitivities.

Removing Temporary Tattoos

Removing temporary tattoos is easy when you know the right steps. There are many tattoo removal methods for different needs and skin types. Knowing these methods helps you remove tattoos without harming your skin.

Methods for Easy Removal

There are several ways to remove temporary tattoos. Here are some popular ones:

  • Baby Oil: Put a little on the tattoo and rub with a cotton ball until it fades.
  • Rubbing Alcohol: Soak a cloth or cotton pad with rubbing alcohol. Press it on the tattoo to soften it, then wipe it off.
  • Adhesive Removers: Use special skin-safe removers as directed on the product.

Aftercare for Your Skin

After removing tattoos, it’s important to take care of your skin. Here’s how:

  1. Gentle Cleansing: Clean the area with mild soap to get rid of any leftover residue.
  2. Moisturizing: Use a lotion or aloe vera gel to keep your skin moist and calm.
  3. Monitoring: Keep an eye out for any irritation or allergic reactions. If you notice anything, see a dermatologist.

By knowing how to remove tattoos and taking good care of your skin, you can keep it healthy after removing temporary tattoos.

Where to Buy Temporary Tattoos

Ready to add some flair to your look? Knowing where to buy temporary tattoos is key. You have many options to find the perfect design. Whether it’s for a special occasion or to change up your style, you can explore online or local stores.

Top Online Retailers

Buying temporary tattoos online is super convenient. Sites like Amazon, Etsy, and Inkbox have lots of designs. From detailed artwork to simple patterns, you’ll find something you like. Plus, many online shops have sales or bundles, so you can buy more of your favorites.

Local Stores to Find Them

Want to shop in person? Local stores for temporary tattoos are hidden gems. Michaels and independent boutiques often have unique tattoos you won’t find online. Party supply shops and pharmacies also have seasonal designs. So, whether you shop online or locally, finding the right temporary tattoos is easy.

FAQ

Q: What are the different types of temporary tattoos you can create at home?

A: You can make several types of temporary tattoos at home. These include water-transfer tattoos, henna tattoos, and DIY paper tattoos. You can choose designs like nature patterns, minimalist motifs, or inspirational quotes to make them personal.

Q: Are DIY temporary tattoos safe for the skin?

A: Yes, DIY temporary tattoos are safe if you use skin-safe materials. Always pick non-toxic inks. Do an allergy test on a small area of your skin before applying the tattoo fully.

Q: How long do temporary tattoos last?

A: Temporary tattoos can last from 3 to 10 days. This depends on how you apply them and where you put them. Areas with less friction tend to last longer.

Q: What are some tips for applying temporary tattoos for the best results?

A: For the best results, clean and dry your skin first. Avoid using lotions on the area. Press a damp cloth over the tattoo for 30 seconds to help it stick to your skin.

Q: How do you remove temporary tattoos easily?

A: To remove temporary tattoos, use baby oil, rubbing alcohol, or adhesive removers. Gently rub the tattoo with a cotton pad soaked in your chosen product until it dissolves.

Q: Where can I buy quality temporary tattoos?

A: You can find quality temporary tattoos online at Amazon, Etsy, and specialty tattoo websites. Local craft stores and boutiques also offer unique designs.

Q: Are temporary tattoos suitable for children?

A: Yes, temporary tattoos are safe for kids. They’re a fun way for children to express themselves without permanent tattoos. Make sure the tattoos are skin-safe and non-toxic.

Q: Can I create seasonal temporary tattoos at home?

A: Absolutely! You can make themed tattoos for any season. Try spooky designs for Halloween, festive motifs for holidays, or summer festival patterns. Get creative with seasonal colors and styles!

Q: What materials do I need to create my own temporary tattoos?

A: To make your own temporary tattoos, you’ll need transfer paper, skin-safe ink or markers, and tools like scissors and a damp cloth. These will help you create custom designs easily.

Q: How can I ensure my temporary tattoo lasts longer?

A: To make your tattoo last longer, avoid rubbing or scrubbing on it. Keep it dry. Applying a thin layer of fragrance-free lotion can help keep the skin hydrated without disturbing the tattoo.

0 comment
0 FacebookTwitterPinterestEmail
How to Upcycle Old Outfits

How to Upcycle Old Outfits

by Mary

When you look at your closet, you might wonder what to do with old clothes. You could throw them away, adding to the waste problem. Or, you could try upcycling outfits. This way, you can make old clothes new again, saving money and the planet.

Upcycling is a fun way to show off your style. It lets you turn old favorites into something new and special. This trend is all about being creative and making your clothes unique.

Upcycling and DIY fashion are great for the environment. They help reduce waste and let you explore your creativity. You can make bags from old t-shirts, shorts from jeans, or even revive a vintage dress.

With a bit of patience and practice, you can create a wardrobe that’s truly yours. It’s a chance to express yourself and stand out from the crowd.

Understanding Upcycling and Its Benefits

Exploring upcycling outfits and DIY fashion is exciting. Upcycling turns old materials into new, unique items. In fashion, it means giving old clothes a new life, cutting down on waste, and reducing the need for new clothes.

Upcycling has many benefits. It helps reduce waste, saves money, and can open up new business chances in DIY fashion. By upcycling, you support a greener fashion world and encourage eco-friendly habits.

What is Upcycling?

Upcycling is different from recycling. Recycling breaks materials down to their basic form. Upcycling, on the other hand, makes materials into something better. In DIY fashion, it means making stylish new clothes from old ones.

Environmental Benefits

Upcycling is great for the environment. It cuts down on textile waste and the need for new clothes. This helps lower the fashion industry’s carbon footprint. Plus, it saves natural resources and supports sustainability.

Economic Advantages

Upcycling also has economic benefits. You can make money by creating unique items from old materials. The DIY fashion market is expanding, making upcycling outfits a promising business for those who love sustainable fashion.

  • Transforming old t-shirts into reusable bags
  • Upcycling jeans into distressed shorts
  • Turning old dresses into skirts

These projects not only cut down on waste but also encourage sustainable fashion.

Assessing Your Wardrobe

To start making unique upcycling outfits, first, you need to check out your current clothes. Look at each item’s condition and fabric to see if it can be upcycled. This way, you can find out which pieces can be turned into new, cool outfits.

Start by collecting all your clothes and sort them into groups like tops, bottoms, dresses, and jackets. As you sort, think about the fabric and how worn each item is. For instance, old t-shirts can become reusable bags or quilts. Worn-out jeans can be made into distressed shorts or a skirt.

After sorting, list the clothes you want to upcycle and the hacks you can use on them. This keeps you organized and focused on your upcycling project. Remember, upcycling is about giving old clothes a new life. So, don’t be afraid to try new things.

Here are some tips for checking your wardrobe:

  • Look at the quality and condition of each item
  • Think about the fabric and its upcycling possibilities
  • Find items that can easily be changed into new outfits using hacks

By using these tips and being creative, you can make your old clothes into unique outfits that show off your style. Happy upcycling!

Creative Ideas for Upcycling

Upcycling outfits is a fun way to give old clothes a new life. With some DIY fashion skills, you can make old items into stylish pieces. Start by looking for clothing hacks to transform your old clothes.

Upcycling offers endless possibilities. You can make tote bags from t-shirts, distressed shorts from jeans, or skirts from dresses. The trick is to think creatively and find new uses for old clothes. Here are some ideas to get you started:

  • Transform old sweaters into cozy pillow covers
  • Turn vintage scarves into one-of-a-kind headbands
  • Upcycle old boots into planters or pen holders

Remember, upcycling is all about creativity and fun. Don’t be afraid to try new things. With practice and patience, you can make unique pieces that show off your style. So, why not give it a try and see what amazing outfits you can create?

By upcycling, you can reduce waste, save money, and make a more sustainable wardrobe. Next time you think about throwing away clothes, consider upcycling them. With a bit of imagination and basic DIY skills, you can turn old clothes into something new and exciting.

Upcycling Idea Materials Needed Difficulty Level
Transforming t-shirts into tote bags Old t-shirts, scissors, needle, thread Easy
Upcycling jeans into distressed shorts Old jeans, scissors, sandpaper, needle, thread Medium
Turning dresses into skirts Old dresses, scissors, needle, thread Easy

Basic Sewing Skills for Upcycling

To start with DIY fashion and clothing hacks, you need basic sewing skills. These skills are the base for your upcycling journey. They let you turn old clothes into unique, stylish items. Remember, patience and practice are important to get better at these skills.

For sewing, having the right tools is key. You’ll need a sewing machine, scissors, threads, and needles. With these, you can learn simple stitches like the running stitch, backstitch, and slip stitch. These stitches are used a lot in upcycling and help you fix, change, and make new clothes.

As you keep upcycling, you’ll learn more techniques for your DIY fashion. For example, you can use old buttons, zippers, and fabric scraps to add unique touches. By using these techniques with your basic sewing skills, you can make one-of-a-kind pieces that show off your style.

Some key sewing skills to work on include:

  • Understanding fabric types and textures
  • Measuring and cutting fabric accurately
  • Threading and using a sewing machine

By mastering these skills and adding clothing hacks to your projects, you’ll make amazing DIY fashion pieces. These pieces will show off your creativity and style.

No-Sew Upcycling Techniques

You don’t need a sewing machine to make cool, stylish outfits. No-sew upcycling is great for beginners or those who like simple projects. You can make amazing outfits with just a few tools.

Techniques like fringe and cut add a cool touch to your outfits. Iron-on transfers let you add your own designs. Glue and fabric tape are also handy for quick fixes or decorations.

  • Fringe and cut techniques: Cut strips of fabric to create a fringe effect, or use scissors to cut out unique shapes and designs.
  • Iron-on transfers: Use heat to apply custom designs or patterns to your upcycling outfits.
  • Glue and fabric tape: Use these to attach embellishments or make quick fixes to your DIY fashion creations.

No-sew upcycling lets you make unique outfits that show off your style. With a bit of creativity, you can make eco-friendly, fashionable pieces.

Technique Description
Fringe and Cut Create a decorative fringe effect or cut out unique shapes and designs.
Iron-On Transfers Apply custom designs or patterns to your upcycling outfits using heat.
Glue and Fabric Tape Attach embellishments or make quick fixes to your DIY fashion creations.

Adding Personal Touches

As you upcycle old clothes, adding personal touches is key. This is where you can get creative with clothing hacks. Try different dyeing techniques like shibori or tie-dye to make your clothes stand out.

Adding embellishments and patches is another great way to personalize your upcycled outfits. Use fabric paint, iron-on transfers, or hand-stitching for unique designs. For instance, a patch with a fun quote can add a playful touch.

Dyeing Techniques

Dyeing can give your old clothes a fresh look. You can use natural or synthetic dyes in various colors. Always follow the instructions and take precautions when working with dyes.

Embellishments and Patches

Embellishments and patches bring personality to your upcycled outfits. You can use pre-made patches or make your own from fabric scraps. Be creative with textures, colors, and patterns to create unique designs.

Printing and Stamping

Printing and stamping add personal touches to your upcycled clothes. Use screen printing, block printing, or hand-stamping for custom designs. This is a great way to add a personal message or a decorative motif.

Upcycling Accessories

Exploring DIY fashion and upcycling outfits is exciting. It’s key to think about accessories that can make your outfits pop. Upcycling accessories lets you add a personal touch and helps reduce waste. You can revamp old bags, make unique scarves from scraps, or update old jewelry.

Upcycling accessories opens up a world of possibilities. You can make one-of-a-kind scarves from fabric scraps or turn old t-shirts into reusable bags. For jewelry, you can give old pieces a new life as trendy items. The fun part is being creative and enjoying the process.

  • Turn old sweaters into cozy hats or scarves
  • Transform vintage brooches into unique pendants
  • Upcycle old belts into one-of-a-kind bags or wallets

Adding upcycled accessories to your DIY fashion is a great way to express yourself. It shows your creativity and care for the planet. Remember, upcycling is all about experimenting and having fun. So, don’t be afraid to try new things and make mistakes.

Accessory Upcycling Idea
Old Bags Revamp into fashionable pieces, such as tote bags or clutches
Fabric Scraps Create unique scarves or use as embellishments for upcycled outfits
Outdated Jewelry Update into trendy items, such as layered necklaces or statement earrings

Seasonal Upcycling Projects

Exploring upcycling outfits shows how key adaptability is. It lets you change your clothes for each season. This way, you can make light summer clothes into warm fall and winter items, and the other way around. It’s a smart way to cut down on waste and make your clothes last longer.

DIY fashion through seasonal upcycling is a budget-friendly way to update your style. For instance, you can turn old sweaters into hats and scarves for cold weather. Or, you can make reusable bags from faded t-shirts for the warmer months.

Fall and Winter Ideas

  • Upcycle old flannel shirts into quilted blankets or pillow covers
  • Transform worn-out jeans into insulated potholders or coasters
  • Turn vintage sweaters into cozy arm warmers or fingerless gloves

Spring and Summer Creations

  • Upcycle old t-shirts into flowy sundresses or skirts
  • Transform faded shorts into reusable tote bags or produce bags
  • Turn vintage dresses into unique tops or blouses

Seasonal upcycling projects can give your old clothes a new life. They also help the environment. So, let your creativity shine and start upcycling for a greener wardrobe!

Season Upcycling Ideas
Fall and Winter Upcycle old sweaters into warm hats and scarves, transform worn-out jeans into insulated potholders or coasters
Spring and Summer Upcycle old t-shirts into flowy sundresses or skirts, transform faded shorts into reusable tote bags or produce bags

Upcycling for Kids

Exploring upcycling can be a fun activity for kids. It teaches them about being creative and caring for the environment. Start by collecting old clothes and fabrics. Then, brainstorm with your kids how to make something new and exciting from them.

There are many ways to upcycle clothes for kids. You can turn old t-shirts into dresses or skirts. Or, you can make jeans into shorts or bags. You can also dye, embroider, or add appliques to give clothes a fresh look. Encourage your kids to think creatively and come up with their own ideas.

upcycling outfits for kids

  • Develops creativity and problem-solving skills
  • Teaches sustainability and environmental awareness
  • Encourages self-expression and individuality
  • Fosters a sense of accomplishment and pride

By letting your kids join in on upcycling, you teach them to care for the planet. So, let’s get creative and upcycle together today!

Upcycling Project Materials Needed Skills Learned
Turning old t-shirts into dresses Old t-shirts, scissors, needle, thread Sewing, measuring, cutting
Transforming jeans into shorts Old jeans, scissors, needle, thread Sewing, measuring, cutting

Best Practices for Upcycled Fashion

Exploring upcycling outfits is key to a sustainable wardrobe. It’s a way to reduce waste and show off your style. DIY fashion lets you make unique pieces that are truly yours.

To look good, mix upcycled items with regular clothes. For example, a upcycled denim jacket goes well with a white shirt and jeans. Try different textures and patterns to make your outfit interesting.

Sustainable Outfits for Daily Wear

Making sustainable outfits is about mixing pieces for style and eco-friendliness. Here are some tips:

  • Begin with a neutral base like jeans or a white shirt.
  • Add a upcycled item, like a refashioned scarf or earrings.
  • Play with textures and patterns to add interest.

Tips for Styling Upcycled Pieces

Styling upcycled items is fun and creative. Here are some tips to start:

  1. Be bold and try new things.
  2. Think about the occasion when dressing.
  3. Accessories can really make an outfit stand out.

By using these tips, you can make your wardrobe unique and green. Have fun and be creative. Don’t be afraid to try new styles and looks.

Documenting Your Upcycling Journey

Starting your DIY fashion journey is exciting. It’s key to document your progress. This lets you track your growth and share your journey with others. By taking before and after photos, you can see how your old clothes become new, stylish pieces.

Sharing your upcycling projects on social media is a smart move. It connects you with people who love DIY fashion and upcycling. Use hashtags to reach more people and find inspiration from others.

Tips for Documenting Your Journey

  • Take high-quality photos of your before and after projects
  • Use good lighting to showcase your creations
  • Write a brief description of your project, including materials used and techniques applied

Starting a blog is another great way to share your upcycling journey. You can write about your experiences, share tutorials, and show off your favorite DIY fashion projects. This way, you’ll inspire others to make their own unique upcycling outfits.

Platform Benefits
Instagram Visual platform, great for sharing photos and videos
Blogging Allows for in-depth writing and sharing of tutorials and experiences

Where to Find Upcycling Inspiration

Starting your upcycling journey can be exciting. The internet is full of ideas for upcycling outfits and DIY fashion. Look at social media sites like Pinterest and Instagram. They are filled with upcycling projects and tutorials.

Local workshops and events are also great for inspiration. Many cities have crafting and upcycling events. You can learn new skills and try different materials and techniques. Search online or check local craft stores and community centers for events.

upcycling outfits

  • Upcycling blogs and websites, such as The Spruce Crafts and Upcycle That
  • Social media groups and forums, like Facebook groups and Reddit communities
  • Online marketplaces, such as Etsy and eBay, where you can find unique and creative upcycled items

By exploring these resources and connecting with others, you’ll stay inspired. You’ll keep creating your own unique and sustainable fashion pieces.

Conclusion: Your Evolution in Fashion

Upcycling outfits opens a world of creativity. It lets you show off your style and learn new DIY skills. It’s not just about saving the planet. It’s about making clothes that truly reflect you.

Keep trying new things and get ideas from online groups and local classes. Let your upcycled clothes be your statement. With each piece, you’ll care more about what you wear and help the planet.

Your journey in fashion shows your creativity and care for the environment. Keep exploring and watch your clothes tell your story. Together, we can make fashion more sustainable and stylish, one piece at a time.

FAQ

What is upcycling?

Upcycling is making something new from old items. In fashion, it means turning old clothes into something new and cool.

What are the benefits of upcycling outfits?

Upcycling helps reduce waste and saves money. It lets you show off your style with unique pieces.

How do I identify items in my wardrobe that are good candidates for upcycling?

Look for clothes that are in good shape but don’t fit anymore. Check the fabric and condition to see if they can be upcycled.

What are some creative ideas for upcycling clothes?

You can make tote bags from t-shirts or turn jeans into shorts. Think outside the box to give old clothes a new life.

Do I need sewing skills to upcycle my clothes?

No, you don’t need to sew to upcycle clothes. You can use fringe, transfers, and glue to make changes without a sewing machine.

How can I personalize my upcycled outfits?

Add your own style with dyeing, patches, or prints. These methods let you make your upcycled clothes truly yours.

Can I upcycle accessories too?

Yes! Upcycle bags, make scarves from scraps, or update old jewelry. It’s a great way to refresh your accessories.

How can I get inspiration for my upcycling projects?

Look online, attend workshops, or start a blog. These can help spark ideas for your upcycling projects.

0 comment
0 FacebookTwitterPinterestEmail